Apex Legends Aim Guide: Recoil Control, Tracking, Flicking & Aim Drills

Apex Legends Aim Guide: Recoil Control, Tracking, Flicking & Aim Drills

Good aim in Apex Legends is not just about moving your crosshair onto an enemy quickly.

You have to acquire targets, track players who are moving, control recoil, switch between enemies, choose between hip-fire and ADS, and keep your aim functional while your own character is moving. A player can have excellent raw mechanics and still miss because their crosshair started in the wrong place, their corrections were too large, or they were taking a shot that their position made unnecessarily difficult.

That is why aim is better understood as a group of skills rather than one talent.

This Apex Legends aim guide focuses on the parts you can actually train: crosshair placement, tracking, recoil control, flicking, hip-fire, ADS, target switching, movement shooting, and Firing Range drills.

The most useful approach is not to practice everything at once.

Find the miss. Identify the cause. Train that skill.


The Aim Framework

Think of aiming as four stages:

Acquire

Get your crosshair onto the target efficiently.

Track

Keep the crosshair with the target as they move.

Control

Manage recoil, corrections, and your own movement.

Convert

Turn accurate aim into meaningful damage and useful combat pressure.

Acquire → Track → Control → Convert

This framework matters because good aim is not measured by how fast you can move your crosshair.

It is measured by how consistently you can put the crosshair where it needs to be and keep it there long enough to matter.


1. Crosshair Placement Comes First

The easiest way to make aiming easier is to reduce how much aiming you have to do.

Keep your crosshair near the height and location where an enemy is likely to appear.

That means avoiding habits such as:

  • looking at the floor while approaching a doorway,
  • staring at the sky while moving toward a ridge,
  • or entering a room with your crosshair nowhere near a likely enemy position.

EA’s current aim guidance specifically recommends keeping the crosshair where enemies might appear and centering the enemy on screen before shooting. (EA Help)

Good crosshair placement turns some of the reaction into preparation.

Instead of:

Enemy appears → huge crosshair movement → fire

you get:

Enemy appears → small correction → fire

That difference adds up over an entire match.


2. Pre-Aim Common Enemy Positions

Pre-aiming means placing your crosshair where you expect the opponent to appear before they arrive.

This is particularly useful around:

Doorways

Windows

Corners

Stairs

Ledges

Common peek points

You don’t need to know the exact position of the enemy.

You are simply reducing the amount of work required once they appear.

The more familiar you become with common angles and terrain, the more useful this becomes.

That is one reason aim and positioning are closely connected. Your Apex Legends Positioning Guide covers the terrain and angle side of the equation.


3. Don’t Stare at the Crosshair

Where you place your visual attention can change with distance.

EA’s current guidance suggests thinking more about the enemy at close range and the crosshair at longer ranges. (EA Help)

The practical lesson is more useful than treating that as a strict rule.

At close range, you have very little time to react to sudden movement, so maintaining awareness of the character model can help.

At longer ranges, tiny crosshair adjustments matter much more.

Your attention should adapt to the shot rather than following one rigid aiming habit.


4. Tracking: Follow the Target, Don’t Chase It

Tracking means keeping your crosshair on a moving opponent.

It is one of the most important skills in Apex because players constantly strafe, slide, change direction, climb, and reposition.

The common mistake is overreacting to every movement.

A smoother approach is to follow the target’s general path and make smaller corrections.

Think:

Smooth movement first. Correction second.

EA recommends practicing smooth mouse movement while following moving targets in the Firing Range. (EA Help)

The same principle applies to controller players. Constantly slamming the stick from one direction to the other makes it harder to keep the target centered.


5. Track the Enemy’s Movement Pattern

Not every movement change is random.

Players often:

  • strafe left and right,
  • repeat a direction,
  • change direction after taking damage,
  • move toward cover,
  • or commit to a predictable escape.

You don’t need to predict every input.

You only need enough awareness to avoid making your crosshair chase every twitch.

Watch the target’s overall movement, then keep your aim flowing with it.

This becomes particularly useful when fighting around cover, where the enemy’s available movement is already limited by the terrain.


6. Recoil Control Starts With Familiarity

There is no universal recoil movement that works perfectly for every weapon.

EA notes that Apex weapons can differ in recoil, firing behavior, bullet drop, and projectile travel characteristics. (EA Help)

You therefore don’t need to memorize every weapon in the game.

Learn the recoil behavior of the weapons you use often.

Take one into the Firing Range.

Fire at a wall.

Watch how the weapon moves.

Then make controlled corrections while shooting.

Once the basic pattern feels familiar, add movement and target tracking.

The goal is not perfect memorization.

It is making recoil control sufficiently familiar that it doesn’t consume your attention in the middle of a fight.


7. Recoil Control Isn’t Just Pulling Down

Pulling down can be part of recoil control, but it isn’t the whole technique.

Weapons can have horizontal movement as well, and EA’s current guidance specifically discusses moving your aim horizontally while firing as part of managing recoil. (EA Help)

Watch the actual weapon behavior.

Then counter it.

The correction should respond to what the gun is doing rather than follow a memorized “pull down harder” routine.


8. Practice Recoil Before Adding Speed

When learning a weapon, begin slowly.

Your first question should be:

Can I keep the shots grouped?

Then:

Can I maintain that control while tracking?

Then:

Can I maintain it while moving?

That progression matters.

If your recoil control is poor while standing still, adding rapid movement usually hides the problem instead of fixing it.


9. Don’t Fight Recoil With Tension

Overcorrecting is one of the easiest ways to make recoil worse.

You pull too far.

Then correct back.

Then overcorrect again.

The result is:

Overshoot → correction → overshoot → correction

Make the size of your input smaller.

Try:

Smooth → controlled → repeatable

rather than constantly trying to “save” a spray after you’ve already lost control.


10. Flicking Is Fast Target Acquisition

A flick is a rapid movement from one target or point to another.

It is useful when:

  • another enemy appears unexpectedly,
  • a target changes position,
  • you need to switch between opponents,
  • or your initial aim point is far away from the target.

The goal isn’t maximum speed.

A useful flick is:

The fastest movement you can consistently stop on target.

EA recommends practicing flicking between widely spaced targets in the Firing Range and varying the order in which you shoot them. (EA Help)

Start under control.

Increase speed only when accuracy survives.


11. Practice Flicks in Different Directions

Don’t train only left-to-right flicks.

Vary:

Left → Right

Right → Left

Up → Down

Down → Up

Near → Far

Far → Near

Change the sequence so your brain isn’t simply memorizing the route.

The goal is target acquisition.

Not choreography.


12. Hip-Fire vs. ADS: Choose the Tool for the Fight

A common mistake is treating ADS as the “proper” way to aim.

It isn’t.

EA specifically recommends hip-fire for fast, close-range combat. (EA Help)

Hip-fire makes more sense when:

The enemy is very close.

You need maximum freedom of movement.

The fight is happening around tight terrain.

You need to react quickly to a changing target.

ADS makes more sense when:

The target is farther away.

You need more precision.

The situation gives you time to stabilize.

The extra accuracy outweighs the mobility trade-off.

There is no universal distance where you must switch.

Learn to recognize the situation.


13. Don’t ADS Because You’re Panicking

This is an underrated aiming mistake.

An enemy suddenly appears.

You panic.

You immediately ADS.

The enemy is already moving across your screen.

Now you’re trying to combine precise aiming with a fight that demands rapid movement.

The result can be worse than controlled hip-fire.

The better habit is to choose the aiming method deliberately.

More precision isn’t always better precision.


14. Practice Hip-Fire on Purpose

Don’t wait for close-range fights to teach you how to hip-fire.

Practice it.

Start near a target.

Move laterally.

Keep the target centered.

Then add:

Direction changes

Target switching

Slides

Different distances

The objective is to make hip-fire feel like a controlled technique rather than something you panic into when an enemy gets too close.


15. Aim While Moving

Apex doesn’t ask you to aim from a shooting range booth.

You are moving.

Your opponent is moving.

Both sides are trying to survive while dealing damage.

EA’s current aim guidance recommends practicing tracking while moving as well as standing still. (EA Help)

That means your aim training should eventually combine:

Movement + tracking

Movement + recoil

Movement + target switching

The objective is not flashy movement.

It’s keeping your aim functional while making yourself harder to hit.

Your Apex Legends Movement Guide covers the actual movement mechanics separately.


16. Don’t Separate Aiming From Positioning

Not every missed shot is an aim problem.

You may have missed because:

  • you started with poor crosshair placement,
  • you were fighting from an exposed position,
  • the enemy had a better angle,
  • you were trying to shoot at an uncomfortable range,
  • or you were forced to make a difficult correction because your positioning was poor.

Your Apex Legends Positioning Guide covers how to make those shots easier before you take them.

That distinction is important:

Sometimes the best way to improve your aim is to improve the situation you’re aiming from.


17. Target Switching Is Its Own Skill

Staying on one target is only part of combat.

An Apex fight can change in an instant.

You are tracking one player.

Another enemy swings from the side.

Now you must:

Acquire → stabilize → shoot → switch

That is a different skill from pure tracking.

Practice switching between targets at different angles and distances.

Don’t make speed the only objective.

A fast target switch that lands nowhere is just a fast miss.


18. Don’t Overcorrect

Aiming errors are often caused by too much input rather than too little.

You see the target.

You move past them.

You correct.

You pass them again.

This happens when you’re reacting to the crosshair instead of controlling it.

Reduce the size of your corrections.

A useful cue is:

Get close, then refine.

The final few pixels of adjustment should feel much smaller than the original movement.


19. Diagnose the Miss Before You Train

This is where aim practice becomes far more useful.

Instead of saying:

“My aim was bad.”

Ask what actually happened.

Crosshair-placement miss

Your starting position was wrong.

Practice: pre-aim and corner-entry drills.

Overflick

You moved too far.

Practice: slower flicks with deliberate stops.

Underflick

You stopped short.

Practice: gradually increase movement distance.

Tracking miss

You couldn’t keep up with the target.

Practice: smooth tracking.

Recoil miss

Your shots drifted away during sustained fire.

Practice: recoil drills.

Target-switch miss

You couldn’t acquire the second target cleanly.

Practice: two- and three-target switching.

Decision miss

Your mechanics were fine, but the shot selection was poor.

Practice: hip-fire/ADS decisions and realistic fight scenarios.

This is more useful than simply logging more hours.


20. Don’t Blame Aim for a Positioning Mistake

Suppose you miss several shots while fighting from bad cover.

You might conclude:

“I need better aim.”

But the actual problem may be that the enemy had a clean angle while you were exposed.

Likewise, a difficult long-range shot isn’t necessarily proof that your tracking is poor.

Diagnosis matters because you want to train the skill responsible for the failure.

That is the difference between practicing aim and improving aim.


21. Your Settings Should Support Your Aim

Sensitivity matters, but changing settings constantly can become its own bad habit.

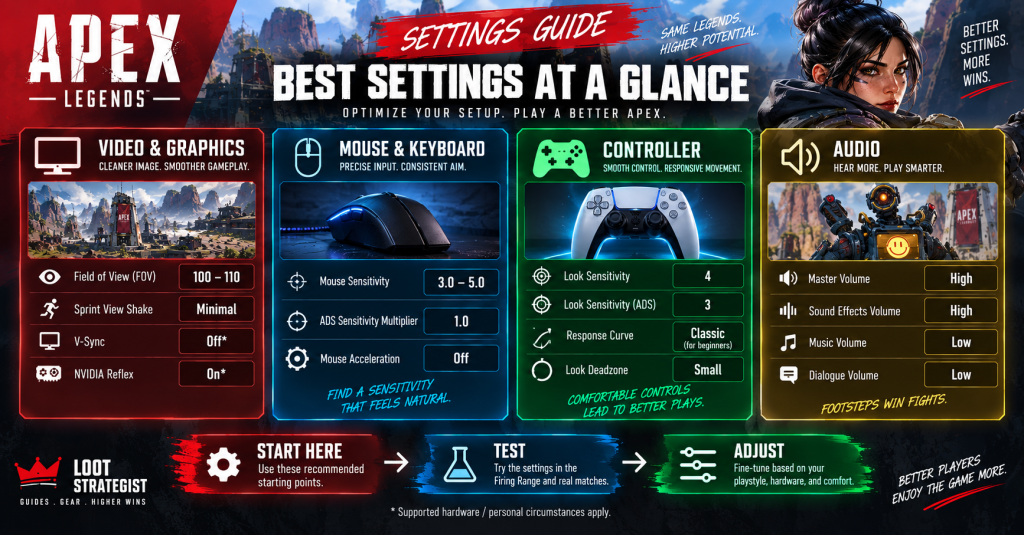
EA currently says the best mouse or controller settings depend on personal preference and recommends experimenting to find a comfortable setup. Its current competitive starting points include 3.0–5.0 mouse sensitivity with a 1.0 ADS multiplier, while some competitive controller players use 4-3 sensitivity; EA also recommends Classic response curve as a starting point for newer players. (EA Help)

Treat those numbers as starting points, not universal answers.

Your Apex Legends Settings Guide already covers the broader settings question. This article only needs the practical rule:

Make deliberate changes, test them, then give yourself time to adapt.


22. Stop Changing Sensitivity After Every Bad Game

A bad match doesn’t prove your sensitivity is wrong.

Your performance changes because of:

  • fatigue,
  • target distance,
  • different weapons,
  • positioning,
  • movement,
  • pressure,
  • and simple match-to-match variance.

Constant settings changes prevent consistency from developing.

Make a change because you identified a specific problem.

Then test that change long enough to judge it properly.


23. FOV Changes How Aim Feels

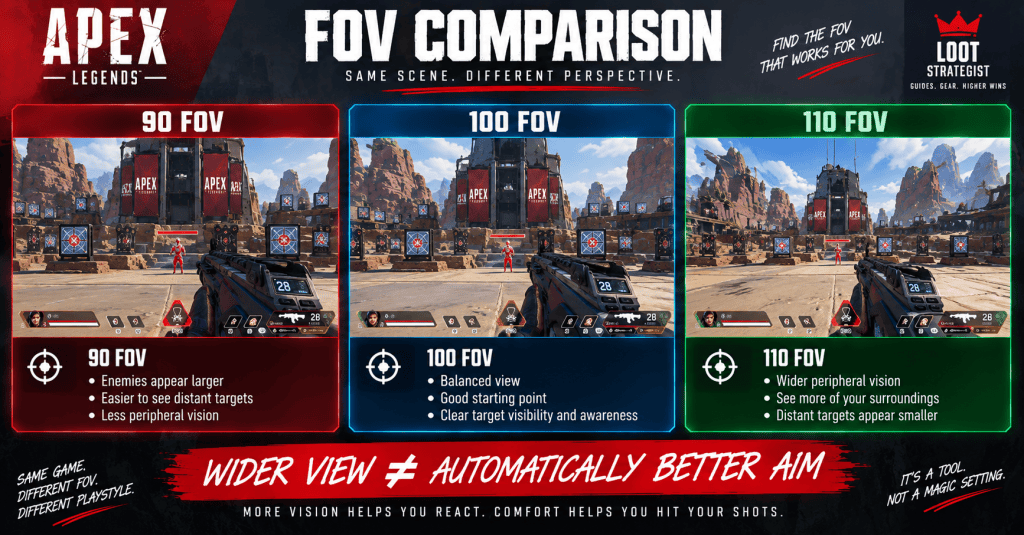
FOV affects the size and visibility of targets on screen.

EA currently recommends experimenting within 90–110 FOV and notes that 110 is common among competitive players. Higher FOV shows more of the surroundings but makes distant targets appear smaller. (EA Help)

That’s another reason not to copy another player’s settings without testing them.

A setting can be excellent for one player and uncomfortable for another.

For the full FOV and sensitivity discussion, use the Apex Legends Settings Guide.


24. Controller Players: Understand Aim Assist Without Overthinking It

EA says aim assist is automatically enabled for console players and PC players using controllers, while mouse-and-keyboard players do not receive it. EA also notes that console aim assist is stronger. (EA Help)

EA currently does not recommend turning aim assist off, although the option exists for players who want to experiment without it in the Firing Range. (EA Help)

For most players, the useful takeaway is simple:

Consistency matters more than constantly changing the assistance settings.

Build your mechanics around the input system you actually use in matches.


25. The Firing Range Should Be a Laboratory

The Firing Range is most useful when you have a question you want to answer.

Not:

“I’ll shoot targets for twenty minutes.”

Instead:

Can I track smoothly?

Can I control this weapon?

Can I switch targets without overshooting?

Can I hip-fire while moving?

Does this sensitivity feel controllable?

EA’s current guidance specifically recommends the Firing Range for testing sensitivity, tracking, flicking, recoil, movement, and related aiming skills. (EA Help)

The more specific the question, the more useful the session.


26. Five Aim Drills Worth Repeating

You don’t need ten different routines.

Five focused drills cover most of the important mechanics.

Drill 1: Crosshair Placement

Move through the Firing Range and pre-aim where targets are likely to appear.

Don’t shoot immediately.

First place the crosshair.

Then acquire the target.

Goal: reduce unnecessary crosshair movement.


Drill 2: Smooth Tracking

Follow moving targets without firing.

Then repeat while firing.

Finally, add your own movement.

Goal: maintain smooth target control without large corrections.

EA specifically recommends moving with your crosshair on moving targets as part of aim practice. (EA Help)


Drill 3: Recoil + Tracking

Choose a familiar weapon.

Track a moving target while controlling recoil.

Start at a comfortable range.

Then increase the difficulty.

Goal: manage weapon movement without losing the target.


Drill 4: Flick + Target Switch

Shoot one target.

Move quickly to a second.

Stabilize.

Shoot.

Then repeat with different target orders.

Goal: acquire new targets quickly without sacrificing accuracy.

EA recommends varying target patterns during flick practice. (EA Help)


Drill 5: Hip-Fire + ADS Transition

Start close enough for hip-fire.

Move while tracking.

Then create distance and switch to ADS when the situation calls for more precision.

Goal: choose the appropriate aiming technique rather than defaulting to one.


27. A Simple 10-Minute Aim Routine

You don’t need an hour-long warm-up before every match.

Try:

Minutes 1–2: Crosshair placement

Minutes 3–4: Tracking

Minutes 5–6: Recoil control

Minutes 7–8: Flicks and target switching

Minutes 9–10: Movement + shooting

Then spend a few extra repetitions on the weakness you identified from your previous session.

That last part matters.

A routine should adapt to your problem rather than become another activity you complete on autopilot.


28. Practice the Miss, Not Just the Mechanic

Suppose you keep missing because you stop your flick too late.

Don’t spend the next hour doing faster flicks.

Slow them down.

Suppose tracking breaks when the target changes direction.

Don’t immediately increase speed.

Practice smoother directional changes.

Suppose recoil is fine until you start moving.

Add movement.

Suppose your Firing Range aim looks good, but your matches don’t.

Practice target switching, movement, and realistic decision-making.

Your training should reproduce the conditions causing the mistake.

That’s how practice becomes specific.


29. Don’t Only Practice What Feels Good

It is easy to spend a session doing the drill you’re already comfortable with.

Tracking feels good.

So you track for 20 minutes.

Meanwhile, you still overshoot every target switch.

Train the weakness.

A useful split is:

Strong skill: maintain

Average skill: improve

Weak skill: prioritize

Your aim gets better when the training session is slightly uncomfortable.


30. Mechanical Aim vs. Combat Aim

There is a difference between being accurate in a controlled drill and being accurate in a live match.

Combat adds:

  • movement,
  • cover,
  • multiple targets,
  • sound,
  • pressure,
  • target prioritization,
  • positioning,
  • and decisions about whether to shoot at all.

That’s why your final practice stage should eventually combine the skills.

Track while moving.

Control recoil while tracking.

Switch targets.

Use the appropriate aiming mode.

Work around terrain.

The closer the drill becomes to a real situation, the more useful the transfer becomes.


31. Aim Is Easier When the Shot Is Easier

This is an important connection between your combat guides.

Good positioning can reduce the mechanical difficulty of a shot.

A strong angle gives you more time.

Cover reduces exposure.

High ground can improve visibility.

A predictable doorway simplifies target acquisition.

Your Apex Legends Positioning Guide explains those concepts in detail.

The lesson here is:

Don’t try to mechanically solve a problem that better positioning could prevent.


32. Common Apex Legends Aim Mistakes

Changing sensitivity constantly

You never give yourself enough time to adapt.

Starting with poor crosshair placement

Your first correction is larger than it needs to be.

Practicing only stationary targets

Real opponents move.

Practicing only flicks

Flicking is only one part of aiming.

ADSing every close-range fight

You may be sacrificing the movement freedom the situation requires.

Overcorrecting

Large inputs create a cycle of misses and corrections.

Ignoring target switching

Real fights rarely involve one perfectly isolated opponent.

Blaming recoil for every miss

The starting crosshair position may be the actual problem.

Training without a goal

Random shooting is harder to measure.

Practicing only strengths

Improvement slows when you never train the weaknesses.


Aim Problems → Fixes at a Glance

ProblemLikely causeBest practice
Crosshair starts too lowPoor placementPre-aim drill
Crosshair flies past targetOverflickSlower flicks
Stop short of targetUnderflickGradually increase movement
Lose moving playersTrackingSmooth tracking
Spray leaves targetRecoil controlRecoil + tracking
Miss after switching targetsAcquisitionTarget-switch drill
Struggle at point-blank rangePoor aiming-mode choiceHip-fire practice
Aim is good in Range but poor in matchesPoor transferMovement + target switching
Miss while peekingPositioning problemReassess cover and angle
Aim feels inconsistent after settings changesConstant tweakingSettle on one setup and test it

This is the part of the guide I’d bookmark.

The most useful question after a bad fight isn’t “How do I aim better?”

It’s:

“What kind of miss was that?”


Final Thoughts

Better aim in Apex Legends isn’t about making your crosshair move as quickly as possible.

It’s about making the correct movement repeatable.

Start with crosshair placement.

Learn to track smoothly.

Understand the recoil of the weapons you actually use.

Practice controlled flicks.

Know when hip-fire makes more sense than ADS.

Switch targets without losing control.

Keep your aim functional while moving.

Then diagnose your misses instead of blindly practicing more.

The most useful progression is:

Acquire → Track → Control → Convert

And the most useful training rule is even simpler:

Don’t practice aim. Practice the miss.

If your crosshair starts in the wrong place, work on placement.

If you overshoot, work on stopping.

If you lose moving targets, work on tracking.

If your spray breaks down, work on recoil.

If your Range performance doesn’t transfer to matches, add movement, pressure, and target switching.

You don’t need perfect aim.

You need reliable aim that holds up when the fight gets messy.

That’s what turns practice into better games.


Apex Legends Aim Cheat Sheet

Before the fight:
Pre-aim → correct crosshair height → choose hip-fire or ADS.

During the fight:
Track smoothly → control recoil → stay aware of movement → switch targets when needed.

After a miss:
Identify the type of error before changing your settings.

In the Firing Range:
Train one specific skill at a time.

For improvement:
Acquire → Track → Control → Convert.

For diagnosis:
Practice the miss, not just the mechanic.


Frequently Asked Questions

How do I improve my aim in Apex Legends?

Identify the type of mistake you’re making, then practice that specific skill. Crosshair placement, tracking, recoil control, flicking, target switching, and movement shooting all require slightly different training. EA currently recommends using the Firing Range for tracking, flicking, recoil practice, sensitivity testing, and related aim work. (EA Help)

What is the best way to control recoil?

Learn the recoil behavior of the weapons you use most often, then make smooth corrections while firing. Don’t rely on a single universal movement because Apex weapons can behave differently. (EA Help)

Should I hip-fire or ADS?

Use the technique that fits the engagement. Hip-fire is particularly useful for fast, close-range fights, while ADS is generally more useful when you have enough space and time to benefit from additional precision. EA specifically recommends practicing hip-fire for fast close-range combat. (EA Help)

How do I improve tracking?

Practice smooth tracking against moving targets before adding your own movement. Once you can stay on target consistently, introduce strafing, direction changes, recoil, and target switching. EA recommends practicing tracking against moving targets in the Firing Range. (EA Help)

How do I get better at flicking?

Start slowly enough that you can stop accurately on the target. Then gradually increase speed and vary the target order so you aren’t memorizing one fixed movement pattern. EA recommends practicing flicks between widely spaced targets and changing the target sequence. (EA Help)

What sensitivity should I use in Apex Legends?

There is no universally correct sensitivity. EA currently lists 3.0–5.0 mouse sensitivity with a 1.0 ADS multiplier as competitive starting points, while noting that personal preference matters. For controller, EA notes that some competitive players use 4-3 sensitivity and recommends Classic response curve as a starting point for newer players. (EA Help)

Is 110 FOV best for Apex Legends?

110 is common among competitive players, but it isn’t automatically best for everyone. EA currently recommends experimenting between 90 and 110 FOV and notes that higher FOV shows more of the environment while making distant targets appear smaller. (EA Help)

Should I turn off aim assist to improve?

EA currently says aim assist is automatically enabled for console players and PC players using controllers and does not recommend turning it off generally, although players can disable it to experiment in the Firing Range. (EA Help)

Why do I aim well in the Firing Range but miss in matches?

Live matches add movement, pressure, multiple targets, positioning, cover, target switching, and decision-making. Add those elements progressively rather than assuming your basic mechanics are broken.

Why do I keep missing even though I practice?

You may be practicing the wrong skill. Review your misses and determine whether the problem is crosshair placement, tracking, recoil, flicking, target switching, aiming-mode choice, or positioning.

How long should I practice aim?

A short, focused session can be enough. A structured 10-minute routine is often more useful than a long session of random shooting, especially when you spend the final minutes working on the weakness you identified.


Sources & Updates

Last reviewed: September 2026

EA’s current Best Settings for Apex Legends on PC guide was used to verify guidance around mouse sensitivity, ADS sensitivity, controller settings, FOV, crosshair placement, tracking, flicking, recoil, hip-fire, weapon behavior, and Firing Range practice. (EA Help)

EA’s current Aim Assist documentation was used to verify controller aim-assist behavior and EA’s current recommendation regarding enabling or disabling aim assist. (EA Help)

EA’s current PC and controller controls documentation was checked for current input terminology. (EA Help)

The training framework in this guide—Acquire → Track → Control → Convert, together with the “practice the miss” diagnostic approach—is Loot Strategist editorial analysis rather than official EA instruction.

This article deliberately avoids temporary weapon rankings, recoil tables, and Legend-specific meta advice so its core aim-training guidance remains useful as Apex Legends changes.

For related guides, see the Apex Legends Settings Guide, Apex Legends Movement Guide, Apex Legends Positioning Guide, Apex Legends Fight Guide, and Apex Legends Team Fighting Guide.
Apex Legends Positioning Guide: Cover, Angles & High Ground

Apex Legends Positioning Guide: Cover, Angles & High Ground

Apex Legends Positioning Guide: Cover, Height, Angles & Playable Space

Winning a fight in Apex Legends often starts before anyone fires a shot.

Two players can have similar weapons, armor, and aim, yet one can have a major advantage because they are fighting from cover, holding a better angle, controlling useful space, or keeping an escape route available.

That’s positioning.

It is more than finding the highest roof or crouching behind the nearest rock. Good positioning gives you more useful choices while forcing the enemy to make harder ones.

You can peek without exposing yourself for long. You can change angles. You can heal safely. You can support a teammate. You can retreat without crossing an open field.

A weak position takes those options away.

This Apex Legends positioning guide explains how to evaluate cover, height, angles, space, and playable zones so you can make better positioning decisions in almost any fight.


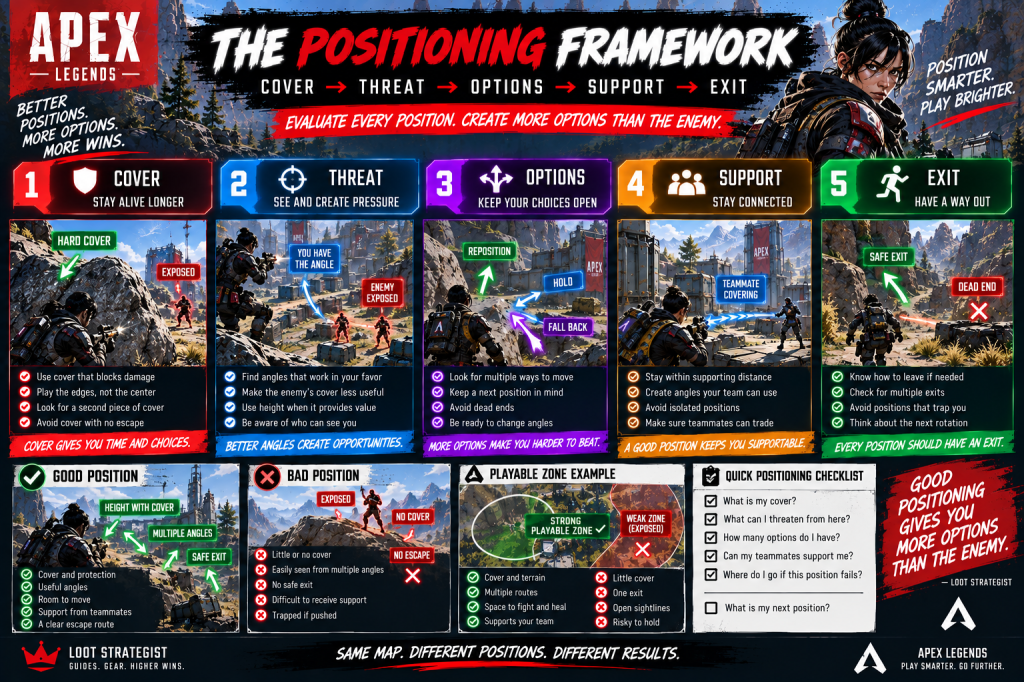
The Positioning Framework

Apex Legends positioning framework showing cover, threat, options, support, exit, and playable zone examples

When you reach a new piece of terrain, run five questions through your head:

Cover

What protects me from incoming fire?

Threat

What can I attack from here, and who can attack me?

Options

How many useful choices do I have if the enemy moves?

Support

Can my teammates help me quickly?

Exit

Where do I go if this position stops being good?

Cover → Threat → Options → Support → Exit

A position does not have to score perfectly in every category.

A rooftop with excellent sightlines but weak cover can still be useful for a short peek.

A building with strong cover but only one exit can be excellent until the enemy controls that exit.

The point is to recognize what you’re gaining and what you’re giving up.


1. Cover Comes First

Height and angles can help you win a fight.

Cover helps you survive long enough to use them.

EA’s current beginner guidance encourages players to stay with their squad and use movement and terrain intelligently; its grenade guidance also specifically identifies forcing enemies out of cover and buying time to retreat or gain high ground as useful tactical purposes. (EA Help)

For positioning, the most useful cover generally does more than block bullets.

Good cover lets you:

  • peek,
  • break line of sight,
  • heal,
  • reload,
  • change sides,
  • and move toward another piece of terrain.

A huge object with no escape can be worse than a smaller piece of cover connected to a better route.

Think of cover as a platform for decisions, not merely protection.


2. Work the Edge of Your Cover

Standing directly in front of cover wastes part of its value.

Instead, use the edges.

Peek.

Take the shot.

Break line of sight.

Change the angle.

Return when you have another opportunity.

This forces the enemy to expose themselves while allowing you to limit your own exposure.

It also makes your position harder to predict.

The goal is not to hide permanently.

The goal is to control how much of the fight you have to expose yourself to.


3. One Piece of Cover Is Fine. A Chain Is Better.

Look beyond the object immediately in front of you.

Imagine:

Rock → wall → building

If the first piece becomes unsafe, you already have another option.

Now imagine:

One rock → open ground → cliff

The rock may be excellent for the first few seconds, but once the enemy takes another angle, your choices disappear.

This is why strong positioning often involves a cover chain.

You don’t need hard cover every meter.

You need enough connected terrain that one bad exchange doesn’t leave you stranded.


4. High Ground Is Only Valuable When You Can Play It

High ground gives you visibility and often better attack angles.

But elevation by itself is not a strategy.

A rooftop with no cover can leave you exposed from several directions.

A hilltop with one escape route can become a trap.

A tower can provide a perfect view while offering a terrible place to heal.

So instead of asking:

“Is this higher?”

ask:

“What does this height actually give me?”

Useful high ground usually offers some combination of:

Cover

Sightlines

Room to move

Support

A safe way down

A useful next position

High ground is an advantage when it improves your options.

It is a liability when it removes them.


5. The Difference Between Good Height and Bait Height

Before committing to elevated terrain, check five things:

Can you fight from it?

Does the terrain actually provide usable angles?

Can you survive from it?

Is there enough cover to withstand pressure?

Can your squad support you?

Are teammates close enough to trade?

Can you leave?

What happens when the enemy pushes?

Is it still playable when the Ring changes?

A position can be excellent for the next 20 seconds and terrible afterward.

That doesn’t necessarily make it bad.

It means you should treat it as temporary high ground, not a permanent home.


6. Create Angles Instead of Simply Moving Closer

One of the easiest positioning mistakes is assuming that closing the distance automatically improves your fight.

It doesn’t.

Sometimes the best move is sideways.

An enemy behind cover may be difficult to damage from the front.

Move around that cover, and the geometry changes.

Suddenly they have to decide whether to expose themselves to you or move into another angle.

This is why small lateral movements can be more valuable than simply walking forward.

A better angle can create more pressure without requiring more risk.


7. Stop Repeating the Same Peek

Once you fire from the same position, the enemy has information.

If you peek the exact same side again, you’re making their job easier.

After a meaningful exchange, consider:

A different side of the cover

A wider angle

A slightly different elevation

A nearby piece of terrain

A teammate’s angle

You don’t need a spectacular flank.

Sometimes shifting a few meters is enough to change the fight.

The objective is to keep your position from becoming predictable.


8. Use Space as a Resource

Space is not just the ground between you and the enemy.

It determines:

Where you can move.

Where the enemy can move.

How quickly teammates can help.

Where you can heal.

Which angles are available.

That makes space something you can gain, lose, and control.

Push an enemy away from a rock, and you gain the area around it.

Take the other side of a building and you control another route.

Occupy the center of a useful area and you may force the opponent toward predictable exits.

This is why positioning is really about usable space, not just personal safety.


9. A Playable Zone Is More Than Being Inside the Ring

Being inside the Ring does not automatically mean you’re well positioned.

EA’s terminology describes a “good spot” as a strong position in the Ring, including areas with substantial cover.

For practical positioning, think of a playable zone as an area where you can:

  • fight,
  • heal,
  • reposition,
  • receive support,
  • and move again when the situation changes.

Compare:

Inside the Ring + exposed + one exit

with:

Inside the Ring + cover + multiple routes + room to fight

Both are technically playable.

Only one gives you much freedom.

The second is the position you should prefer.


10. A Strong Position Gives You a Next Position

A position should not be evaluated in isolation.

When you take cover, look beyond it.

Where is your next piece of protection?

When you take a building, where is the second exit?

When you climb high ground, how do you get down safely?

When you win an angle, where will the enemy move?

Think:

Position → Next Position → Exit

This prevents one of the most common positioning mistakes: taking a strong first position that leaves you with nowhere to go afterward.


11. Never Let Cover Become a Prison

Cover can create a false sense of safety.

A building with one entrance can become a trap.

A rock beside a cliff can eliminate your retreat.

A corner can protect you from one direction while exposing you to another.

Before committing, identify at least one fallback.

The best positions give you another answer when the enemy changes the question.

That might mean another doorway, another rock, another elevation change, or simply enough room to move around your current cover.


12. Position Yourself So You Can Be Supported

This is where individual positioning meets squad play.

You do not have to stand beside your teammates.

You do have to remain supportable.

Ask:

If an enemy pushes me right now, can one of my teammates help before I’m knocked?

If yes, the position is probably workable.

If no, a brilliant angle may simply be a lonely one.

EA’s current beginner guidance specifically recommends sticking close to your squad so teammates can help when you’re attacked. (EA Help)

For detailed squad coordination, see the Apex Legends Team Fighting Guide.
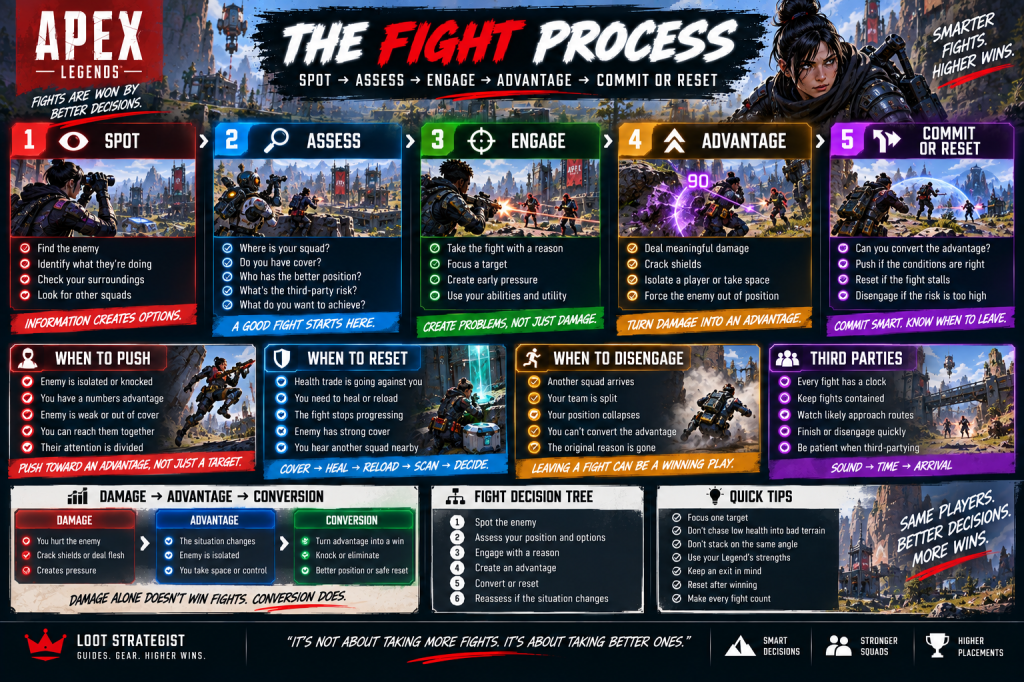

13. A Good Flank Is Still a Supportable Position

Flanking can create excellent angles.

It can also turn you into a free knock.

Before taking a wide angle, ask:

Can they reach me first?

Can my team trade for me?

What cover protects the route?

Where do I go if they push?

What does my flank actually accomplish?

A flank that forces the enemy to split their attention can be excellent.

A flank that takes you 40 meters away from your squad for a slightly better angle usually isn’t.


14. Make the Enemy’s Cover Worse

Positioning isn’t only defensive.

You can use your position to reduce the value of theirs.

Suppose an enemy is safely behind a rock.

You don’t need to walk directly toward the rock.

You can:

Take the side angle.

Control the retreat.

Take better elevation.

Use ordnance to force movement.

Move into space that makes their cover less useful.

EA specifically identifies grenades as a way to get enemies out of cover and buy time for a retreat or a high-ground play. (EA Help)

The objective isn’t always to shoot someone immediately.

Sometimes the better play is to make their current position stop working.


15. Reposition Between Exchanges

You do not need a dramatic movement every time you fire.

Small changes are often enough.

After an exchange, consider moving:

To the other side of your cover.

Behind a second piece of terrain.

To a slightly wider angle.

Closer to your team’s support.

Toward a better escape route.

Repeatedly appearing in exactly the same location gives your opponent useful information.

Small repositioning removes that predictability while preserving the strength of your original position.


16. Position Around Buildings

Buildings can be excellent defensive terrain because they provide cover, multiple rooms, elevation changes, and different angles.

They can also create predictable entrances.

Before holding one, identify:

Primary entrance

Secondary exit

Vertical access

Windows or exterior angles

Nearby fallback terrain

Don’t treat the building as a box.

Treat it as a network of positions.

The strongest player inside may not be the person holding the doorway.

It may be the player who controls the space the enemy needs to cross to reach the doorway.


17. Positioning in Open Terrain

Open ground is dangerous because your movement and exposure are easier to read.

When caught outside, look for the nearest useful terrain:

Rock

Wall

Building

Slope

Dip

Elevation change

Don’t stand in the open searching for the perfect fight.

Reach the best available piece of terrain first.

Then reassess.

And when moving between cover, your Apex Legends Movement Guide is the better resource for the mechanics themselves. This guide’s concern is the choice of destination, not how to perform the movement.


18. Small Geometry Can Win Big Fights

Not every positioning advantage comes from obvious high ground.

A small ridge can hide part of your body.

A shallow slope can change which angle an enemy has.

A box can block one firing line.

A doorway can restrict movement.

A corner can let you expose less of yourself while still attacking.

Players often overlook these details because they don’t look strategically important.

But combat is built from geometry.

The question is always:

How much of me can the enemy see, and how much of them can I see?

That’s the real value of small terrain advantages.


19. Heal Where You Can React

Healing is also a positioning decision.

The nearest piece of cover isn’t necessarily the safest.

Before starting a heal, consider:

Can the enemy see the cover?

Can they swing around it?

Can they throw ordnance onto it?

Can I move if they push?

Can my teammate cover the approach?

A good healing position gives you enough time to restore your resources without trapping you when the enemy changes direction.

You’re not simply looking for a place where bullets can’t currently reach you.

You’re looking for a place where you can react when they do.


20. Know When to Abandon a Good Position

Positioning is temporary.

The Ring changes.

The enemy gains an angle.

A teammate gets forced away.

A third squad arrives.

Your cover becomes compromised.

A position that was excellent five seconds ago may now be poor.

Ask:

Does this position still give me more useful options than the enemy?

If not, leave it.

Don’t defend a position just because you spent time taking it.

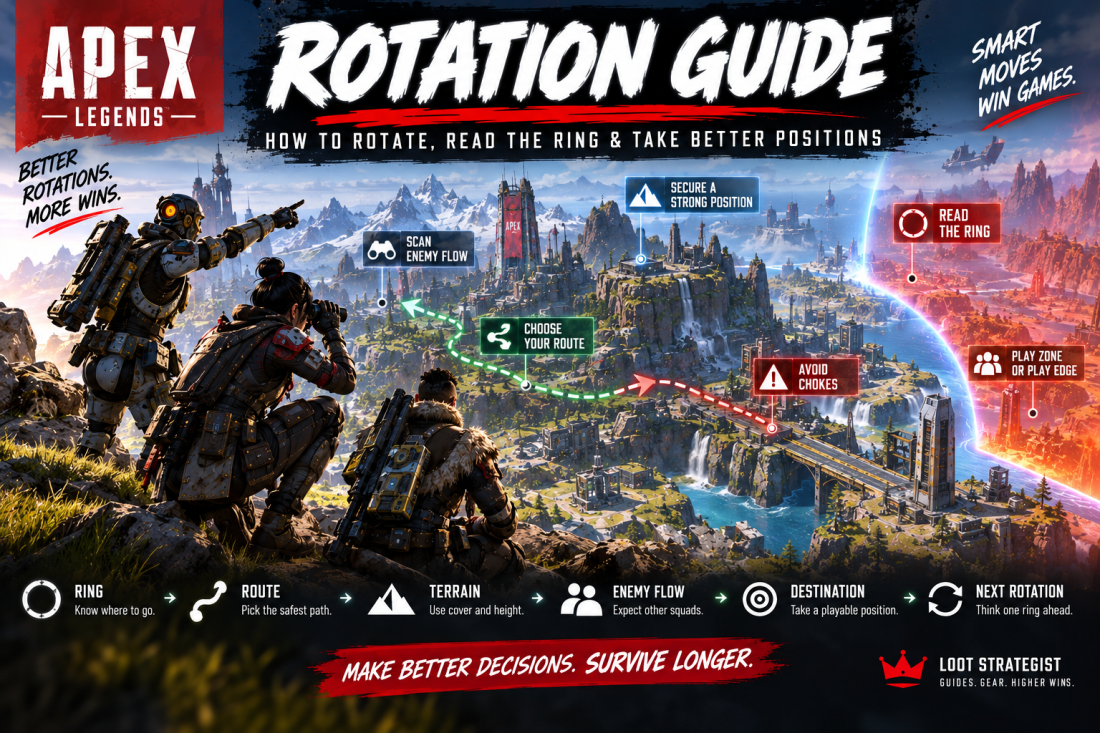
Your Apex Legends Rotation Guide covers the broader decision of choosing the next route and destination.

Here, the lesson is simpler:

Good positioning means knowing when a position has stopped being good.


21. Endgame Positioning: Space Gets More Valuable

Late in a match, available space becomes more limited.

That increases the value of:

Cover

Exit routes

Useful height

Information

Support

A position that is merely comfortable early in a match may be extremely valuable late because fewer safe areas remain.

But the same rule still applies:

Don’t chase a position simply because it is technically inside the Ring.

Look for the area that allows you to survive the current pressure and still make the next move.


22. Don’t Let the Center of the Ring Decide for You

Central positioning can be strong.

It can also make you visible to teams arriving from multiple directions.

A slightly offset position with strong cover and several exits may be much more useful.

This is why distance to the center isn’t enough.

Evaluate:

Cover

Threat

Options

Support

Exit

The same five-part framework works whether you’re in an early-game POI or the final playable area.


23. A Practical Positioning Test

When two locations look equally attractive, compare them directly.

Position A

Good height.

Weak cover.

One exit.

Poor teammate support.

Position B

Lower ground.

Strong cover.

Two exits.

Better angle.

Easy teammate support.

Position B may be the better choice even though it looks less impressive.

That’s the point of the framework.

You’re not choosing the location that looks strongest.

You’re choosing the one that behaves strongest when the fight changes.


Common Apex Legends Positioning Mistakes

Standing in the open because you have the better weapon

Weapons don’t replace cover.

Taking high ground just because it is high

Elevation without useful cover or an exit can become a trap.

Repeating the same peek

The enemy gets free information about your position.

Flanking farther than your team can support

Your angle may be good while your timing is terrible.

Treating the Ring as the destination

Inside the zone does not automatically mean playable.

Staying behind cover that only protects one side

You can still be exposed to the rest of the enemy squad.

Fighting from a dead end

A strong first exchange doesn’t matter if your next move is impossible.

Refusing to abandon a once-good position

Good positions have expiration dates.

Moving for a better angle without checking the route

The path to an angle may be more dangerous than the angle itself.

Standing directly beside teammates

You reduce your squad’s ability to create useful angles.

Standing too far away

You turn yourself into an isolated target.


How to Practice Better Positioning

You don’t need a special positioning drill.

Instead, review where you were standing when you lost a fight.

Ask:

What protected me?

What could see me?

Where could I retreat?

Could my teammate help?

What angle did the enemy have?

Was there a nearby position that gave me more options?

Then identify one recurring problem.

Maybe you always fight from exposed ground.

Maybe you take aggressive angles that your teammates cannot support.

Maybe you hold high ground without checking the escape route.

Maybe you stay in one position too long.

Fix one problem at a time.

That is more useful than trying to memorize dozens of positioning rules.


The Apex Legends Positioning Checklist

Before taking a position, ask:

What is my cover?

What can I threaten from here?

How many useful options do I have?

Can my squad support me?

Where do I go if this position fails?

Then look one step farther:

What is my next position?

That’s it.

You don’t need a complicated formula once the concepts become familiar.


Positioning by Situation

Holding a building

Use the building as a network of angles rather than standing on one doorway.

Holding high ground

Prioritize cover and an escape route over elevation alone.

Fighting around a rock

Work the sides and look for a second piece of cover.

Crossing open ground

Move toward the nearest connected playable terrain.

Taking a flank

Make sure your team can support the angle.

Healing

Choose cover that still lets you react to a push.

Endgame

Prioritize playable space, exits, and support rather than simply chasing the center.


Final Thoughts

Good positioning doesn’t make you impossible to kill.

It changes the terms of the fight.

You have more cover.

More useful angles.

More room to move.

More opportunities to support your squad.

More ways to disengage.

And, most importantly, more choices.

That’s why the strongest position isn’t always the highest building or the exact center of the Ring.

It’s the location that gives you useful answers when the enemy changes the situation.

Use:

Cover → Threat → Options → Support → Exit

Then keep looking one step ahead.

Where do you move if the enemy pushes?

Where do you heal?

Where does your teammate help?

Where does the enemy have to expose themselves?

Where do you go when the Ring changes?

Apex Legends gives you better odds when you stop treating positioning as a place to stand and start treating it as a resource you manage.

The enemy doesn’t need to be out-aimed if they are forced into worse choices.

And when your position consistently gives you more options than theirs, you’ve already made the fight easier before the first shot lands.


Frequently Asked Questions

What is positioning in Apex Legends?

Positioning is where you place yourself relative to enemies, teammates, cover, terrain, the Ring, and available escape routes. Good positioning gives you useful attack and defensive options while limiting the enemy’s choices.

Is high ground always better in Apex Legends?

No. High ground is valuable when it provides useful sightlines while maintaining cover, support, mobility, and an escape route. Height without those advantages can be surprisingly weak.

What is the most important part of positioning?

Cover is usually the first consideration because it determines how safely you can take damage, heal, peek, and reposition. From there, look at threat, available options, teammate support, and your exit.

How do I create better angles?

Use the edges of cover and make small lateral adjustments rather than repeatedly peeking from the same location. A modest change in angle can make the enemy’s cover much less effective.

Should I flank by myself?

Only when the angle is still supportable and the risk is justified. A flank that puts you too far from your teammates can turn a strong angle into an isolated fight.

What makes a position playable?

A playable position gives you enough cover and space to fight, heal, reposition, receive teammate support, and retreat when circumstances change. Being inside the Ring alone doesn’t make a location strategically strong.

When should I leave a good position?

Leave when it stops giving you useful options—for example, when the Ring forces you out, an enemy gains a stronger angle, your cover becomes compromised, or your retreat route disappears.

How do I improve my positioning?

After each bad fight, analyze your location instead of only your aim. Ask what protected you, what could see you, where you could retreat, and whether you had another nearby position that offered better options.

How does positioning differ from rotation?

Positioning is primarily about where you stand and how you use the terrain around you. Rotation is about moving from one area to another and choosing the route and destination. Your Apex Legends Rotation Guide covers the macro side.

How does positioning differ from movement?

Movement is how your character physically traverses the game world. Positioning is the decision about where you should be and why. Your Apex Legends Movement Guide covers movement mechanics separately.


Sources & Updates

Last reviewed: September 2026

EA’s current How to Play Apex Legends guidance was used for durable gameplay references involving staying with your squad, movement, grenades, cover, and using utility to create or escape from positions. (EA Help)

EA’s terminology documentation was checked for the concept of a good spot in the Ring and related gameplay language.

EA’s current Apex news and update documentation confirms that the game remains actively updated during Season 30: Marked, with balance and gameplay changes continuing through September 2026. This guide intentionally avoids temporary weapon rankings, Legend-tier claims, or map-specific positions that could quickly become obsolete. (EA)

The practical framework in this guide—Cover → Threat → Options → Support → Exit—is Loot Strategist editorial analysis designed to help readers evaluate positions rather than memorize fixed locations.

For related guides, see the Apex Legends Rotation Guide, Apex Legends Fight Guide, Apex Legends Team Fighting Guide, Apex Legends Movement Guide, Apex Legends Squad Composition Guide, and Apex Legends Solo Queue Guide.
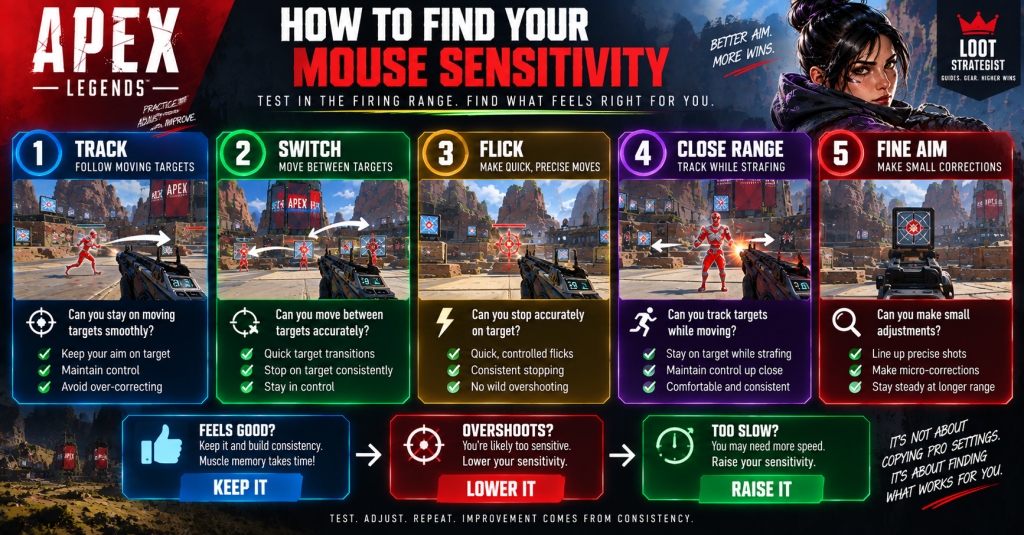
Apex Legends Team Fighting Guide: Focus Fire & Crossfires

Apex Legends Team Fighting Guide: Focus Fire & Crossfires

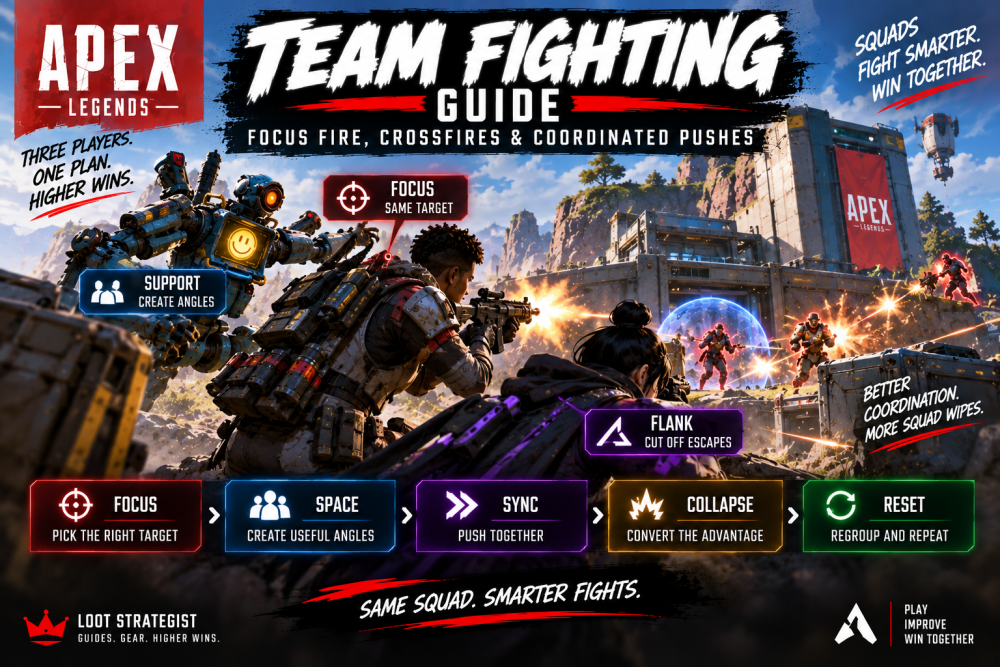
Apex Legends Team Fighting Guide: Focus Fire, Crossfires & Coordinated Pushes

Apex Legends is a team game, but three players fighting in the same area are not automatically fighting as a team.

Coordinated fighting is about making three sets of actions serve one objective. One player creates pressure. Another takes a useful angle. A third controls an escape route or prepares the next move. When the timing is right, the squad collapses on the advantage before the enemy can recover.

That is very different from three players independently taking aim at whichever enemy happens to be in front of them.

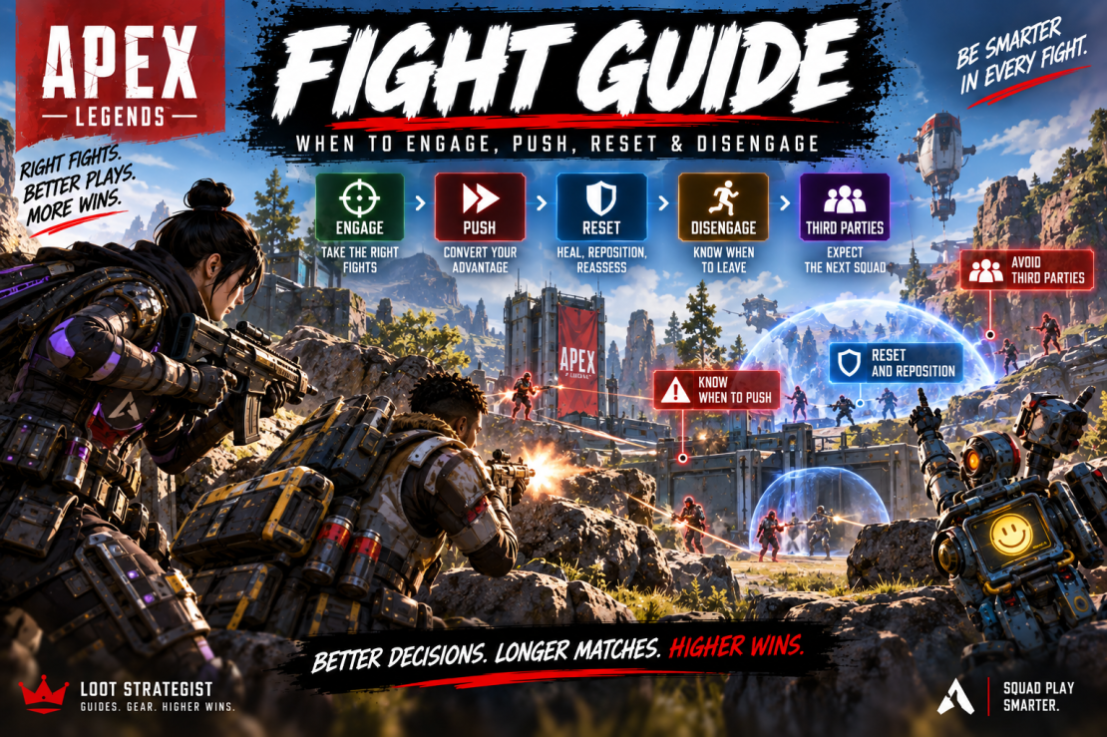
Our existing Apex Legends Fight Guide covers the bigger question of whether to engage, push, reset, or disengage. This guide starts one step later:

Once your squad has decided to fight, how do you make all three players more effective together?

The simplest framework is:

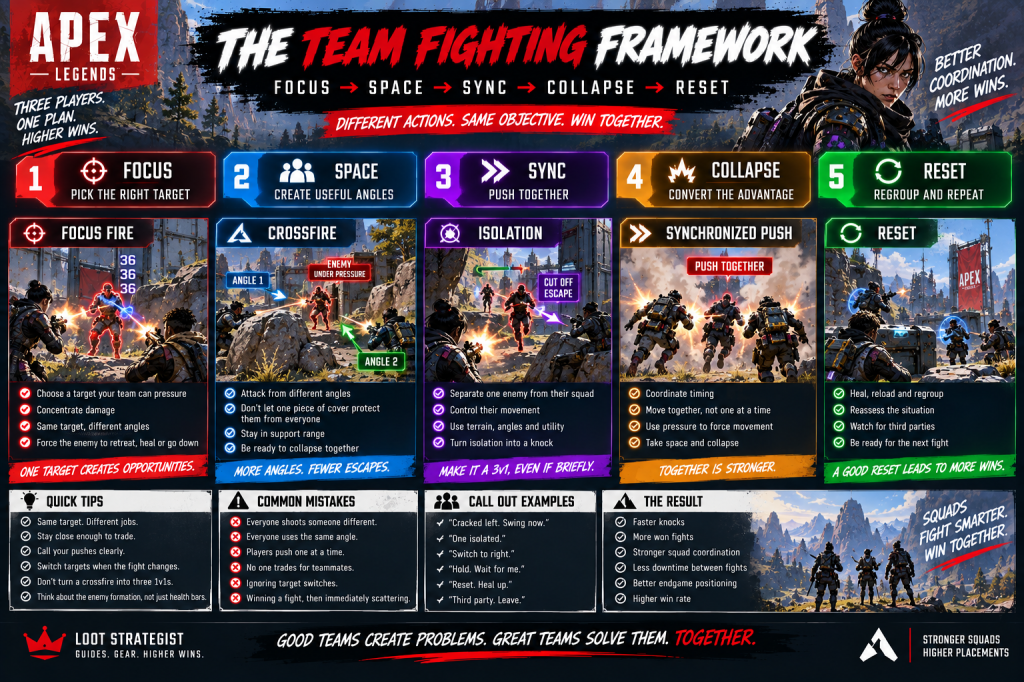
Focus → Space → Sync → Collapse → Reset

That is the foundation for everything that follows.


The Team-Fight Framework

Apex Legends team fighting framework showing focus fire, crossfires, isolation, synchronized pushes, and resets

Focus

Choose the enemy who gives your squad the best opportunity.

Space

Create useful angles without separating so far that teammates become isolated.

Sync

Make sure your pressure and movement happen close enough together to matter.

Collapse

When the enemy formation breaks, take space together and convert the opening.

Reset

After the fight changes, rebuild your formation before the next engagement.

This is not a rigid sequence. Fights move too quickly for that.

Think of it as a checklist for keeping three players pointed toward the same problem.


1. Focus Fire: Same Target, Different Jobs

Focus fire is the easiest team-fighting concept to understand and one of the easiest to execute badly.

Three teammates can all shoot the same enemy and still fail to create a meaningful advantage if the target has strong cover and the squad is standing in poor positions.

The better version is:

Same target. Different jobs.

One player keeps the target occupied.

Another takes an angle that punishes movement.

The third supports the pressure, watches for the target’s teammates, or prepares to cut off the retreat.

EA’s official terminology describes “focus” as concentrating attacks on one enemy. (EA Help)

The practical goal is not simply to produce a lot of damage. It is to make one enemy’s survival increasingly difficult.


2. Pick the Target Your Team Can Actually Pressure

Don’t choose a target just because their health bar looks attractive.

Look at the enemy formation first.

A 100-health player standing between two teammates may be a worse target than a full-health player who has drifted 15 meters away from support.

Look for:

Isolation — Can the target receive immediate help?

Cover — How safely can they hide?

Escape — Where can they move?

Support — Who can punish your push?

Access — Can your whole squad reach the fight?

This leads to an important team-fighting rule:

Choose the target that three players can pressure, not necessarily the target with the lowest health.

That single adjustment can make focus fire far more effective.


3. Create Space Without Creating Three Solo Fights

A team needs enough spacing to produce different angles.

Too little space, and your squad becomes one large target.

Too much space, and you’ve created three separate fights.

The best spacing is practical rather than numerical.

Ask:

If this teammate gets pushed right now, can I help before they are knocked?

If the answer is yes, the spacing is probably workable.

If the answer is no, the angle may be clever but the formation is too spread out.

EA’s current beginner guidance similarly recommends staying close enough to support your squad while avoiding landing directly on top of one another. (EA Help)

That principle continues into combat.


4. Build Crossfires That Actually Work

A crossfire is useful when an enemy cannot use one piece of cover to protect themselves from every attacker.

Imagine an enemy behind a rock.

Player A holds the front.

Player B moves far enough left to create a second line of sight.

The enemy can no longer comfortably fight Player A without exposing themselves to Player B.

That’s the value of a crossfire.

But distance alone doesn’t make a crossfire.

A good crossfire needs three things:

Threat — both angles must matter.

Support — teammates must be able to help one another.

Collapse potential — once the enemy moves, the squad can follow up together.

A bad crossfire looks like three teammates scattered across the map.

A good one looks like one enemy trying to solve several connected problems.


5. Same Objective, Different Jobs

This is the central idea behind coordinated team fighting.

Your squad does not need three players doing the same thing.

It needs three players working toward the same result.

For example:

Player 1 — Pressure

Keeps the enemy occupied.

Player 2 — Support Angle

Punishes movement and creates the second threat.

Player 3 — Cutoff

Covers the retreat, watches the flank, or prepares to collapse.

Those jobs can rotate constantly.

The player holding the cutoff may become the aggressor.

The player creating pressure may need to fall back.

The point is not permanent roles.

It is shared intent.


6. Isolate the Enemy by Controlling Their Options

“Look for isolated enemies” is useful advice.

Making an enemy isolated is better.

A squad can create isolation by controlling the space between one player and their teammates.

For example:

An enemy backs away from your pressure.

One teammate moves to cut off the shortest route back.

Another keeps their attention from the front.

The third player closes the remaining space.

Suddenly, the target is alone even though the enemy team started together.

This is the key:

Isolation is often created by positioning, not discovered by accident.

Grenades and other ordnance can help force players away from cover or deny parts of a position; EA specifically lists those as strategic uses for grenades. (EA Help)

Use the tools your squad has to make the enemy formation worse.


7. Attack the Formation, Not Just the Health Bar

An enemy team is a shape.

Sometimes all three players are stacked tightly.

Sometimes two are together and one is ahead.

Sometimes one is healing while another holds the angle.

Sometimes a player has rotated to a completely different building.

That arrangement tells you more than the health bars alone.

Ask:

Who can support whom?

Which player is hardest to reach?

Which player is closest to becoming isolated?

Where is the escape route?

You are looking for a weakness in the formation.

Once the formation breaks, your squad has something to exploit.


8. Sync the Push

A coordinated push is mostly a timing problem.

One player pushing first and hoping the others follow is not synchronization.

It creates a staggered fight.

The first player gets focused.

They retreat.

The second player arrives late.

The third is still moving.

Now the enemy gets three manageable engagements instead of one difficult team fight.

A better sequence is:

Pressure → position → call → collapse

The call does not need to be elaborate.

“Cracked left. Swing.”

Or:

“One isolated. Now.”

Or:

“Hold. Wait for me.”

The objective is to make sure the squad’s movement reaches the enemy at roughly the same moment.


9. A Team Push Should Improve the Fight

Don’t push simply because the enemy is nearby.

A good push should improve at least one part of the situation.

You should be gaining:

Space

A stronger angle

Closer access to an isolated target

Control of an escape route

A numbers advantage

A better position for the next exchange

If every step forward exposes another teammate without giving anything back, the push is probably getting worse.

That is where coordinated teams stop thinking about momentum and start thinking about conversion.


10. Change Targets When the Fight Changes

Focus fire is not a commandment.

Your initial target can stop being the correct target.

Imagine:

You begin pressuring Player A.

Player A reaches excellent cover.

At the same time, Player B swings wide and becomes isolated.

Continuing to shoot Player A because “that’s who we called” makes no sense.

Switch.

All three players should understand the reason for the change.

That is why short callouts matter:

“Switch.”

“Right side.”

“Isolated.”

“New target.”

Good teams don’t simply share targets.

They share changes in priority.


11. Trade for Your Teammates

You don’t need to win your own duel every time.

Sometimes your most useful action is punishing the enemy for attacking someone else.

Suppose an enemy swings at your teammate.

Your teammate takes heavy damage.

Instead of watching the duel, you take the angle and punish the attacker.

Now the enemy has a problem:

If they keep attacking your teammate, another player will damage them.

That is a trade.

Trading makes aggressive enemy plays expensive.

It also gives your teammate confidence to take space because they know the squad can respond when the fight turns.


12. Communication Should Be Short Enough to Use

A team callout has three useful pieces:

State — What happened?

Action — What should we do?

Timing — When?

For example:

“Cracked left. Swing now.”

That’s more useful than narrating the entire fight.

Apex’s ping system is also designed to communicate enemies, locations, and movement without voice chat. EA explicitly recommends using pings to communicate with teammates and alert them to nearby enemies. (EA Help)

Good communication doesn’t mean talking constantly.

It means providing the information that changes what your teammates should do.


13. Buildings and Open Ground Require Different Coordination

In buildings

Avoid turning every push into three players entering through the same doorway.

One player can create pressure.

Another can hold an adjacent angle.

A third can cover the route the enemy is most likely to use.

You want the enemy to deal with more than one threat without giving them three isolated targets.

In open terrain

Spacing becomes more dangerous because there may be less cover between teammates.

Don’t spread out simply to create a theoretical crossfire.

Move from one usable piece of terrain to another.

Rocks, walls, slopes, buildings, and elevation changes can become temporary anchors for your formation.

The question is not:

“How far apart can we get?”

It is:

“How much useful space can we control while remaining able to trade?”


14. When the First Knock Happens

A knock creates a numbers advantage.

It does not automatically solve the fight.

This is where coordinated teams should become calmer, not more frantic.

Immediately identify:

Where are the remaining enemies?

Can they support one another?

Can we take space safely?

Is the knocked player worth finishing now?

Is another squad approaching?

Then choose the next action.

You might collapse.

You might hold the better position.

You might finish the knock.

You might prepare for the remaining two players.

The key is that everyone understands what happens next.


15. Reset as a Team

A coordinated squad should know how to stop fighting together as well as start fighting together.

Once the exchange turns bad—or once the immediate fight is won—rebuild the formation.

Use:

Cover → Heal → Reload → Regroup → Scan → Decide

Regroup is especially important.

One teammate shouldn’t be behind a rock healing while another is already pushing the next building and the third is looting.

Get the squad back into a state where everyone can contribute.

Our existing Apex Legends Fight Guide covers the broader engage/reset/disengage decision. This article’s focus is narrower: make the reset happen as a squad rather than three separate players reacting individually.


16. Don’t Let a Won Fight Become Three Solo Plays

This is where many teams throw away an advantage.

They get a knock.

One player chases.

Another opens a death box.

The third watches a completely different angle.

The enemy team is no longer fighting the squad.

They are fighting three distracted players.

After an advantage, switch from damage mode to control mode.

Secure the area.

Watch the approaches.

Rebuild health and ammunition.

Then decide whether another push is worthwhile.

The same principle applies after a squad wipes: the next danger often comes from somewhere else.


17. Third Parties Change Your Formation

When another squad enters the fight, don’t continue your original plan by habit.

EA defines a third party as another squad joining an existing fight. (help.ea.com)

The squad that was previously your opponent may suddenly become temporary cover, an obstacle, or a source of pressure.

Your priorities can change from:

“Finish this team.”

to:

“Keep our squad alive and preserve our position.”

That may mean:

  • pulling back,
  • taking cover,
  • changing angles,
  • finishing a vulnerable enemy quickly,
  • or leaving the area.

Coordination matters most when the plan changes.


18. Use Legend Abilities to Support the Team Fight

Your Legend choice matters, but this article doesn’t need to become another class guide.

EA currently divides Legends into Assault, Controller, Recon, Skirmisher, and Support, with different class benefits and roles. (EA Help)

For team fighting, think more simply:

Information helps the squad choose an angle.

Mobility helps the squad take or abandon space.

Control helps restrict enemy movement.

Offensive utility helps create pressure.

Recovery helps the team survive mistakes.

The best ability is usually the one that makes the whole squad’s next decision easier, not the one that produces the flashiest individual play.

For the broader team-building question, see the Apex Legends Squad Composition Guide.
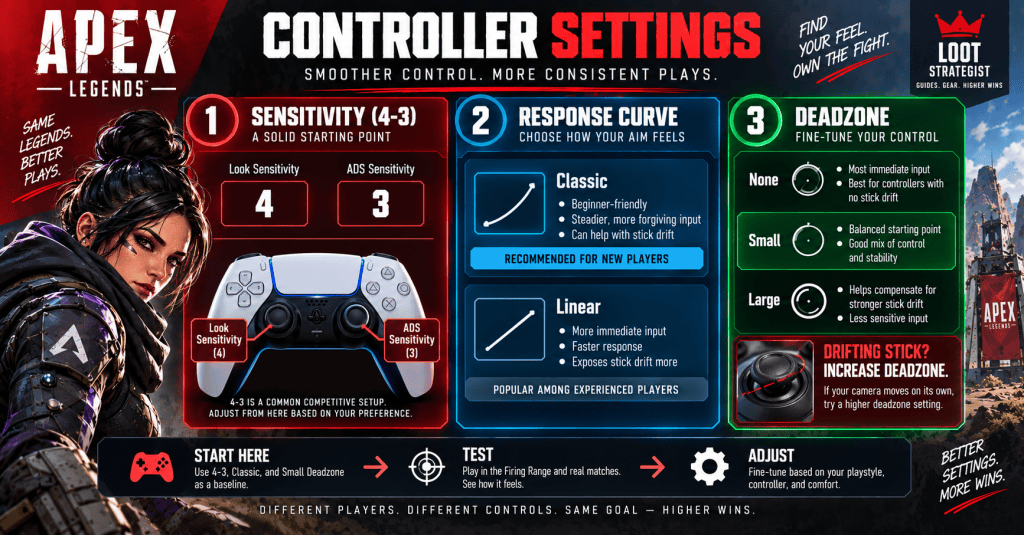

19. Solo Queue: Coordinate With the Team You Actually Have

Perfect synchronization is difficult with random teammates.

You can still create basic structure.

Ping the target.

Stay close enough to trade.

Mirror a teammate’s reasonable commitment.

Don’t build your entire plan around an assumption that nobody else has heard.

A teammate pushing alone does not always mean you should blindly follow. But if you can safely support their play, doing so may turn a reckless push into a successful team fight.

For more on adapting to random teammates, see the Apex Legends Solo Queue Guide.
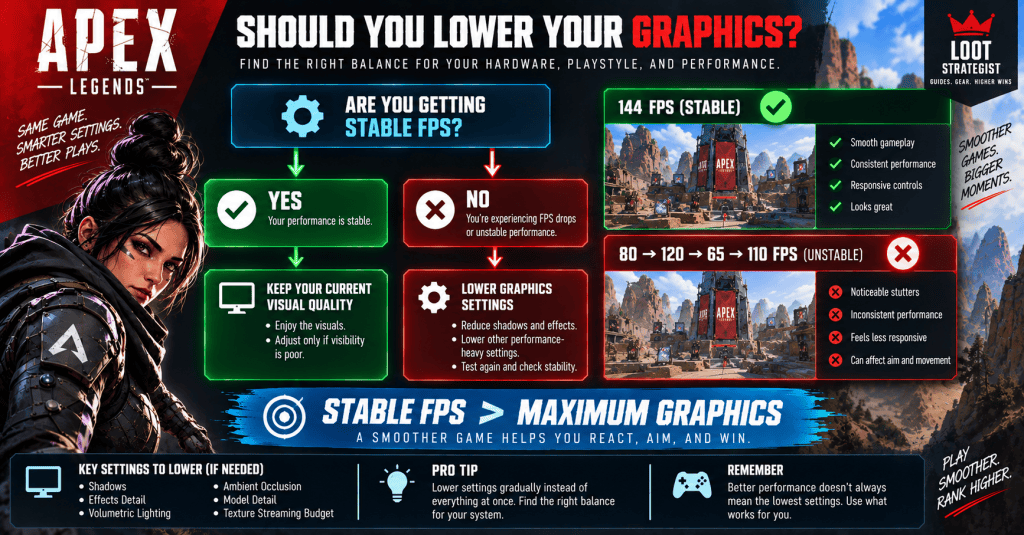

20. The Most Common Team-Fighting Mistakes

Everyone shoots someone different

The enemy takes manageable damage instead of facing a decisive threat.

Everyone stands at the same angle

One piece of cover protects the entire squad.

Everyone creates their own flank

Your crossfire becomes three isolated 1v1s.

One player pushes before the others are ready

The enemy gets an easy isolated target.

The squad never switches targets

Players keep following an old plan after the fight has changed.

A knock causes panic

Everyone rushes forward without checking terrain or the remaining enemies.

Nobody trades for the teammate taking damage

The squad behaves like three separate players.

Everyone talks, but nobody calls the decision

Communication becomes noise instead of information.

The squad wins the fight and immediately scatters

The next enemy gets three separate targets.

These mistakes are often more serious than raw aim because they determine whether your mechanical skill gets the support it needs.


The Team-Fight Checklist

Before committing, ask:

Who are we focusing?

Where is everyone standing?

Can we trade for each other?

Which angle creates the most pressure?

How do we isolate the target?

When the opening appears:

Are we ready to move together?

After the knock:

Where are the remaining enemies?

After the fight:

Cover → Heal → Reload → Regroup → Scan → Decide

That is enough.

You don’t need a complicated tactical system to start fighting better as a team.


A Simple Team-Fight Scenario

Imagine an enemy squad is holding a building.

One player is watching the front door.

The second is on a side angle.

The third is deeper inside.
Instead of sending three players through the front:

Player 1 pressures the entrance.

Player 2 moves toward the side.
Player 3 watches the likely escape route.

The defender at the entrance backs away.
That movement exposes the side.

Player 2 gets damage.

The enemy tries to retreat farther inside.

Player 3 closes the exit.

Now the enemy squad has a choice:

Stay and fight from a worse position.

Or move into another player’s line of fire.

That is the entire point of coordinated team fighting.

You are not simply adding three sources of damage.

You are taking away the enemy’s good choices.


How to Practice Team Fighting

Don’t try to fix everything at once.

After a bad engagement, identify one coordination failure.

If your squad constantly spreads too far apart, work on support distance.

If you deal damage without getting meaningful advantages, work on focus fire.

If your pushes fail, work on synchronization.

If enemies keep escaping, work on cutoffs.

If your squad wins the first fight and loses the second, work on resets and awareness after the engagement.

The goal is not to make every match perfect.

It’s to make the same mistake less often.


Final Thoughts

Strong team fighting isn’t about making three players act like one person.

It’s about making three different players work toward the same outcome.

Focus the right target.

Create space without breaking support range.

Build crossfires that actually threaten the enemy.

Use pressure to isolate players.

Sync the push instead of trickling in.

Switch targets when the fight changes.

Trade for teammates when they take pressure.

And after the fight, regroup before the next problem finds you.

The most useful mental model is:

Focus → Space → Sync → Collapse → Reset

One player can create the opening.

Another can make the opening larger.

The third can make the escape route disappear.

Then the squad moves together.

That’s coordinated Apex.

Not three players standing beside one another.

Three players creating one advantage.


Frequently Asked Questions

What is focus fire in Apex Legends?

Focus fire means concentrating your squad’s attacks on one enemy rather than spreading damage across several targets. The goal is to create a decisive problem for one player instead of manageable pressure across the whole squad. EA’s terminology also uses “focus” for concentrating attacks on one enemy. (EA Help)

How do I create a crossfire in Apex Legends?

Use two or more useful angles that the enemy cannot comfortably defend with one piece of cover. Keep the angles close enough for teammates to support one another, and be ready to collapse when the enemy moves.

How do I isolate an enemy?

Use pressure, positioning, and utility to separate a player from their teammates. Cut off the easiest route back to their squad while another teammate maintains pressure.

Should all three teammates shoot the same enemy?

Concentrated pressure is usually useful, but the squad should not stand in the exact same position. The strongest setup is generally the same target, different jobs.

When should we push together?

Push when your squad has created a meaningful opening and everyone is close enough to contribute. A synchronized push is much stronger than three players arriving seconds apart.

What should we do after getting a knock?

Find the remaining enemies, assess the terrain, and decide whether the knock can be converted into space, another knock, an elimination, or a stronger position. Don’t assume the knock automatically means “rush.”

How important are crossfires?

Very. A good crossfire can force an enemy to choose between exposing themselves to one teammate or another. But a crossfire that leaves teammates too far apart can create more problems than it solves.

What should I say in voice chat?

Keep calls short and actionable. Examples include “Cracked left,” “Swing now,” “Hold,” “Switch,” “Isolated,” and “Reset.” The exact vocabulary matters less than making sure teammates understand the state of the fight and the intended action.

Can team fighting work in solo queue?

Yes, although perfect coordination is unlikely. Use pings, maintain support distance, mirror reasonable teammate decisions, and communicate simple priorities rather than expecting random teammates to follow a detailed plan. EA specifically supports ping-based squad communication. (EA Help)

How can I practice coordinated team fighting?

Pick one coordination problem per session—focus fire, spacing, crossfires, synchronized pushes, target switching, or resets—and work on that one habit deliberately.


Sources & Updates

Last reviewed: September 2026

EA’s current How to Play Apex Legends guidance was used for durable gameplay references involving squad communication, pinging enemies and locations, staying close enough to support teammates, movement, and strategic use of grenades. (EA Help)

EA’s current Legends Guide was used to verify the five current Legend classes—Assault, Controller, Recon, Skirmisher, and Support—and their broad team functions. (EA Help)

EA’s current terminology documentation was used for established gameplay terminology such as third party and related combat language. (EA Help)

The practical frameworks in this article—Focus → Space → Sync → Collapse → Reset, target switching, formation-based isolation, synchronized pushes, and the distinction between stacking and genuine teamwork—are Loot Strategist editorial analysis rather than official EA rules.

This guide deliberately avoids temporary weapon rankings and Legend tier-list recommendations so that the core team-fighting advice remains useful as Apex balance changes.

For related guides, see the Apex Legends Squad Composition Guide, Apex Legends Solo Queue Guide, and Apex Legends Rotation Guide. The existing Apex Legends Fight Guide covers the broader engage/push/reset/disengage decision, while this article focuses specifically on coordinating the squad once combat begins.

Apex Legends Fight Guide: When to Engage, Push & Reset

Apex Legends Fight Guide: When to Engage, Push & Reset

Apex Legends fights are not decided by aim alone.

You can win your gunfights and still lose the match because you started from a bad position, pushed a cracked enemy into their teammates, chased a knock too far, or stayed in a fight long enough for a third squad to arrive.

The harder skill is deciding when a fight is worth taking, when an advantage is real, and when it is time to leave.

That is what this guide is about.

Instead of treating every engagement as a simple question of aim, use this combat loop:

Spot → Assess → Engage → Create an Advantage → Commit or Reset

And remember one distinction throughout the fight:

Damage is not the same thing as an advantage. An advantage is not the same thing as a win.

Your goal is to turn a small opening into something useful without throwing away the position that created it.


The Loot Strategist Fight Framework

Apex Legends fight process showing when to engage, push, reset, disengage, and handle third parties

Before you fire, quickly assess five things:

Spot

Where is the enemy, and what are they doing?

Assess

Where is your squad? What cover do you have? Who has the better position?

Engage

Do you have a sensible target and a reason to start shooting?

Create an Advantage

Can you create meaningful damage, isolate someone, take space, or force the enemy out of position?

Commit or Reset

Can you convert that advantage safely, or has the fight changed enough that you should break contact?

This framework is deliberately simple.

You will not have time to think through ten variables during every firefight. With practice, the questions become instinctive.


Damage → Advantage → Conversion

This is the most important idea in the entire guide.

Apex players often treat damage as proof that they are winning.

It isn’t.

Imagine your squad deals 150 damage but gets pushed off high ground, loses half its shields, and ends up exposed.

You dealt more damage.

Your situation may still be worse.

Think of combat in three stages.

Damage

You hurt the enemy.

A crack, flesh damage, or repeated poke can all create pressure.

Advantage

Something about the situation has actually changed.

An enemy is isolated.

Your squad has a numbers advantage.

The opposing team has been forced out of cover.

You have taken a stronger angle.

A teammate has created an opening.

Conversion

You turn that advantage into something meaningful:

a knock, elimination, stronger position, safe reset, or successful disengagement.

That’s the difference between shooting well and fighting well.


1. Know When to Engage

Seeing an enemy does not automatically create a fight.

A good engagement usually begins with some kind of opening:

  • an isolated enemy,
  • a vulnerable rotation,
  • exposed players,
  • superior cover,
  • a useful angle,
  • a numbers advantage,
  • or an enemy distracted by another team.

You do not need every advantage.

But before opening fire, know what you’re hoping to achieve.

Are you trying to:

Take a position?

Pressure a weak player?

Force a team away from the Ring?

Create an opening for a push?

Start a fight because you genuinely have the advantage?

If there is no clear reason, shooting may simply announce your location.


2. Choose a Target Your Squad Can Actually Pressure

One of the easiest ways to waste an opening is spreading damage across the entire enemy team.

Three teammates shoot three different players.

Three players take damage.

Nobody gets knocked.

The enemy retreats and heals.

Your squad has spent ammunition and revealed its position without gaining much.

Whenever possible, establish a focus target.

That doesn’t mean every bullet must hit the same player. It means your squad should have a shared understanding of which enemy is closest to becoming vulnerable.

An isolated player in weak cover is usually more valuable than a full-health enemy sitting safely behind strong cover.

Your objective is not to maximize the damage counter.

It is to create a problem the other squad cannot easily solve.


3. A Crack Creates Pressure, Not Permission

Breaking an enemy’s shields is valuable.

It is also an easy moment to make a bad decision.

You crack someone, sprint forward, and suddenly discover that the enemy was only vulnerable because they were standing in front of their entire squad.

Before pushing a cracked player, check:

Where are their teammates?

Can we reach the target together?

What cover is between us?

Where will we end up after the push?

Could another squad hear this fight?

A crack becomes especially powerful when your squad can convert it quickly.

Otherwise, keep the pressure and improve your position.


4. Pressure Is Not the Same as Commitment

You can make an enemy uncomfortable without betting your entire squad on the engagement.

Hold a strong angle.

Force a player away from cover.

Use ordnance to deny space.

Poke from range.

Take a better position.

EA notes that ordnance can be used for damage, forcing enemies from cover, buying time for retreat, and helping secure high ground. (EA Help)

That makes grenades and other utility useful even when you aren’t trying to finish the fight immediately.

Sometimes the best play is to make the enemy’s position progressively worse until a real opening appears.


5. When to Push

A push makes sense when your existing advantage can become something bigger.

Strong push opportunities include:

An enemy is isolated

They are too far from their teammates to receive immediate support.

You have a numbers advantage

A player is knocked, separated, or otherwise unavailable to the enemy squad.

The enemy is forced out of cover

They have fewer safe positions available.

The enemy is already weak

Your squad has created a meaningful health or shield advantage and can reach them safely.

Their attention is divided

Another squad or another problem is pulling their focus.

But don’t push simply because an enemy is nearby.

Push because the conditions have changed in your favor.


6. When Not to Push

The enemy being low does not automatically make the chase good.

Be cautious when:

  • your squad is split,
  • your health is poor,
  • the route is exposed,
  • the enemy has strong cover,
  • you don’t know where the other players are,
  • another squad may be approaching,
  • or reaching the target requires abandoning your own strong position.

A common mistake is valuing the enemy’s health bar more than your squad’s position.

Don’t chase 20 HP into a terrible fight.

The number on the enemy’s health bar does not tell you how many teammates are waiting around the corner.


7. Fight Toward an Advantage

The best push is one that moves your squad toward something useful.

That could mean:

Better cover

A stronger angle

A knocked enemy

A separated player

A defensible building

A way to cut off an escape

This is different from simply running toward the enemy.

A push should improve your situation as it progresses.

If every meter forward makes your squad more exposed, you may be converting a good fight into a bad one.


8. Know When to Reset

A reset is a temporary break in combat that lets your squad restore the conditions needed to fight effectively.

Use it when:

  • the health trade turns against you,
  • your ammunition is running low,
  • your position becomes exposed,
  • your team loses spacing,
  • the enemy gets back into strong cover,
  • or the fight simply stops progressing.

The sequence is straightforward:

Cover → Heal → Reload → Scan → Decide

Heal and reload first.

Then look again.

Where is the enemy?

Where are your teammates?

Who has the better position now?

Is another squad nearby?

Has the Ring changed the equation?

A reset is not surrender.

It is a way of changing the terms of the fight.


9. Recognize a Stalled Fight

Some fights are neither winning nor losing.

They’re simply going nowhere.

You peek.

They peek.

You trade damage.

They heal.

You peek again.

They heal again.

Minutes disappear.

This is a stalled fight, and it becomes increasingly dangerous because the original two squads are announcing their location while spending resources.

At that point, you need to change something:

Change the angle.

Change the position.

Force movement.

Create a new opening.

Or leave.

Don’t keep repeating the same exchange because you’ve already invested time in it.


10. A Knock Changes the Numbers — Not the Terrain

A knock is one of the strongest temporary advantages you can create.

But the knock itself doesn’t guarantee the fight is won.

EA distinguishes a knocked player from an eliminated player and uses “thirst” for killing a knocked player to take their items. (EA Help)

The more useful strategic distinction is this:

A knock changes the numbers. It does not automatically change the terrain.

You may now have a 3-vs-2.

But if the remaining enemies have strong cover, a superior position, and a safe route to hold you off, blindly charging them can still throw away the advantage.

Before pushing, ask:

Can we reach them together?

Do we have better cover?

Where are the remaining enemies?

Is the knocked player safe to finish?

Could another squad arrive?


11. When to Finish a Knock

Finishing a knocked enemy can remove them from the fight and potentially give your squad access to their loot.

But the finish should not cost more than it is worth.

A safe finish may make sense when the enemy squad cannot punish you.

A risky finish is often a mistake when it requires:

  • leaving cover,
  • splitting from your team,
  • exposing yourself to the remaining enemies,
  • or moving into an area where you have no escape.

The knock is already valuable.

You don’t have to turn every knock into a desperate chase.


12. How to Convert a Knock

After a knock, think about pressure, not just elimination.

Can you use the numbers advantage to:

Take space?

Cut off a retreat?

Force the remaining players into worse cover?

Create a safe angle?

Finish the squad?

If yes, commit.

If not, reset or hold your advantage.

This is where Damage → Advantage → Conversion matters most.

The knock is the advantage.

Your next decision determines whether it becomes a win.


13. Every Fight Has a Clock

EA defines a third party as another squad joining a fight already involving two squads. (EA Help)

That gives every significant fight an invisible timer.

The longer the engagement lasts, the more opportunities nearby teams have to hear it, reposition, and arrive.

Think of the process as:

Sound → Time → Arrival

A fight creates information.

Information attracts attention.

Time gives nearby squads the chance to act on it.

You don’t know exactly when the next team will show up, which is why prolonged fights are dangerous even when neither side is losing badly.


14. How to Avoid Getting Third-Partied

You cannot eliminate third-party risk.

You can reduce it.

Keep the fight contained

Don’t chase an enemy halfway across the map when there is no strategic reason to do so.

Fight from cover

You need somewhere to reset when another squad arrives.

Watch the likely approach

Not everyone needs to stare at the same enemy. One teammate can maintain awareness of the surrounding area.

Finish or disengage

If the fight is no longer progressing, continuing to make noise rarely improves the situation.

Reset immediately after winning

Heal.

Reload.

Scan.

Then loot.

A winning squad that immediately stands around damaged and distracted can become an easy third-party target.


15. How to Third-Party Without Becoming the Third Party

Hearing gunfire does not mean you should sprint directly toward it.

You want to arrive when your presence creates an advantage.

Useful signs include:

  • a knock,
  • prolonged fighting,
  • a squad forced from cover,
  • obvious healing or recovery,
  • or an enemy team moving through exposed terrain.

The danger is arriving too early.

If both original squads are still healthy and already have strong positions, your team may become the easiest target in the area.

Good third-party timing is less about being first and more about arriving when someone else has already spent their resources.


16. Don’t Chase Damage Into Bad Terrain

This deserves special attention because it is one of the most common combat traps.

An enemy is nearly dead.

They retreat.

You chase.

Suddenly you’re:

  • outside your cover,
  • separated from your teammates,
  • underneath high ground,
  • inside another team’s line of sight,
  • or surrounded by terrain that makes retreat difficult.

The enemy’s low health has made you ignore everything else.

Don’t.

Ask:

What do we have to give up to finish this player?

If the answer is your position, health, spacing, or escape route, the target may no longer be worth pursuing.


17. Choose Fights You Can Leave

A fight becomes much safer when your squad already has an exit.

Before committing, consider where you go if the exchange turns against you.

Good fighting locations often have:

Hard cover

Multiple routes

Useful elevation

Space to heal

A clear retreat path

That is one reason combat and rotation are closely connected.

Your Apex Legends Rotation Guide covers the macro side of choosing playable terrain. Inside a fight, the same principle applies:

Fight somewhere you can leave.


18. Don’t Stack on the Same Angle

A coordinated push does not mean three players squeezing through the same doorway.

That makes your squad easier to punish and can allow one enemy angle to affect everyone.

A stronger arrangement is usually:

One player creates pressure.

One supports the entry.

One holds a complementary angle or watches the flank.

The exact spacing depends on the terrain and Legend composition.

The principle is more important:

Stay close enough to trade damage, but spread enough to create options.

Your Apex Legends Squad Composition Guide goes deeper into team roles and synergy.


19. Use Your Legend’s Strengths to Create Better Fights

Your Legend’s abilities can change how a fight develops, but they should serve the decision rather than dictate it.

Mobility can help your squad reach an angle.

Recon tools can provide information.

Defensive abilities can make a position easier to hold.

Area-control tools can restrict an enemy’s movement.

The question is always:

Does this ability improve our position, create an opening, or give us a safer way out?

If not, saving it may be the better choice.

Your Apex Legends Movement Guide and Apex Legends Best Legends Guide cover the mechanics and Legend-specific strengths in more detail.


20. When a Fight Is No Longer Worth Its Original Cost

This is an important combat skill that many players overlook.

A fight begins with one reason.

Maybe you wanted better ground.

Maybe an enemy was isolated.

Maybe you wanted to remove a squad before rotating.

Then the situation changes.

You lose shields.

Another squad appears.

The Ring shifts.

Your strong position disappears.

The enemy gets reinforced.

The original reason for fighting may no longer exist.

So ask:

Is the fight still worth what we’re spending to finish it?

That question is more useful than simply asking whether you can keep fighting.


21. The Five Best Reasons to Engage

You should generally feel more comfortable committing when your squad has one or more meaningful advantages.

Better position

You have stronger cover, elevation, or angles.

Better information

You know where the enemies are and can account for the important threats.

Better timing

The enemy is rotating, healing, reviving, split, or otherwise vulnerable.

Better resources

Your squad has enough health, ammunition, and abilities to sustain the engagement.

Better numbers

One enemy is unavailable or isolated.

No single category guarantees a win.

Several together can turn an ordinary encounter into a strong opportunity.


22. Five Warning Signs That You Should Disengage

On the other side, be ready to break contact when:

Your health trade is getting worse

You’re spending more resources than the enemy.

Your position has collapsed

You are now exposed or fighting uphill with nowhere safe to reset.

Your squad is split

The players who need to support one another cannot.

Another squad arrives

The original engagement has become a multi-team fight.

Nothing is progressing

The fight has stalled without producing a meaningful opening.

You don’t need all five.

One severe warning sign can be enough to leave.


23. What to Do After Winning a Fight

Winning the gunfight is not the same as surviving the aftermath.

The moment the enemy falls, your priorities should be:

Cover → Heal → Reload → Scan → Loot → Rotate

This is where your Apex Legends Loot Guide connects naturally with combat.

Don’t open every death box immediately.

First stabilize the squad.

Then determine whether the area is safe enough to loot.

Then check the Ring and decide whether you actually have time to stay.

The loot is valuable.

The position you just won is valuable too.

Don’t trade one for the other without thinking.


24. Don’t Turn a Winning Fight Into a Losing Fight

Some of the worst deaths happen after the squad has already won.

A team gets the knock.

Then another.

Then everyone runs forward.

One player chases a finish.

Another opens a death box.

The third is still healing.

The squad that was winning is suddenly scattered.

The answer is not “never push.”

It is to recognize when the fight has already been won.

Once your advantage is secure, switch from aggression to control.


25. Fighting and Rotation Are Connected

Your Apex Legends Rotation Guide teaches you how to choose routes, terrain, destinations, and playable positions.

That information should influence your fights.

Imagine another squad is blocking your preferred route.

You can:

Fight them.

Go around them.

Change your destination.

A player focused only on combat sees an enemy.

A player thinking strategically sees a decision.

Sometimes the best fight is the one that clears your rotation.

Sometimes the best rotation is the one that avoids a pointless fight.

Knowing which is which is the skill.


26. How to Practice Fight Decisions

After losing a fight, don’t immediately blame your aim.

Ask what happened before the shooting.

Was the target sensible?

Maybe you focused an enemy who was too well protected.

Was the position good?

Maybe you had no cover.

Was the timing good?

Maybe you started the fight while another squad was already nearby.

Did you overcommit?

Maybe the opening disappeared but you kept pushing.

Did you reset?

Maybe the fight was salvageable ten seconds earlier.

Did you convert your advantage?

Maybe you earned a knock but failed to turn it into anything useful.

This gives you something concrete to fix.

Your Apex Legends Tips for Beginners: 25 Mistakes to Avoid also covers several of these recurring errors, including chasing knocks, fighting in the open, splitting from your squad, and treating every fight as mandatory.


The Apex Legends Fight Decision Tree

When you spot a squad, run this sequence mentally:

1. Spot

Where are they?

2. Assess

What position do we have?

Where are my teammates?

What could reach us?

3. Engage

Is there a target or opening worth exploiting?

If not, hold, reposition, or rotate.

4. Create an Advantage

Deal meaningful damage.

Take space.

Isolate someone.

Force movement.

Create a knock.

5. Convert

Can we safely turn that advantage into something useful?

If yes, commit.

If no, reset.

6. Reassess

If another squad arrives or the terrain changes, start the process again.

That’s the point many players miss.

Fight decisions are not one-time choices.

They are continuous decisions based on changing information.


Apex Legends Fight Guide Cheat Sheet

Engage when:

You have a meaningful opening.

Your squad can support the play.

The position is workable.

You have a clear target or objective.

Push when:

The enemy is vulnerable or isolated.

Your advantage can be converted safely.

Your squad can reach the fight together.

Reset when:

The health trade gets worse.

The position deteriorates.

The fight stalls.

You need to restore resources.

Disengage when:

Another squad arrives.

Your team is split.

Your exit disappears.

The original reason for the fight is no longer worth the cost.

After winning:

Cover → Heal → Reload → Scan → Loot → Rotate


Final Thoughts

Good Apex players know how to shoot.

Great decision-making comes from knowing when the shooting is worth doing.

Don’t confuse damage with an advantage.

Don’t confuse a knock with a guaranteed push.

Don’t confuse aggression with commitment.

And don’t confuse disengaging with losing.

A strong fight follows a simple logic:

Spot → Assess → Engage → Create an Advantage → Convert or Reset

Sometimes that ends with a squad wipe.

Sometimes it ends with a better position.

Sometimes it ends with your team walking away before the third party arrives.

All three can be successful outcomes.

The point is to stop letting the fight make the decision for you.

You choose the target. You choose the commitment. You choose when to reset. And, when necessary, you choose when to leave.

That’s how you turn better fights into a repeatable skill instead of a string of lucky gunfights.


Frequently Asked Questions

When should I engage in Apex Legends?

Engage when your squad has a meaningful opening, such as a vulnerable enemy, better position, useful timing, or numbers advantage. You don’t need every advantage, but you should understand why the fight is worth starting.

When should I push after cracking an enemy?

Push when you can reach the vulnerable target safely and maintain support from your teammates. A crack is an opportunity, not automatic permission to sprint into the enemy squad.

When should I disengage from a fight?

Disengage when your health trade becomes unfavorable, your position collapses, your squad becomes split, another team arrives, or the fight stops producing meaningful progress.

What is a reset in Apex Legends?

A reset is a short break in combat used to restore health, shields, ammunition, positioning, and information before deciding whether to re-engage or leave.

What is a third party in Apex Legends?

EA defines a third party as another squad joining a fight already involving two squads. (EA Help)

How do I avoid getting third-partied?

Keep engagements controlled, avoid unnecessarily long fights, maintain cover, watch likely approach routes, and reset quickly after winning. Loot only after you’ve checked whether the area is safe.

Should I always finish a knocked enemy?

No. Finish a knock when doing so is safe and meaningfully improves your position. Don’t abandon cover or split your squad just to secure a finish.

How do I know whether a fight is worth taking?

Look at your position, target, squad health, resources, enemy numbers, available exits, and potential third parties. The more advantages you have, the easier it is to justify a commitment.

How can beginners improve their fight decisions?

After a bad engagement, identify what failed first: target selection, position, timing, overcommitment, reset timing, or conversion of an advantage. Fix one recurring problem rather than trying to overhaul your entire playstyle at once.


Sources & Updates

Last reviewed: September 2026

EA’s official Apex Legends Terms Guide was used to verify terminology including Rotate, Playing Zone, Playing Edge, Third Partied, Thirst, Knock, and related gameplay terms. (EA Help)

EA’s current Apex guidance was used for gameplay references involving health and shields, squad play, movement, and ordnance. (EA Help)

EA’s Marked Patch Notes, published August 3, 2026, confirm the current Season 30 context, including continuing Legend, weapon, loot, map, and Ranked changes. Because Apex is continually updated, this guide deliberately avoids temporary weapon rankings and balance-specific recommendations. (EA)

The strategic frameworks in this article—Spot → Assess → Engage → Create an Advantage → Commit or Reset and Damage → Advantage → Conversion—are Loot Strategist editorial analysis intended to provide a practical decision-making framework rather than reproduce official game documentation.

For related strategy, see the Apex Legends Rotation Guide, Apex Legends Movement Guide, Apex Legends Loot Guide, Apex Legends Squad Composition Guide, Apex Legends Solo Queue Guide, Apex Legends Ranked Guide, and Apex Legends Tips for Beginners: 25 Mistakes to Avoid.

Apex Legends Rotation Guide: How to Rotate & Read the Ring

Apex Legends Rotation Guide: How to Rotate & Read the Ring

Apex Legends Rotation Guide: How to Rotate, Read the Ring & Take Better Positions

Rotating in Apex Legends is not simply a race toward the next Ring. It is the process of deciding where your squad should play, when it should move, which route gives you the best chance of arriving safely, and what other teams are likely to do along the way.

EA defines a rotation as moving from one area of the map to another while considering the Ring and your position relative to other squads. (EA Help)

That sounds simple. In an actual match, it is anything but.

A squad can have strong weapons and good mechanics and still lose because it rotated too late, crossed the wrong terrain, entered a predictable choke, or arrived at the Ring without a playable position.

The easiest way to improve is to stop thinking about rotation as “go to the circle” and start thinking about it as:

Ring → Route → Terrain → Enemy Flow → Destination → Next Rotation

That is the framework this guide uses.


What Is a Rotation in Apex Legends?

A rotation is any deliberate movement from one area of the map to another, usually because the Ring is shifting, your current position is becoming weaker, or another location offers better strategic value.

The distinction is important because moving and rotating are not necessarily the same thing.

Running across the map because the Ring is closing is movement.

Choosing a route, anticipating another squad, using cover, and arriving at a position you can actually defend is a rotation.

EA also uses two useful terms for different approaches:

Playing zone means moving inside the next zone early to secure a good position.

Playing edge means staying nearer the edge of the zone and looking for squads moving into it. (EA Help)

Neither approach is automatically correct. Good rotation is about choosing the option that makes sense for the situation in front of you.


The Loot Strategist Rotation Framework

Apex Legends rotation process showing Ring, route, terrain, enemy flow, destination, and next rotation

Before we get into individual situations, use this six-step framework whenever your squad needs to move.

1. Ring

Where is the next playable area?

2. Route

Which path gets you there with the least unnecessary exposure?

3. Terrain

What cover, elevation, buildings, chokes, and escape routes exist along that path?

4. Enemy Flow

Which routes are other squads likely to use?

5. Destination

Where do you actually want to play once you arrive?

6. Next Rotation

If the Ring moves again, does your new position give you options?

That final step is where many rotations fall apart. A position can be excellent for thirty seconds and terrible for the next Ring.

Think beyond the immediate move.


1. Read the Ring Early

The Ring should influence your decisions before it becomes an emergency.

EA describes the Ring as an area that shrinks during the match, with players outside it taking damage. (EA Help)

That makes the Ring more than a timer.

It is information.

When you check it, don’t stop at:

“Are we inside?”

Ask:

“Where do we want to be inside it?”

Then look at the space between your squad and that destination.

A short route across open ground may be worse than a slightly longer route through buildings and natural cover.

The earlier you recognize that difference, the more choices you have.


2. Choose a Destination, Not Just a Circle

One of the biggest upgrades you can make to your rotations is learning to distinguish being safe from being well positioned.

You can reach the Ring and still be in trouble.

Maybe you’re:

  • below another squad,
  • exposed from several directions,
  • trapped against a cliff,
  • sitting in a building with one exit,
  • or already looking at another long rotation.

Instead, identify a playable destination.

A good destination usually gives your squad some combination of:

Cover

Useful sightlines

Defensible terrain

Multiple approaches

An escape route

A reasonable path toward the following Ring

You don’t need the mathematically perfect position.

You need one your squad can actually use.


3. Rotate Before the Route Becomes a Problem

Late rotations are not always avoidable. Making them your default is.

When you wait too long, the number of available routes shrinks.

The straightforward path may now be occupied.

A choke may have become a shooting gallery.

Another squad may have already taken the building you wanted.

And the route you finally choose may leave everyone sprinting through open terrain.

This is why early rotation is really about preserving choices.

You’re not necessarily trying to arrive first.

You’re trying to avoid reaching the point where the only option left is the bad one.


4. How to Read Any Apex Map

You do not need to memorize every rotation on every map to become better at rotating.

Instead, learn to identify the features that influence movement everywhere.

Choke Points

A choke funnels players through a limited path.

Bridges, narrow passes, tunnels, tight corridors, and constrained entrances can become natural confrontation points.

Whenever your route passes through one, consider who else is likely to use it.

Open Crossings

Large exposed areas are dangerous because they reduce the value of movement.

A squad that controls the surrounding high ground can punish almost anyone trying to cross.

When you spot an open crossing, ask:

Can we avoid it?

If not:

What cover can we use, and how quickly can we get across?

High-Ground Spines

Many areas have ridgelines, slopes, rooftops, or elevated terrain that naturally controls movement below.

These positions often matter more than the exact center of the Ring.

A squad that recognizes those terrain patterns early can arrive before the position becomes contested.

Building Chains

Clusters of buildings can create safer rotation paths than open terrain.

They also give your squad natural checkpoints.

Instead of thinking:

“Run from here to there.”

Think:

“Reach that building, reassess, then continue.”

That makes long rotations easier to manage.

Natural Rotation Lanes

Look at where players are forced to travel.

A location with several possible approaches is harder to predict.

A narrow entrance to a Ring or a major pass between terrain features is easier to anticipate.

Those predictable lanes are where enemy flow becomes especially important.


5. Pick the Route, Not the Straight Line

The shortest route and the best route are rarely identical.

When choosing between two paths, compare three things:

Exposure

How much time are you visible?

Predictability

How obvious is the route to another squad?

Flexibility

Can you change direction if someone is already there?

A slightly longer path can be much stronger if it gives your squad cover and another way out.

That does not mean you should always take the slow route.

Sometimes speed is exactly what matters.

The point is to choose deliberately.


6. Use Cover as a Chain

A useful way to visualize a rotation is as a chain:

Building → Rock → Wall → Slope → Building

Each step gives you another place to break line of sight or reassess the situation.

Compare that with:

Open field → Open field → Open field

The second route is simple, but it gives an enemy very few reasons not to shoot you.

Your Apex Legends Movement Guide covers the mechanics of moving efficiently. Rotation adds another layer: knowing where to move, not just how to move.


7. Terrain Matters More Than Distance

Two destinations can be the same distance away and have completely different value.

One might be:

  • elevated,
  • covered,
  • defensible,
  • connected to multiple routes.

The other might be:

  • exposed,
  • difficult to leave,
  • surrounded by high ground,
  • and separated from the next Ring by open terrain.

This is why experienced players often seem to “know” where to go before the Ring becomes urgent.

They are reading the terrain, not just the circle.


8. High Ground Is Good. Playable High Ground Is Better.

High ground gives you visibility and often better firing angles.

But height alone doesn’t make a position strong.

A hilltop with no cover and no escape can be worse than a lower position surrounded by hard cover.

When evaluating high ground, ask:

Can we survive here?

Can all three players support one another?

Can we leave?

Can we reach the next Ring from here?

If the answer is no to several of those questions, the extra elevation may not be worth taking.


9. Think About Enemy Flow

This is the part that separates basic Ring awareness from genuine rotation awareness.

Don’t only ask:

“Where is the Ring?”

Ask:

“Where are other squads likely to enter it?”

If a large section of the Ring can only be reached through one obvious choke, that route is likely to attract traffic.

If several major paths lead into the same area, predicting enemy movement becomes harder.

You do not need perfect information.

You’re making a probability judgment:

Where would another team go if it were standing where I am?

That question alone can make your rotations more intelligent.


10. Use Audio as Early Warning

Visual information is only part of the picture.

Gunfire, footsteps, abilities, healing, doors, and other sounds can tell you that a route is no longer as quiet as it looked from the map.

You may not know exactly where another squad is.

You don’t need to.

Knowing that there is likely activity ahead can be enough to change your route, slow down, or prepare for a fight.

A rotation should evolve when new information appears.

Never keep following the original plan simply because it was the original plan.


11. Chokes Deserve a Pause

A choke is not automatically a reason to turn around.

It is a reason to think before entering.

Before committing, consider:

Has there been recent gunfire?

Can another squad reach this route first?

Do we have cover approaching the choke?

Can we retreat if the other side is occupied?

Does another route exist?

Sometimes the direct path is still the right path.

The difference is that you’re entering it with your eyes open.


12. Stay Close Without Stacking

Good rotation spacing is a balance.

Your squad should be close enough that one player getting attacked does not become a solo fight.

But standing on top of each other creates another problem: one enemy angle can affect everyone at once.

Think in terms of support distance.

One player can move slightly ahead.

Another can hold the middle.

Another can cover a different angle.

The goal is not perfect formation.

The goal is that every player remains capable of helping the others quickly.

Your Apex Legends Squad Composition Guide goes deeper into team roles and synergy. Here, the important principle is simple: your rotation should preserve your squad’s ability to fight together.


13. Don’t Let Loot Destroy Your Rotation

Looting and rotation are connected.

A squad that has functional weapons, ammunition, shields, healing, and the basic resources it needs eventually reaches a point where another ten seconds of looting has diminishing value.

That becomes especially important when the Ring is moving.

Your Apex Legends Loot Guide goes deeper into loot priorities, but the rotation rule is straightforward:

An upgrade is only worth taking if its value justifies the time and risk required to get it.

You don’t need a perfect backpack before leaving.

You need enough equipment to survive what comes next.


14. Do Not Automatically Run Toward the Center

The center of the Ring can be useful.

It can also be a terrible place to stand.

The central area may attract several squads from different directions, while a slightly off-center position can offer better cover and a more manageable approach.

Don’t optimize for distance alone.

Optimize for:

Cover + information + support + escape options

A strong outer position can be better than a weak central one.


15. Play Zone or Play Edge?

EA describes these as two different approaches: playing zone means entering the next zone early to secure a position, while playing edge means staying near the edge and looking for squads rotating in. (EA Help)

Playing zone

This approach makes sense when the early position offers meaningful value.

You can establish yourself before other teams arrive and force later squads to make the difficult move.

Its weakness is that you may spend too long sitting in a location that isn’t actually strong.

Playing edge

This approach can work when you have a good opportunity to catch teams moving into the Ring.

Its weakness is timing.

Wait too long and the Ring stops being a strategic tool and starts becoming a problem.

The better question

Don’t ask:

“Which style is better?”

Ask:

“Which style gives us better options on this Ring?”

That keeps the decision contextual instead of turning it into a rigid rule.


16. Rotate Through Information, Not Blindly

A good route can become a bad route between one second and the next.

A squad appears.

Gunfire starts.

A teammate gets spotted.

The Ring shifts.

A destination becomes occupied.

When that happens, update the plan.

A strong rotation has checkpoints where you reassess.

For example:

Leave POI → reach cover → scan → continue or change route

That is safer than putting your head down and sprinting the entire distance.


17. Always Know Your Exit

Before settling into a new position, ask:

“If another squad appears here, where do we go?”

This is especially important for buildings and elevated terrain.

A position with one entrance and one exit can become a trap.

A position with multiple routes gives your squad more freedom when the situation changes.

You don’t need to know the exact escape path in advance.

You should at least know which direction you can retreat without crossing a death sentence.


18. Think One Ring Ahead

The strongest rotation question may be the simplest:

“What happens after we get there?”

A location can solve the current Ring but create a terrible next move.

Suppose you secure a comfortable building, but the next likely Ring requires a long exposed crossing.

That building may still be worth taking.

But now you know the next problem early.

You can prepare for it instead of discovering it when the timer is already running down.

A good rotation does not finish when you arrive.

It finishes when you have a plan for what happens next.


19. When Should You Rotate After a Fight?

Post-fight loot is one of the easiest ways to lose a good position.

You win the engagement.

Open the boxes.

Find an upgrade.

Find another upgrade.

Then another.

Meanwhile, the Ring moves and another squad hears the activity.

Use a quick reset:

Cover → Heal → Reload → Scan → Loot → Rotate

Sometimes the answer is to loot.

Sometimes the answer is to leave almost immediately.

The correct choice depends on:

  • Ring timing,
  • squad health,
  • ammunition,
  • enemy activity,
  • position,
  • and the value of the available loot.

Your objective is not to maximize the time spent looting.

It is to maximize the value of the fight you just won.


20. How Rotation Changes in Ranked

Ranked already has its own broader strategy on Loot Strategist, so this guide doesn’t need to duplicate it.

The rotation-specific lesson is simple:

risk should be deliberate.

A dangerous route may be worth taking when the alternative is worse.

What matters is understanding the trade.

Before crossing a questionable area, consider:

Can we reach safer terrain another way?

Are we strong enough to contest the route?

Is the destination valuable enough to justify the risk?

Your Apex Legends Ranked Guide covers the larger Ranked framework. This article should remain focused on the map-level decision itself.


A Simple Route Test

When two routes look reasonable, compare them using five questions:

Which route gives us more cover?

Prefer protection over unnecessary exposure.

Which route is easier for another squad to predict?

Predictable routes deserve more caution.

Which route gives us an alternate path?

Flexibility is valuable when information changes.

Which route lets us arrive in a useful position?

Reaching the Ring is not enough.

Which route leaves us a better next move?

Think beyond the current rotation.

This is faster and more useful than trying to memorize one “correct” rotation for every situation.


The Rotation Mistakes That Cost the Most

Waiting Until the Ring Is Forcing You to Move

You lose route choices.

Taking the Shortest Route Automatically

Distance is only one variable.

Ignoring Terrain

A route through cover can be dramatically safer.

Entering Chokes Without Information

You’re giving predictable terrain more power than it needs.

Running Too Far Ahead of Your Team

Your squad cannot support you.

Stacking on Your Teammates

One enemy angle can punish everyone.

Chasing the Perfect Position

A good, reachable position often beats a theoretically perfect one.

Fighting Every Squad on the Route

You control whether many of those fights happen at all.

Staying Too Long After a Fight

Loot becomes dangerous when the surrounding situation changes.

Forgetting the Next Ring

You solve today’s problem and create tomorrow’s.


The Best Way to Practice Rotations

Don’t try to master every map at once.

Instead, review your bad rotations.

After you die, ask one question:

Which part failed?

Was it the:

Ring?

Route?

Terrain?

Enemy flow?

Destination?

Next rotation?

That gives you a concrete problem to work on.

For example, if you keep reaching the Ring through exposed terrain, the problem probably isn’t your aim.

It’s route selection.

If you consistently arrive safely but end up trapped in poor positions, the problem is probably your destination.

If you repeatedly get surprised by teams using the same choke, you need to improve your understanding of enemy flow.

This is much more productive than simply playing more matches and hoping the answer appears.


A Beginner Rotation Checklist

Before leaving an area, ask:

Where is the Ring?

Where do we actually want to play?

Which route has the best mix of cover and flexibility?

Where are other squads likely to travel?

What position will we take when we arrive?

Where do we go after that?

You don’t need to say all six questions aloud.

After enough practice, they become part of your decision-making automatically.


Apex Legends Rotation Cheat Sheet

Before the rotation

Check the Ring → choose a destination → identify the route.

During the rotation

Stay together → use cover → watch enemy flow → reassess when new information appears.

When you arrive

Secure playable terrain → establish support angles → scan for threats → prepare for the next move.

After a fight

Cover → Heal → Reload → Scan → Loot → Rotate.

When uncertain

Choose the option that preserves the most choices.


Final Thoughts

Good rotation is not about knowing one perfect path across an Apex map.

It is about making better decisions with incomplete information.

Read the Ring early.

Choose a destination instead of blindly running toward the circle.

Treat terrain as part of the route.

Think about where other squads are likely to travel.

Arrive somewhere your team can actually fight from.

And before you settle in, ask where the next rotation will take you.

The biggest upgrade is changing the question from:

“How do we get into the Ring?”

to:

“Where do we want to play, and what is the safest useful way to get there?”

That is the difference between simply moving around the map and actually rotating.


Frequently Asked Questions

What does rotating mean in Apex Legends?

Rotating means moving from one area of the map to another while considering the Ring and your position relative to other squads. (EA Help)

Should I always rotate early?

Not necessarily. Early movement can preserve route choices and help you secure useful terrain, but rotating too early can also put you into an area before you understand what is happening around it. The right timing depends on the Ring, terrain, enemy activity, and your destination.

Is playing zone better than playing edge?

Neither is universally better. EA defines playing zone as moving inside the next zone early for a good position and playing edge as staying near the edge to target squads moving into the zone. (EA Help) Choose the approach that gives your squad the stronger options on that particular Ring.

Should I always take high ground?

No. High ground is valuable when it gives you useful sightlines, cover, support, and escape options. A high position with no protection or poor access to the next Ring can be weaker than a lower but more playable location.

How do I know which rotation route is safest?

Look at more than distance. Consider cover, exposure, predictable chokes, enemy flow, alternate routes, and the position waiting for you at the end.

Should I fight a squad blocking my rotation?

Not automatically. Consider whether you can go around them, whether your squad has the advantage, and whether the destination is worth the risk. The fact that another team occupies your preferred route does not mean you are required to take the fight.

How can beginners improve their rotations?

After a bad death, identify whether the problem was Ring timing, route choice, terrain, enemy flow, destination, or planning for the next Ring. Fix one recurring problem at a time rather than trying to change everything simultaneously.


Sources & Updates

Last reviewed: September 9, 2026

EA’s current Apex Legends Terms Guide was used to verify the definitions of Ring, Rotate, Playing Zone, Playing Edge, and Map Rotation. (EA Help)

EA’s Season 30: Marked Patch Notes were checked for the current Battle Royale map context. The current listed rotation is World’s Edge, Storm Point, and E-District; because map availability and layouts can change, this article deliberately focuses on rotation principles that remain useful across map rotations. (EA)

The strategic recommendations in this article—including route evaluation, terrain reading, enemy-flow prediction, destination selection, and next-rotation planning—are Loot Strategist editorial guidance, not official EA rules.

For related strategy, see the Apex Legends Beginner Guide, Apex Legends Movement Guide, Apex Legends Loot Guide, Apex Legends Squad Composition Guide, and Apex Legends Ranked Guide.

Apex Legends Tips for Beginners: 25 Mistakes to Avoid

Apex Legends Tips for Beginners: 25 Mistakes to Avoid

Apex Legends has a habit of teaching lessons the hard way.

You land with your squad, find a weapon, take a fight, and thirty seconds later you’re staring at the spectator screen wondering what happened.

Often, there wasn’t one enormous mistake.

You wandered too far from your team.

You looted for too long.

You pushed someone without cover.

You chased a knock that wasn’t worth chasing.

You heard gunfire and decided it had to be free kills.

These are normal mistakes. Every new Apex player makes them.

The useful part comes afterward: figuring out why the mistake happened and avoiding it next time.

This Apex Legends Tips for Beginners guide focuses on 25 habits that commonly make new players struggle, along with a practical alternative for each.

The advice is aimed primarily at Core Battle Royale modes such as Ranked and Unranked. EA currently separates Core from Freestyle modes such as Wildcard, and some of the systems discussed here work differently outside Core. (EA Help)


The 25 Biggest Beginner Mistakes in Apex Legends

You don’t need to fix everything in one session.

Start with the mistakes that are costing you the most fights, then work outward.

Apex Legends 25 beginner mistakes to avoid checklist

1. Landing Directly on Top of Your Teammates

Apex is a squad game, but that doesn’t mean three players should land on the same roof and fight over the same loot.

EA recommends landing close to teammates without landing directly on top of them. That gives everyone room to loot while keeping the squad close enough to respond to nearby enemies. (EA Help)

Better habit

Land within supporting distance.

Take a different building, room, or nearby loot area.

The goal is simple:

Separate enough to loot.

Stay close enough to fight.


2. Landing So Far Away That Nobody Can Help You

The opposite mistake is just as dangerous.

If you’re exploring one side of a POI while your teammates are on the other, an enemy squad can isolate you before anyone can help.

Better habit

Keep an eye on your teammates’ positions while you loot.

You don’t need to stand beside them.

You do need to be close enough that help can arrive before the fight is over.

Think support range, not maximum distance.

Apex Legends beginner landing example showing teammates landing together but not on the same building

3. Waiting for Your Perfect Weapon

New players often ignore perfectly usable guns because they’re waiting for their favorite weapon to appear.

That can be an expensive habit.

Better habit

Take the first reasonable weapon you can use.

Once you’re armed, you can search for an upgrade without being completely defenseless.

A mediocre gun in your hands is more useful than a perfect gun that you haven’t found yet.


4. Carrying the Wrong Ammo

A weapon isn’t much help when you don’t have ammunition for it.

EA’s current beginner guidance specifically recommends matching ammunition to the weapon you’re carrying. (EA Help)

Better habit

Before leaving your starting area, check three things:

Do I have a usable weapon?

Do I have its ammunition?

Do I have enough to take a fight?

You can optimize your inventory afterward.


5. Ignoring the Gear You Already Have

Core-mode players don’t start completely empty.

EA currently lists a starter kit that includes a Level 1 Helmet, Level 1 Evo Shield, Level 1 Knockdown Shield, two Syringes, and two Shield Cells. (EA Help)

That means some early loot decisions are really about filling gaps, not replacing everything.

Better habit

Check what you already have before grabbing duplicates.

Then prioritize the things you’re missing.


6. Looting for Too Long

This is one of the easiest beginner habits to underestimate.

You find a decent weapon.

Then a better magazine.

Then another building.

Then a better backpack.

Then one more death box.

Meanwhile, your squad has already rotated.

Better habit

Once you can fight, start thinking about your next position.

A useful question is:

“What am I still missing that is worth staying here for?”

If the answer is “not much,” move.

For a deeper breakdown of inventory priorities, see our Apex Legends Loot Guide.

Apex Legends beginner loot priority showing essential gear before extra attachments

7. Picking Up Everything Because It’s Purple

A purple item looks important.

Sometimes it is.

Sometimes it’s an attachment for a weapon you don’t even use.

Better habit

Before taking an upgrade, consider:

Will I use it?

Will I notice the difference?

Does a teammate need it more?

Will getting it delay our rotation?

Rarity is useful information.

It isn’t an order.


8. Waiting Until You’re Nearly Dead to Heal

New players often keep fighting with broken shields because they don’t want to stop.

Then they get cracked again.

Better habit

When the immediate danger is gone, reset.

Check:

Shields

Health

Ammo

Legend abilities

EA’s current beginner advice also emphasizes maintaining both health and shield resources. (EA Help)

A short reset can be the difference between winning the next fight and being the first knock.


9. Healing in the Open

Healing takes time.

An exposed player is an easy target.

Better habit

Heal behind:

Cover

Corners

Buildings

Terrain

Ideally, your teammates should also know where you’re resetting.

A few seconds of protection are worth far more than trying to save a few steps.


10. Reloading Automatically

Reloading after every burst feels safe.

It isn’t always safe.

If an enemy is one shot away from going down, starting a long reload can give them the time they need to push.

Better habit

Reload when the situation allows it.

Consider:

How much ammunition is left?

How close is the enemy?

Do I have cover?

Is my second weapon ready?

In some close-range situations, switching weapons is better than waiting for a reload.


11. Shooting Every Enemy You See

Seeing another squad doesn’t mean you have to start a fight.

A few bullets from long range can turn into a long-distance argument that attracts a third team.

Better habit

Before shooting, consider:

Can we realistically win this?

Do we have cover?

Are we together?

What does the Ring look like?

Could another squad punish us?

If the answers are poor, keep moving.


12. Chasing a Knock Too Far

You knocked one player.

They are crawling away.

You chase.

Their teammates are waiting.

Your own squad is still behind you.

The knock has now become a problem.

Better habit

Let the knock create pressure.

Push when:

Your squad is together

The enemy is isolated

You have a position advantage

You have a realistic path to the finish

A knock is an opportunity.

It isn’t a reason to abandon your team.


13. Following Your Teammate Through the Same Door

Supporting a teammate doesn’t mean walking directly behind them.

Three players entering through one doorway can give the enemy one predictable angle to punish.

Better habit

Take a complementary angle.

Use:

Another doorway

A window

A side route

A nearby head-glitch position

Your teammate applies pressure.

You create another problem for the enemy.

That is much harder to defend against.


14. Fighting in Open Ground

Open terrain gives your opponents options.

If several enemies can see you and you can’t reach useful cover, you’re making their job easy.

Better habit

Move through:

Cover

Angle

Cover

Reposition

You don’t need to stand still to shoot well.

You do need to make yourself difficult to punish.

Apex Legends beginner fight decision tree for choosing when to engage or reposition

15. Taking High Ground Without Asking Why

High ground is useful.

But “higher” doesn’t automatically mean “better.”

A rooftop with no cover and no escape can be worse than a lower position behind solid cover.

Better habit

When evaluating a position, consider:

Can enemies easily shoot me?

Can my teammates reach me?

Do I have cover?

Can I leave if things go wrong?

Does this position help our next rotation?

The useful goal is advantageous positioning, not simply height.


16. Forgetting the Ring

The Ring is one of the game’s biggest strategic pressures.

EA’s current beginner guidance specifically tells players to stay with their squad and stay in the Ring. (EA Help)

Better habit

Check the map regularly.

Know:

Where the next zone is

How far away it is

Which route gets you there

Whether another squad could be holding that route

Moving early often gives you more choices.


17. Rotating Without Checking What’s Ahead

Getting into the Ring doesn’t mean running blindly toward it.

The next area may already belong to another squad.

Better habit

Before moving through an important choke or POI, consider:

What can we hear?

Where are enemies likely to be?

What cover is available?

Where can we stop if we get shot?

You don’t need perfect information.

You need enough information to avoid walking into an obvious trap.


18. Forgetting to Holster While Rotating

Apex is fast, and movement efficiency matters.

EA’s beginner guide recommends holstering while running, sprinting instead of walking when appropriate, sliding downhill, and using available movement systems to travel efficiently. (EA Help)

Better habit

When you’re safely rotating:

Holster

Sprint

Slide when useful

Draw your weapon when danger becomes likely

Don’t interpret this as “always run with your weapon away.”

When you’re entering a dangerous area, being ready matters more than shaving a little time off the rotation.


19. Never Using Grenades

Think of grenades as movement tools, not just damage tools.

EA’s current beginner guidance recommends carrying grenades and notes that they can push enemies out of cover, deal damage, or buy time when retreating or repositioning. (EA Help)

Better habit

Use grenades to:

Force enemies out

Block routes

Interrupt healing or revives

Create space

Cover a retreat

You don’t need perfect grenade lineups.

Start using them deliberately.


20. Looting a Death Box Immediately After a Fight

Winning a fight does not guarantee safety.

The gunfire may have attracted another squad.

Better habit

Reset first:

Heal

Reload

Check surroundings

Listen for another squad

Loot essentials

Leave

This is one of the simplest habits you can develop early.

Apex Legends post-fight reset showing healing, reloading, scanning, and then looting

21. Treating Every Fight Like It Must Be Won

Not every fight is worth taking.

Some fights are unfavorable before the first bullet is fired.

Better habit

Judge fights using:

Position

Numbers

Cover

Resources

Ring

Third-party risk

Your objective isn’t to fight constantly.

It’s to take fights that improve your chances of winning the match.


22. Splitting From Your Squad During a Fight

You can spread out while looting.

During an actual fight, separation becomes much harder to justify.

If your teammate is fighting three enemies while you’re 80 meters away, your extra loot isn’t helping.

Better habit

Stay close enough to:

Trade damage

Cover a retreat

Push together

Revive or recover a teammate

EA’s current beginner advice similarly emphasizes staying with your squad. (EA Help)

You don’t have to stand on top of one another.

You need to remain mutually reachable.

Apex Legends squad positioning showing teammates supporting different angles during a fight

23. Ignoring the Ping System

You don’t need a microphone to communicate effectively.

EA specifically highlights Apex’s ping system as a way to communicate enemy positions, loot, and movement quickly without typing or using voice chat. (EA Help)

Better habit

Ping:

Enemies

Useful loot

Your destination

A rotation

Where you want the squad to move

A good ping can communicate an idea instantly.


24. Treating Ranked Like Your Training Ground

You can enter Ranked when you’re comfortable.

But you don’t have to learn every basic mechanic there.

EA currently recommends Unranked for players who want a lower-pressure environment to learn the fundamentals before committing to Ranked. (EA Help)

Better habit

Use:

Firing Range → mechanics and experimentation

Unranked → real-match practice

Ranked → competitive games once the fundamentals feel familiar

You don’t need to wait until you’re “good enough” for Ranked.

You simply want to know enough about movement, looting, healing, positioning, and squad play that you’re learning from your matches rather than fighting the controls.


25. Trying to Win Every Match Instead of Learning From It

This is the mistake that keeps the other 24 alive.

You get knocked and think:

“My aim was awful.”

Maybe.

But what actually happened?

Were you:

Exposed?

Isolated?

Too aggressive?

Late to the Ring?

Reloading at the wrong time?

Taking a fight your squad couldn’t support?

Looting while another team was approaching?

That question is more useful than simply blaming your aim.

Better habit

After a bad death, identify one mistake.

Not ten.

Fix that one in the next match.

Then find the next one.

That’s how improvement becomes measurable instead of frustrating.


The Five Beginner Habits to Fix First

You don’t need to memorize all 25 mistakes.

Start here:

Stay Near Your Squad

Be close enough to support one another.

Get Combat-Ready Quickly

Find a weapon, ammunition, and enough resources to survive.

Use Cover

Make yourself difficult to punish.

Choose Your Fights

Seeing an enemy isn’t an obligation to shoot them.

Reset After Fights

Heal, reload, check the area, then loot.

These five habits alone can eliminate a huge amount of unnecessary frustration.


A Simple Beginner Fight Checklist

Before committing to a fight, quickly consider:

Are we together?

Do we have cover?

Do we have enough health and shields?

Do we have ammunition?

Where is the Ring?

Could another squad arrive?

What happens if the first push fails?

You don’t need every answer to be perfect.

But if several answers are obviously bad, you’re probably better off repositioning.


What Beginners Should Practice First

Don’t try to master the entire game simultaneously.

Build your fundamentals in this order:

1. Movement

Learn sprinting, sliding, climbing, and efficient travel.

2. Aim

Work on tracking, recoil control, and target switching.

3. Positioning

Learn how cover changes a fight.

4. Looting

Learn what you need and when you have enough.

5. Team Play

Stay close, ping, and support your teammates.

6. Rotations

Read the Ring and think ahead.

7. Fight Selection

Learn when not to shoot.

That last skill usually takes the longest.


Use the Firing Range Properly

The Firing Range isn’t just somewhere to warm up.

EA currently identifies it as a place to practice and test weapons, ammunition, and Legends. (EA Help)

Use it to isolate a problem.

For example:

Bad recoil?
Practice one weapon.

Aim too slow?
Test sensitivity.

Missing close-range shots?
Practice tracking while moving.

Uncomfortable with a Legend?
Test the abilities before taking them into a serious match.

You don’t need an hour-long routine.

Even a short, focused session can tell you much more than randomly changing things between matches.


Don’t Change Legends Constantly

Learning the roster takes time.

EA’s current beginner guidance recommends learning a small group of Legends so you have alternatives when another player chooses your preferred character. (EA Help)

A simple approach works:

One main

One backup

One different-style Legend

For example, learning one aggressive, one mobility-focused, and one support-oriented option gives you flexibility without forcing you to memorize the entire roster.


Your First Goal Isn’t to Become a Kill Leader

Kills are satisfying.

They aren’t the only measure of improvement.

A much better early benchmark is:

Did I make a better decision than last match?

Maybe you:

  • stayed with your team
  • took cover
  • rotated earlier
  • stopped chasing a knock
  • healed before re-engaging
  • recognized a bad fight
  • escaped instead of forcing it

Those improvements eventually produce more kills and wins.


The 25 Mistakes at a Glance

MistakeBetter Habit
Landing directly on teammatesLand nearby and spread out
Landing too far awayStay within support range
Waiting for the perfect gunTake a usable weapon
Carrying the wrong ammoMatch ammo to your weapon
Ignoring existing gearCheck what you already have
Looting too longGet ready and move
Taking every purple itemPrioritize useful upgrades
Waiting too long to healReset when safe
Healing in the openUse cover
Reloading automaticallyReload when the situation allows
Shooting every enemyTake fights deliberately
Chasing knocksPush when your squad can support it
Following the same doorwayCreate another angle
Fighting in open groundMove between cover
Taking high ground blindlyChoose useful positions
Ignoring the RingWatch the zone
Rotating blindlyCheck the next area
Forgetting to holster while rotatingHolster when safe
Never using grenadesUse them to create pressure
Looting death boxes immediatelyReset before looting
Taking every fightFight for a reason
Splitting during fightsStay mutually reachable
Ignoring pingsCommunicate with the ping system
Treating Ranked as trainingUse Unranked/Firing Range for fundamentals
Focusing only on winningLearn from each death

A Beginner’s Apex Improvement Loop

Here’s a simple routine you can use every session:

Play a match

Identify one mistake

Decide what you should have done instead

Try that adjustment next match

Repeat

That is more useful than watching ten videos and changing your entire playstyle every night.

Apex Legends beginner improvement loop showing how to learn from mistakes after each match

Frequently Asked Questions

How should a beginner play Apex Legends?

Start by staying near your squad, learning basic movement, getting combat-ready quickly, using cover, and taking fights that your team can actually support.

Should beginners play Ranked?

You can.

But Unranked and the Firing Range provide lower-pressure environments for learning fundamentals first. EA currently recommends Unranked for players who aren’t ready to jump directly into Ranked. (EA Help)

How many Legends should a beginner learn?

Start with one main and one or two backups.

Learn them well before trying to master the entire roster.

Should beginners land somewhere quiet?

Not necessarily.

A contested landing can teach fighting quickly, while a quieter POI gives you more room to learn looting, movement, and positioning. Choose based on what you’re trying to practice.

Should I copy professional players?

Use professional players as references, not instruction manuals.

Their settings, mechanics, decision-making, and team coordination are built around a different skill level and play environment.


Final Thoughts

Apex Legends has a steep learning curve because you’re learning several things at once.

Movement.

Aim.

Looting.

Positioning.

Rotations.

Teamwork.

Fight selection.

You don’t need to master all of them immediately.

Start by fixing the mistakes that happen most often.

Stay close to your squad.

Get combat-ready quickly.

Use cover.

Think before you push.

Reset after fights.

Then review your deaths instead of simply being angry about them.

The goal isn’t to play every match perfectly.

It’s to make fewer avoidable mistakes.

That is how Apex gradually stops feeling chaotic.

The enemy doesn’t necessarily become easier.

You simply start recognizing bad situations before they become bad.

And that’s one of the biggest milestones a new Apex player can reach.


Related Apex Legends Guides

Apex Legends Beginner Guide — Start here for a broader introduction to Apex Legends, including movement, weapons, looting, positioning, healing, and squad fundamentals.

Apex Legends Loot Guide — Learn how to prioritize loot, manage your inventory, handle death boxes, and know when to stop searching.

Apex Legends Settings Guide — Optimize FOV, sensitivity, controller settings, graphics, audio, FPS, and accessibility options.

Apex Legends Best Legends Guide — Find Legends that fit your playstyle, from beginners and solo queue to mobility, support, and defense.

Apex Legends Solo Queue Guide — Learn how to communicate, position, adapt to random teammates, and stay useful without a premade squad.

Apex Legends Ranked Guide — Learn how to approach Ranked with better positioning, rotations, fight selection, and decision-making.

Apex Legends Squad Composition Guide — Learn how complementary Legend roles can make a squad stronger.

Apex Legends Tier List — See which Legends currently have the strongest overall value in Season 30.


Sources & Updates

Last reviewed: September 8, 2026

This article is primarily written for Core Apex Legends Battle Royale, including Ranked and Unranked. EA currently distinguishes Core from Freestyle modes such as Wildcard, Mixtape, and Bot Royale Evolved. Wildcard uses a substantially simplified loot, inventory, healing, and revival system, so some of the advice in this article does not apply there in the same way. (EA Help)

EA’s current Apex Legends beginner guide was used to verify advice regarding landing near teammates, spreading out while looting, matching weapons with ammunition, using the ping system, maintaining shields and health, moving efficiently, carrying grenades, staying with the squad, and learning a small group of Legends. (EA Help)

EA’s current game-mode documentation was used to verify that Ranked and Unranked are Core modes, while Wildcard is part of Freestyle. EA currently recommends Unranked as a lower-pressure way to practice the fundamentals before moving into Ranked. (EA Help)

EA’s current documentation also identifies the Firing Range as a place to practice and test weapons, ammunition, and Legends. (EA Help)

Editorial note: The 25 mistakes and recommended habits in this article are Loot Strategist’s editorial guidance. EA’s documentation provides the underlying game information; the tactical recommendations and examples are our interpretation of how beginners can apply those mechanics in real matches.

Apex Legends Loot Guide: How to Loot Faster and Smarter

Apex Legends Loot Guide: How to Loot Faster and Smarter

Apex Legends isn’t won by the player with the fullest backpack.

It’s won by the player who gets combat-ready quickly, understands what is actually useful, and knows when to stop searching and start moving.

That matters more than ever in Season 30.

Respawn has tightened the Core loot economy, removed several older high-tier loot sources, changed how Arsenals work, reduced some attachment spawn rates, and completely changed how Energy weapon ammunition works. (EA)

So an older loot guide can give you perfectly reasonable advice that is simply outdated.

This Apex Legends Loot Guide focuses primarily on Core modes—Ranked and Unranked—while explaining where Wildcard works differently. EA currently describes Core as the standard competitive experience and Wildcard as a faster Freestyle mode with a deliberately simplified loot system. (EA Help)

The goal isn’t to teach you how to open every bin on the map.

It’s to teach you what is worth your time.


Apex Legends Loot Guide at a Glance

Need the quick answer?

Use this order:

1. Get a usable weapon

2. Get the ammunition it needs—or understand the weapon’s Energy stockpile

3. Check your starter gear

4. Find additional shields and health healing

5. Get a second weapon

6. Take important upgrades

7. Share useful resources

8. Leave when the next upgrade isn’t worth the time

The simplest version is:

Get ready to fight, then get out.

EA’s current beginner guidance similarly emphasizes getting weapons, matching ammunition, useful attachments, shield and health healing, and increasing inventory capacity without wasting time searching the exact same areas as teammates. (EA Help)


What Should You Loot First in Apex Legends?

Apex Legends loot guide showing the recommended order for weapons, ammo, starter gear, healing, a second weapon, upgrades, and rotation

In Core modes, you don’t begin completely empty.

Every Legend starts with a basic starter kit containing a Level 1 helmet, Level 1 Evo Shield, Level 1 Knockdown Shield, two Syringes, and two Shield Cells. (EA Help)

That changes your opening priorities.

Your first goal should usually be:

Weapon → ammo → check starter gear → second weapon → useful healing/resources → upgrades

Don’t spend your opening minute searching for a full inventory.

You don’t need one.

You need enough equipment to survive the next fight.


Core vs. Wildcard Loot

Apex Legends guide comparing Core and Wildcard loot systems, inventory, weapons, healing, and attachments

Before going any further, make sure this guide matches the mode you’re playing.

EA currently separates Apex into Core and Freestyle modes.

Core includes:

Ranked

Unranked

Wildcard belongs to Freestyle and uses a significantly simplified loot system. (EA Help)

In Wildcard:

  • There are no backpacks, helmets, knockdown shields, med kits, accelerants, or traditional attachments in the loot pool.
  • Inventory is simplified into dedicated slots.
  • Weapons arrive kitted.
  • Ammo and EVO are automatically collected from certain drops.
  • Legends auto-heal outside combat.
  • Players start with self-revive functionality. (EA Help)

So most of this article is written for Core BR.

That’s important because a loot strategy designed around Ranked doesn’t translate one-for-one into Wildcard.


The First Rule of Looting: Get Combat-Ready

The biggest beginner mistake is trying to build the perfect inventory before you can fight.

You don’t need:

Your dream weapon

Your favorite optic

A full stack of every consumable

Every purple attachment

You need something that can win the next engagement.

Your first usable weapon is usually more valuable than another thirty seconds of searching.

Once you’re capable of defending yourself, your next decision is no longer:

“What else can I loot?”

It’s:

“Is staying here actually worth it?”


Land Close to Your Squad

Looting starts with your drop.

EA currently recommends landing close to your teammates without landing directly on top of them, allowing everyone to search different nearby areas while staying close enough to support one another. (EA Help)

A good landing pattern is:

Same POI

Different buildings

Close enough to help

That is much more efficient than three players opening the same bins.


Don’t Loot the Same Building as Your Teammate

If your teammate is already searching a large building, take another room or another structure.

You are not fighting your squad for loot.

You’re trying to get three players equipped as quickly as possible.

EA specifically advises players not to search exactly the same loot spots, especially in larger buildings. (EA Help)

A simple system works:

Player 1 → Building A

Player 2 → Building B

Player 3 → Building C

Then regroup.

That’s faster than splitting to opposite sides of the map.


The Early-Game Loot Priority

Your first few seconds should be about survival.

1. Weapon

Take the first usable weapon.

2. Ammo

Collect enough for the weapon you’re carrying.

3. Check Your Starter Gear

You already have a basic helmet, Evo Shield, Knockdown Shield, Syringes, and Shield Cells in Core modes. (EA Help)

4. Second Weapon

Once the immediate danger is manageable, complete the loadout.

5. Healing

Top up what you’ll realistically need.

6. Important Attachments

Take meaningful upgrades.

7. Move

Don’t turn preparation into procrastination.


Weapon First, Perfect Weapon Later

Suppose you land and find:

Mozambique

You can use it.

Then twenty seconds later you find:

Peacekeeper

That’s an upgrade.

You didn’t lose anything by taking the first weapon.

The mistake is spending forty seconds refusing every mediocre gun because you are waiting for your favorite.

A bad weapon you can shoot is better than the perfect weapon that hasn’t appeared yet.


How Much Ammo Should You Carry?

There is no universal number that works for every loadout.

Your ammo needs depend on:

Weapon

Fire rate

Range

How often you fight

Inventory size

How quickly your squad rotates

A player using a rapid-fire weapon may burn ammunition much faster than someone playing at longer ranges.

So instead of memorizing:

“Always carry X stacks.”

Use:

Carry enough for the next fight, then adjust based on your actual usage.

That is more flexible and more useful.


Understanding Apex Legends Ammo

EA currently lists the game’s ammunition categories as:

Light

Heavy

Energy

Shotgun

Sniper

Arrows

along with other weapon-specific ammunition rules. (EA Help)

For ordinary weapons, the old rule still applies:

If you need it, carry it.

For Energy weapons, there is an important exception.


The New Energy Ammo System

Season 30 changed Energy weapons substantially.

Traditional Energy ammo bricks were removed from Core and Wildcard.

Instead, Energy weapons come with their own regenerating ammunition stockpile. You no longer need to pick up conventional Energy ammo bricks for those weapons. (EA)

That changes inventory management.

If you’re carrying an Energy weapon:

Don’t reserve backpack space for old-style Energy ammo stacks.

Pay attention to the weapon’s stockpile instead.

The important tactical point is that the stockpile regenerates over time, and regeneration isn’t something you can rely on while continuously firing. EA’s Season 30 documentation explains that the new system replaces traditional Energy ammo pickups with the weapon-specific stockpile. (EA)

So don’t assume:

“I have an Energy weapon, therefore I’m carrying infinite ammunition.”

You still need to manage when and how you’re using it.


Build Your Ammo Around Your Loadout

Apex Legends inventory guide comparing backpack priorities for assault rifle and SMG, shotgun and SMG, and marksman and SMG loadouts

Your two weapons should influence your inventory.

Assault Rifle + SMG

You will often want:

More ammunition

Shield resources

Some grenades

Shotgun + SMG

You’ll typically need:

Less overall ammunition

More healing

More close-range utility

Marksman + SMG

You may need:

Marksman ammunition

A reliable close-range weapon

Enough shields to reset between fights

The exact numbers change.

The principle doesn’t.

Your inventory should serve your weapons, not the other way around.


Attachments: Take the Upgrade That Matters

An attachment is valuable when it changes how effectively you can use the weapon.

Ask:

Does it improve control?

Does it improve handling?

Does it improve the weapon’s practical range?

Will I actually notice the difference?

Does it fit the way I play?

If yes, take it.

If not, save the slot.


Season 30’s New Attachment Loot Cards

Season 30 also made attachments easier to evaluate.

EA added loot cards that show the stat change an attachment will provide when equipped, while weapon pickup cards can compare a weapon you’re holding with one you’re considering. (EA)

That’s useful because newer players no longer have to guess whether a particular attachment is genuinely improving the weapon.

Use the information.

If the improvement is meaningful, take it.

If the change doesn’t matter for your weapon or playstyle, move on.


Corrupted Attachments: Should You Take Them?

Season 30 introduced Corrupted Attachments.

These are deliberately different from ordinary upgrades.

EA describes them as attachments that provide significant stat bonuses while also applying a negative trade-off. Only one Corrupted Attachment can be equipped to a weapon at a time. (EA)

That means you shouldn’t automatically think:

Corrupted = better

Think:

Corrupted = trade-off

An attachment may improve one part of the weapon while making another part worse.

So ask:

Does the benefit suit this weapon?

Can I tolerate the drawback?

Does it match my playstyle?

A powerful downside can outweigh a powerful bonus.


Don’t Chase Every Purple Attachment

This is where rarity becomes misleading.

A purple attachment doesn’t automatically deserve a backpack slot.

Suppose you have:

Good weapon

Good shields

Enough healing

Enough ammo

and then find an attachment that produces only a modest improvement.

Meanwhile, the Ring is closing.

Take the small upgrade only if the time and position justify it.

Otherwise:

Leave it.


Backpacks and Inventory Space

In Core modes, larger backpacks let you carry more resources.

EA’s beginner guidance specifically recommends looking for larger backpacks as part of your normal looting progression. (EA Help)

But more space isn’t automatically better.

A backpack full of:

Unused ammo

Attachments for weapons you don’t use

Too many grenades

isn’t an efficient inventory.

The goal is not:

“Fill every slot.”

It’s:

“Fill the right slots.”


Build Your Inventory Around the Next Fight

Your inventory should change as the match develops.

Early Game

Prioritize:

Weapons

Ammo

Shield resources

Healing

Mid Game

Add:

Better attachments

More grenades

Survival tools

Extra resources for the squad

Late Game

Think more carefully about:

Space

Shield recovery

Grenades

Ammo efficiency

Survival items

By the late game, every slot has more opportunity cost.


Healing: Don’t Ignore Health Recovery

EA’s current beginner guide highlights Shield Cells, Shield Batteries, Syringes, and Med Kits as core healing resources. (EA Help)

Your exact inventory mix depends on your shield status, playstyle, and upcoming fight.

But there is a simple mistake worth avoiding:

Six Shield Batteries + almost no health healing

doesn’t necessarily mean you’re prepared.

You need resources for both layers of survivability.


Shield Healing vs. Health Healing

Shield Cells

Fast and useful for topping up armor.

Shield Batteries

Stronger shield restoration, but slower.

Syringes

Basic health recovery.

Med Kits

Larger health restoration.

You don’t need every item in equal quantities.

You need enough of each to survive the types of damage you’re actually taking.


Grenades Are Inventory, Not Decoration

Grenades can:

Force enemies out of cover

Interrupt a revive

Punish players trapped inside a building

Create space

Block routes

Finish weak enemies

If you use grenades constantly, carry more.

If you never throw them, reconsider whether they’re earning their inventory slot.


Survival Items

EA currently identifies Survival items such as:

Heat Shields

Evac Towers

Mobile Respawn Beacons

as tools that protect or reposition players. (EA Help)

These are situational.

A Heat Shield can be priceless during a bad Ring rotation.

An Evac Tower may transform a dangerous crossing into a manageable one.

A Mobile Respawn Beacon can preserve a match after an elimination.

But if carrying one prevents you from holding essential healing or ammunition, the trade-off matters.


Looting Death Boxes

Apex Legends death box reset showing the steps to secure an area, heal, reload, check for third parties, loot essentials, and leave

Death boxes are among the richest loot sources in a match.

They’re also one of the easiest places to die.

After a fight, don’t immediately start grabbing everything.

Use:

Secure the area

Heal

Reload

Check for another squad

Loot

Leave

This is one of the most important loot habits in Apex.


Loot the Best Death Box First

You don’t have to inspect every box.

Look for:

Your missing essentials

Useful ammo

Batteries

Grenades

Important attachments

Better weapons

Resources your teammates need

Take what improves your next fight.

Then move.


The Post-Fight Looting Trap

You win.

Everyone starts looting.

Nobody watches the surrounding terrain.

Another squad arrives.

Now the team that won the fight loses the next one while standing over the first squad’s boxes.

That’s why your reset order matters.

Win the fight.

Recover.

Scan the surroundings.

Then loot.


Looting While the Ring Is Moving

This is another classic mistake.

Your squad finds a death box.

The Ring is already closing.

Someone says:

“Just one more thing.”

That’s how “one more thing” becomes a long run through damage.

Before committing to the box, ask:

How far is the next safe position?

How much time do we have?

Is the loot actually useful?

Are enemies likely to rotate through here?

Sometimes the correct answer is:

Leave the box.


How Long Should You Loot?

There is no perfect number of seconds.

Use a simpler rule:

Once your inventory can support the next fight, your next upgrade should justify the time and risk required to find it.

If you’re already equipped and the area is becoming dangerous, move.

A slightly better backpack won’t save you from being late to the Ring.


The Loot Value Test

Apex Legends loot guide comparing rare attachments with useful survival items to show why rarity does not equal value

Whenever you’re unsure whether to pick something up, run through five questions:

Do I need it?

Take it.

Will I use it soon?

Probably take it.

Does a teammate need it more?

Ping or share it.

Is it only valuable because of rarity?

Then think twice.

Will it delay our rotation?

If yes, the loot may not be worth it.

This system works better than memorizing a giant list of “must-have” items.


Where Should You Loot?

There is no permanent “best loot spot.”

POIs change.

Loot distributions change.

Match pacing changes.

And Season 30’s World’s Edge update itself changed several named locations and the way players move through the map. EA’s Season 30 materials specifically highlight changes to World’s Edge and its updated POIs. (EA)

So rather than memorizing one sacred landing spot, learn how to evaluate a good POI.

Look for:

Enough loot for your squad

Multiple nearby buildings

A useful next rotation

Manageable contest risk

Access to resources

Good terrain after looting

A POI that gives you slightly less loot but an excellent rotation can be more valuable than a high-loot area surrounded by enemies.


Should You Land at the Highest-Loot POI?

Not automatically.

High-value areas can attract more squads.

That gives you a trade-off:

More potential loot

versus:

More contest risk

In Ranked, that decision matters even more.

A squad capable of winning a contested drop may benefit from it.

A team trying to climb consistently may prefer a quieter landing with enough loot to fight.

There is no universal answer.


Season 30 Loot Changes You Need to Know

Apex Legends Season 30 loot changes showing removed Core loot and updated attachment, Arsenal, Energy ammo, and Corrupted Attachment systems

This is the section that makes this guide more valuable than older loot articles.

Season 30 changed the Core loot system substantially.

EA removed:

Hot Zones

Gold Bins

Mythic Bins

Gold Backpacks

Gold Attachments

Extended Supply Bins

Weapon Supply Bins

It also reduced purple attachment spawn rates globally. (EA)

That means older guides that tell you to rely on those systems may be outdated.


Hot Zones Are Gone

This deserves special attention because Hot Zones were a familiar part of older Apex loot advice.

Season 30 removed them from Core loot. (EA Help)

So don’t use an old “land at the Hot Zone for guaranteed top-tier loot” strategy as though it still describes the current Core game.

That’s precisely why this article should be reviewed after meaningful loot-system changes.


Gold Backpacks and Gold Attachments Are Gone From Core Loot

Season 30 also removed Gold Backpacks and Gold Attachments from the normal Core loot pool. (EA)

The notable exception is the 4–10x Digital Sniper Threat Sight, which EA says remains unaffected by the broader Gold Attachment removal. (EA)

That means a modern loot guide shouldn’t tell players to spend their entire drop searching for the old Gold-item system.


Purple Attachments Are More Meaningful Now

EA reduced purple attachment spawn rates in Season 30 while maintaining the overall attachment quantity. (EA)

That makes meaningful attachment upgrades a little more significant.

But the basic rule still stands:

Don’t delay a rotation just because you haven’t completed your ideal loadout.


How Arsenals Work Now

Season 30 also changed Arsenals.

They no longer activate immediately at match start.

Instead, they activate alongside Evo Harvesters, and EA reduced the number of Arsenals available per POI.

Their Upgrade Panels can upgrade an attachment slot by one tier, with Purple as the maximum, and can provide an Optic when a weapon doesn’t already have one. (EA)

That makes an Arsenal more useful as part of your mid-match upgrade path than as an automatic first stop after landing.


Don’t Confuse Loot With Progression

Apex now has several systems that interact with equipment and progression.

You have:

Loot

EVO

Legend upgrades

Arsenals

Replicators

Survival items

The best route isn’t always:

“Get every upgrade immediately.”

Sometimes the better route is:

Loot essentials → rotate → gain EVO → revisit upgrades when safe

Think in terms of match tempo.


Smart Looting for Solo Queue

Solo queue creates another challenge.

You can’t assume your teammates will:

Share ammunition

Ping useful loot

Rotate quickly

Stop looting

Watch the Ring

That makes self-sufficiency more valuable.

Carry enough to survive without constantly relying on someone else’s inventory.

But still ping useful resources.

EA explicitly recommends using pings to communicate loot and other important information. (EA Help)

For the broader strategy, see our Apex Legends Solo Queue Guide.


Smart Looting for Ranked

Ranked makes time and risk more important.

A loot detour may cost:

Position

Ring timing

Information

Health

A safer rotation

Before extending a loot trip, ask:

Does this upgrade materially improve our chances in the next fight?

If the answer is no, move.

That habit can be worth more than another rare attachment.


Don’t Become the Squad’s Inventory Manager

Helping teammates is good.

Managing every item they own is not.

Ping useful equipment.

Share excess resources.

Give someone a Shield Battery when they need one.

But don’t stand in one building for two minutes because somebody still wants a particular optic.

At some point, the best loot decision is:

Go.


Loot Faster by Learning Your Loadouts

The more weapons you understand, the faster you loot.

Suppose you see:

Assault Rifle

You already know what ammo and attachments make sense.

Suppose you find:

SMG

You know what secondary range it covers.

That reduces decision time.

You don’t have to stand there debating every item.

Your loadout makes the decision for you.


Stop Reopening the Same Bins

This sounds almost too obvious.

It’s also common.

You search an area.

You walk twenty meters.

Then come back.

Then reopen the same bin.

You probably missed something.

That’s okay.

Keep moving.

Apex rewards momentum.


Don’t Loot an Area After It Has Become Unsafe

This is a critical distinction.

An area can go from:

Safe

to:

Maybe unsafe

to:

Definitely unsafe

very quickly.

Gunfire starts nearby.

A squad rotates through.

The Ring shifts.

Your escape route closes.

Your loot priorities should change immediately.

Don’t keep looting simply because you started.


A Smart Looting Routine

Here’s the entire process in one sequence:

Land

Stay near teammates and spread across nearby buildings.

Arm

Find a usable weapon and its ammunition.

Stabilize

Check your starter gear and top up your healing.

Equip

Take a second weapon and useful upgrades.

Share

Ping or give teammates what they need.

Rotate

Leave once the next upgrade no longer justifies the time.

Reset

After every fight, heal, reload, check your surroundings, then loot.

Rebuild

Replace resources as you spend them.

That’s the loop.


Common Apex Legends Looting Mistakes

Staying Too Long in One POI

More loot isn’t automatically more value.

Chasing the Perfect Loadout

A functional loadout is enough to fight.

Taking Every Rare Attachment

Rarity doesn’t guarantee meaningful value.

Carrying Too Much Ammo

Unused ammunition occupies space.

Ignoring Healing

Good weapons don’t compensate for an empty healing inventory.

Looting Immediately After a Fight

Another squad may already be coming.

Forgetting the Ring

The best death box in the world isn’t worth dying outside the zone.

Ignoring Teammates

Looting is a squad activity.

Treating Gold as Automatically Better

Season 30 has also changed which Gold items even exist in Core loot. (EA)

Using Old Loot Guides

Live-service games punish outdated information.


A Simple Core-Mode Loot Checklist

Before leaving your landing area, ask:

Do I have a usable weapon?

Do I have the correct ammunition or understand my Energy stockpile?

Have I checked my starter gear?

Do I have a second weapon?

Do I have shields and health healing?

Do I have enough resources for the next fight?

Does my squad need anything?

Do we know where we’re rotating?

If the answers are mostly yes:

Leave.


Loot Rule

The best loot isn’t the rarest loot. It’s the loot that keeps you alive long enough to use it.

A purple attachment is useless if you die carrying it.

A full backpack doesn’t matter if your squad is trapped outside the Ring.

A perfect loadout doesn’t help if you spent five minutes building it while another team took the best position.

Good looting is a balance between:

Resources

Time

Risk

Position

Squad needs

The strongest looters aren’t the people who search everything.

They’re the people who know when they’ve found enough.


Final Thoughts

Looting looks simple.

Open a bin.

Pick something up.

Move on.

But good loot management is really a game of priorities.

You need a weapon before you need the perfect attachment.

You need enough ammunition before you need another stack of grenades.

You need a survivable position before you need one more purple upgrade.

And after a fight, you need to know whether it’s safe to loot at all.

Season 30 makes those decisions even more important. Hot Zones are gone. Gold Backpacks and Gold Attachments are out of the normal Core pool. Purple attachments are less common. Arsenals activate later. Energy weapons use regenerating ammunition instead of traditional Energy ammo bricks. Corrupted Attachments add meaningful bonuses with trade-offs. (EA)

So don’t approach Apex loot as a hunt for the rarest possible inventory.

Approach it as a question of tempo:

What do I need now?

What will help in the next fight?

And is the upgrade worth staying here for?

Get equipped.

Get organized.

Take what matters.

Then move.


Related Apex Legends Guides

Apex Legends Beginner Guide — Learn the fundamentals of landing, movement, weapons, healing, positioning, and squad play.

Apex Legends Best Legends Guide — Find the right Legend for beginners, Ranked, solo queue, mobility, support, defense, and other playstyles.

Apex Legends Tier List — See which Legends currently dominate the Season 30 meta and why pick rate isn’t the same as power.

Apex Legends Settings Guide — Optimize FOV, sensitivity, graphics, audio, controller, and FPS settings.

Apex Legends Solo Queue Guide — Learn how to adapt to random teammates, communicate, and make better decisions without a premade squad.

Apex Legends Squad Composition Guide — Learn how to combine Legend classes and squad roles into a more effective team.


Sources & Updates

Last reviewed: September 7, 2026

This guide primarily covers Core Apex Legends modes, including Ranked and Unranked. EA currently distinguishes Core from Freestyle modes such as Wildcard; Wildcard uses a much simpler loot and inventory system and is therefore not treated as the default context for the loot recommendations above. (EA Help)

EA’s current beginner guide was used to verify Core-mode looting advice, including landing near—but not directly on top of—teammates, splitting nearby loot areas, prioritizing weapons and ammunition, and gathering useful healing and equipment. (EA Help)

EA’s current terminology guide was used to verify the Core-mode starter kit, Shield Core, Supply Bins, Survival items, and other core loot terminology. Every Legend in Core modes starts with a Level 1 helmet, Level 1 Evo Shield, Level 1 Knockdown Shield, two Syringes, and two Shield Cells. (EA Help)

EA’s official Season 30: Marked Patch Notes were used to verify the removal of Hot Zones, Gold and Mythic Bins, Gold Backpacks, Gold Attachments, Extended Supply Bins, Weapon Supply Bins, and the reduction in purple attachment spawn rates. The same source was used to verify the updated Arsenal system, weapon-comparison loot cards, attachment stat cards, and the new Energy ammunition system. (EA)

EA’s current Season 30 documentation also confirms that Energy weapons now use regenerating ammunition stockpiles rather than traditional Energy ammo bricks, and that Corrupted Attachments provide strong bonuses with negative trade-offs and are limited to one per weapon. (EA Help)

EA’s Season 30 materials were also used to verify the current World’s Edge updates and changed POIs. Because map layouts and loot conditions can change, this guide deliberately avoids claiming that one location is a permanently “best” loot spot. (EA)

Editorial note: Loot priorities, inventory recommendations, rotation advice, and other strategy in this article are Loot Strategist editorial guidance. They are not official EA rules and should be adapted to the player’s weapons, squad, map, mode, and playstyle.

Apex Legends Tier List: Best Legends for Season 30

Apex Legends Tier List: Best Legends for Season 30

Apex Legends has 28 Legends, and the strongest pick can change surprisingly quickly.

One balance patch can push a forgotten character into the spotlight. A popular Legend can get nerfed and suddenly become less attractive. A supposedly “weak” specialist can still post excellent results when a skilled player builds an entire strategy around the kit.

That’s why a useful Apex Legends Tier List needs more than an S-to-C chart.

This Season 30: Marked ranking looks at current competitive strength, practical squad value, flexibility, combat impact, reliability, and specialist potential. We also use current high-level pick-rate and RP-performance data as evidence—but not as an automatic ranking machine.

The result is a tier list designed to answer the question players actually care about:

Who is worth learning right now?

Season 30 note: This ranking is a current snapshot, not a permanent verdict. Respawn launched Season 30 on August 4, 2026 and introduced a Bloodhound rework, Loba and Rampart buffs, and balance changes to Axle, Seer, and Valkyrie.


Apex Legends Tier List at a Glance

Apex Legends Season 30 tier list ranking all 28 Legends from S-tier to C-tier
TierLegends
S-TierLoba, Axle, Pathfinder, Seer
A-TierMad Maggie, Alter, Vantage, Bangalore, Sparrow, Fuse, Revenant, Gibraltar, Wraith, Horizon, Valkyrie, Ballistic
B-TierBloodhound, Crypto, Wattson, Ash, Mirage, Conduit, Caustic, Lifeline, Newcastle, Catalyst, Octane
C-TierRampart

That gives every current Legend a place.

And that last point matters: 28 Legends in the roster means 28 names in the tier list.

For competitive context, ApexRanked’s September 6, 2026 snapshot tracks 823 current Apex Predators across 170,269 Season 30 Split 1 appearances. Loba leads tracked pick rate at 20.2%, followed by Axle at 19.3%, Pathfinder at 11.7%, Seer at 9.4%, and Mad Maggie at 6.7%.


What S, A, B, and C Mean

A tier list is only useful when the tiers actually mean something.

S-Tier — Meta-Defining

These Legends combine exceptional current strength with broad practical value and strong competitive relevance.

They don’t need a perfect team composition to be useful.

A-Tier — Excellent

These Legends are highly effective and can absolutely carry a strong game plan, but they usually have a clearer weakness, narrower specialization, or higher opportunity cost than S-tier choices.

B-Tier — Viable and Specialized

These Legends can perform very well but generally have more specific applications, higher learning requirements, or fewer ways to influence a match than the leaders.

B-tier does not mean bad.

C-Tier — Niche

These Legends can still work and can be terrifying in the right hands.

They simply have a larger competitive opportunity cost, stronger map dependence, or fewer consistently useful situations.


How We Ranked the Legends

Our ranking uses six criteria.

Current Meta Strength

How effective is the Legend in the current Season 30 environment?

Combat Impact

How much can the kit change an engagement?

Team Utility

Does the Legend make the rest of the squad better?

Flexibility

Can the Legend contribute across different phases of a match?

Reliability

Can the kit create value consistently rather than only in specific scenarios?

Specialist Potential

Can the Legend become exceptionally strong when mastered, even if relatively few players use them?

We then compare those factors with current data.

That distinction is important because pick rate is not the same thing as power.


Why Pick Rate Isn’t the Same as Strength

Apex Legends tier list guide comparing Loba and Ballistic pick rates, RP performance, and tracked game samples

The current Season 30 data makes this especially obvious.

ApexRanked has Loba at:

20.2% pick rate

and Ballistic at:

0.2% pick rate

Yet Ballistic currently shows the highest RP-performance figure in the tracked Predator sample:

+56.6 RP

Loba sits at:

+52.0 RP.

That doesn’t mean Ballistic should automatically replace Loba at the top of the list.

Ballistic has only 338 tracked games in this dataset, compared with Loba’s 34,378.

The useful conclusion is:

Ballistic may have excellent specialist potential, but the evidence is much thinner.

That’s why we use data as evidence and editorial judgment as the final layer.


S-Tier Legends

These are the four Legends currently offering the strongest overall combination of competitive relevance, flexibility, and practical value.

Loba

Loba is our current #1 overall pick.

Her Jump Drive provides mobility, her Passive helps identify high-rarity loot, and her Black Market can improve team access to nearby resources.

Then Season 30 made her even more attractive.

EA reduced her Tactical equip time from 0.6 seconds to 0.4 seconds, increased its range, reduced travel time, and shortened Black Market Boutique’s cooldown from 150 seconds to 120 seconds. Respawn said the changes were intended to improve her survivability and team support.

The competitive numbers line up with that.

Loba currently leads ApexRanked’s Predator pick-rate table at 20.2%, with more than 34,000 tracked appearances.

Why She Is S-Tier

Excellent general utility

Strong solo-queue value

Useful mobility

Resource control

Works in many squad compositions

Best For

Ranked

Solo queue

Flexible squads

Players who value resources and positioning


Axle

Axle remains the other major meta-defining mobility pick.

Her kit lets her change engagement distance quickly, create movement opportunities, and put pressure on teams from awkward angles.

Respawn has been actively tuning her because her mobility and Kickstart drone created too much pressure in too many situations. Season 30 reduced her maximum slide-boost time from five seconds to three seconds, while also changing her Ultimate so it can affect Axle herself and her allies.

Even after those changes, she remains extremely popular at the highest level.

ApexRanked’s September 6 snapshot puts Axle at 19.3% pick rate and 32,794 tracked appearances.

Why She Is S-Tier

Exceptional mobility

Strong fight creation

Excellent repositioning

High ceiling

Best For

Aggressive players

Mechanical players

Mobility-focused squads


Pathfinder

Pathfinder is the most straightforward S-tier mobility recommendation.

His value isn’t limited to flashy movement.

He can give a squad:

Better angles

Faster rotations

High-ground access

Escape options

More freedom to choose where fights happen

That versatility is why Pathfinder continues to appear frequently in high-ranked play.

ApexRanked currently has him at 11.7% pick rate, with 19,872 tracked appearances. His RP-performance figure sits at +52.5.

Why He Is S-Tier

Broad utility

Reliable movement

Strong rotations

Works with many squad styles

Best For

Movement players

Shot-callers

Aggressive repositioning

Ranked


Seer

Seer is the most information-oriented member of the S-tier group.

That makes his strength somewhat different from Loba or the movement Legends.

Seer can help a squad understand what is happening before committing to the fight.

Respawn has also demonstrated how much power information can provide: Season 30 reduced the turn slow on his Tactical because the ability had become frustrating and oppressive when used repeatedly.

ApexRanked currently has Seer at 9.4% pick rate across 16,022 tracked appearances.

Why He Is S-Tier

Strong information

Fight control

Excellent with coordinated teammates

High value before the first shot

Best For

Information-focused players

Coordinated squads

Shot-callers


A-Tier Legends

A-tier Legends are excellent.

The difference is that their strengths are usually a little more specific than those of the S-tier group.

Mad Maggie

Maggie is one of the best answers to an enemy team that refuses to leave cover.

Her kit is built to apply pressure and force movement, making her especially useful against defensive setups.

She currently sits at 6.7% pick rate in the Predator dataset.

Best For

Breaching

Aggressive squads

Close-range pressure


Alter

Alter offers mobility and unusual ways of interacting with space.

She becomes especially valuable in squads that know how to think beyond the obvious route.

Her current Predator pick rate is 5.7%, putting her firmly among the more frequently selected Legends at the top of the ladder.

Best For

Creative rotations

Unpredictable movement

Advanced players


Vantage

Vantage offers information and ranged pressure, but her value depends heavily on whether the squad knows how to convert that information into an advantage.

Her current Predator pick rate is 3.5%.

Best For

Scouting

Long-range pressure

Information-heavy squads


Bangalore

Bangalore remains one of the safest all-purpose choices in Apex.

Smoke creates cover.

Double Time can help reposition under fire.

Rolling Thunder controls space.

The kit is straightforward enough for newer players but still useful at high levels.

Best For

Beginners

Solo queue

Balanced squads

Repositioning


Sparrow

Sparrow has established meaningful competitive presence, with a 3.3% Predator pick rate in the current dataset.

His value rises when teammates actually use the information and movement his kit provides.

Best For

Active scouting

Coordinated fights

Mobile squads


Fuse

Fuse excels at creating problems for players who think cover makes them untouchable.

His offensive utility can force enemies to move, weaken fortified positions, and make defensive setups uncomfortable.

Best For

Area denial

Aggression

Breaking defensive teams


Revenant

Revenant rewards players who understand timing.

His aggressive mobility can make him extremely dangerous, but poor timing can leave him isolated.

He currently has around 1.9% Predator pick rate.

Best For

Aggressive players

Close-range pressure

Confident entry players


Gibraltar

Gibraltar’s value comes from protection and fight control.

A well-timed Dome can completely change an engagement.

The downside is tempo.

Fast-moving squads can sometimes get more value from mobility-oriented picks.

Best For

Coordinated squads

Defensive fighting

Emergency protection


Wraith

Wraith remains useful because she gives aggressive players another way to escape a bad commitment.

Her Portal also provides a way to create safer movement options for the squad.

She currently sits around 1.5% pick rate in the Predator dataset.

Best For

Solo queue

Aggressive repositioning

Flexible squads


Horizon

Horizon becomes especially useful when vertical positioning matters.

She can create high-ground opportunities that other squads may not be able to answer as easily.

The trade-off is greater map and situation dependence.

Best For

Vertical fights

High-ground play

Coordinated pushes


Valkyrie

Valkyrie remains valuable for teams that prioritize macro movement and rotation options.

She received another balance adjustment in Season 30 as Respawn continued tuning mobility-heavy Legends.

She’s still useful.

She’s simply less automatic than she once was.

Best For

Rotations

Map mobility

Repositioning


Ballistic

Ballistic is the most interesting A-tier placement.

His current pick rate is only 0.2%, with just 338 tracked appearances in the Predator sample. Yet he posts the highest RP-performance figure at +56.6.

That’s too interesting to ignore.

It’s also too small a sample to blindly call him S-tier.

So we place him in A as a high-upside specialist.

Best For

Weapon-focused aggression

Experienced players

Players who understand fight timing


B-Tier Legends

B-tier means viable, not bad.

These are often strong choices for specific players, teams, maps, or situations.

Bloodhound

Season 30 completely refreshed Bloodhound.

The Passive now displays enemy footsteps and introduces White Ravens for tracking. The Tactical has a three-second full-body scan followed by four snapshot scans, while the new Allfather’s Cloak Ultimate provides a temporary cloaking effect within its area.

Yet Bloodhound currently has only a 0.7% Predator pick rate.

At the same time, the tracked RP-performance number is +54.7, second only to Ballistic.

That’s exactly why we don’t use pick rate as the tier itself.

Best For

Tracking

Aggressive recon

Players learning information play


Crypto

Crypto is another specialist whose numbers need context.

He currently has only 0.6% Predator pick rate, but posts +55.4 RP performance across 1,036 tracked games.

That suggests impressive potential when mastered.

The problem is execution.

Time spent controlling the drone is time not spent directly fighting.

Best For

Coordinated squads

Scouting

Advanced information play


Wattson

Wattson remains excellent when the squad can decide where it wants to fight.

Her value rises in controlled positions and late-game setups.

It falls when the squad is constantly forced to rotate.

Best For

Endgame positioning

Building control

Defensive squads


Ash

Ash remains a functional aggressive mobility option, but she faces significant competition from the stronger current movement picks.

Best For

Aggression

Mobility

Target isolation


Mirage

Mirage rewards players who understand misdirection and timing.

His deception can still create clutch situations, particularly in lower- and mid-level lobbies.

The higher the skill level of the opposition, the more important good timing becomes.

Best For

Mind games

Solo queue

Clutch situations


Conduit

Conduit is one of the better Support picks for players who want to stay active during fights.

Her value becomes much clearer when the squad plays aggressively and her abilities can keep teammates fighting.

Her current Predator pick rate is 0.4%, but her tracked RP performance is a respectable +51.9.

Best For

Aggressive support

Team sustain

Coordinated fights


Caustic

Caustic remains dangerous when the enemy has to enter controlled space.

The problem is the same one that affects many defensive specialists:

Apex eventually makes you move.

Best For

Area denial

Building defense

Close-range control


Lifeline

Lifeline is still one of the simplest ways to bring recovery utility into a squad.

Her current Predator pick rate is only 0.3%, but that says much more about high-level meta preferences than it does about her usefulness to an ordinary player.

Best For

Beginners

Support players

Recovery-focused squads


Newcastle

Newcastle can be extremely strong when a squad understands how to fight around his defensive abilities.

His current pick rate is only 0.3%, so the dataset doesn’t show widespread competitive adoption, but he remains an attractive specialist for coordinated defensive recovery.

Best For

Revives

Defensive recovery

Coordinated squads


Catalyst

Catalyst can reshape how enemies enter and exit an area.

That control is valuable, but it requires a squad that knows how to capitalize on it.

Best For

Area control

Defensive squads

Endgame positions


Octane

Octane belongs in B-tier for a simple reason:

He’s still fun, mobile, and perfectly capable of taking over a lobby in the right hands.

But the current game offers stronger overall movement options.

ApexRanked has Octane at 2.6% Predator pick rate and +43.6 RP performance in its September 6 snapshot.

That makes him a viable movement choice without giving him the same overall value as Axle or Pathfinder.

Best For

Aggressive players

Movement practice

Fast-paced casual play


C-Tier Legend

C-tier is the narrowest category in this list.

It’s not a “never play this character” warning.

It’s a statement about competitive opportunity cost.

Rampart

Rampart is the clearest example.

Respawn actually buffed her in Season 30 because the team felt she still struggled to compete despite previous improvements. The developer notes describe her as extremely strong when she can bunker into a favorable position, but difficult to make work otherwise.

That perfectly describes her current tier.

Give Rampart:

Time

Strong ground

A favorable Ring

A defensible position

and she can become terrifying.

Give her:

A bad rotation

Open terrain

Constant movement

and the value falls quickly.

Her current Predator pick rate is only 0.2% across 321 tracked appearances.

Best For

Defensive specialists

Prepared positions

Players who enjoy controlling space


What the Current Meta Actually Looks Like

The headline is straightforward:

Loba + Axle + Pathfinder

is currently the most common trio tracked by ApexRanked.

The combination has appeared 2,967 times with an average +56.2 RP in the current Season 30 Split 1 dataset.

That combination makes sense.

Axle provides aggressive movement.

Loba supplies resources and flexible utility.

Pathfinder handles mobility and rotation.

It’s a good example of what the current meta rewards:

mobility + resources + flexible positioning

But it doesn’t mean every player should copy that squad.

A different combination may suit your team better.


The Most Interesting Low-Pick Legends

Apex Legends tier list comparison showing meta-defining Legends versus low-pick specialist Legends

Current data gives us another story that deserves attention.

Ballistic

0.2% pick rate

+56.6 RP

Crypto

0.6% pick rate

+55.4 RP

Bloodhound

0.7% pick rate

+54.7 RP

Those are excellent performance numbers compared with their relatively tiny pick rates.

But the sample sizes matter.

Ballistic has only 338 tracked games.

Loba has more than 34,000.

You shouldn’t read those numbers as:

“Ballistic is secretly the strongest Legend.”

Read them as:

“Some low-pick specialists can perform extremely well when the right player uses them.”

That’s a much more defensible conclusion.


Why Tier Lists Shouldn’t Be Static

Season 30 already demonstrates how quickly things move.

Bloodhound received a rework.

Loba was buffed.

Rampart was buffed.

Axle was nerfed.

Seer was nerfed.

Valkyrie was adjusted.

Respawn also changed the weapon and loot systems, which can indirectly alter the value of Legend kits.

A Legend doesn’t need a direct buff to become stronger.

Sometimes the environment changes around them.

That’s why this article should be reviewed when there is a meaningful balance patch, not only when a new Season starts.


When Should You Ignore the Tier List?

You should ignore it when:

You’re still learning the game.

You don’t understand the S-tier kit.

Your squad already has too much overlapping utility.

The map doesn’t suit the Legend.

You simply play another Legend dramatically better.

A tier list describes relative strength.

It does not play the match for you.


Best Legends by Role

For readers who don’t care about tier letters, here’s the more practical version.

RoleStrong Choices
OverallLoba, Axle, Pathfinder
AggressionAxle, Mad Maggie, Revenant
MobilityAxle, Pathfinder, Wraith
InformationSeer, Vantage, Bloodhound
SupportLoba, Lifeline, Conduit
DefenseRampart, Wattson, Catalyst
Solo QueueLoba, Bangalore, Pathfinder, Wraith
BeginnersBangalore, Lifeline, Pathfinder
RankedLoba, Axle, Pathfinder, Seer, Mad Maggie
BreachingMad Maggie, Fuse
SpecialistBallistic, Crypto

For playstyle-specific recommendations, see our Apex Legends Best Legends Guide.


Tier List vs. Best Legends Guide

These pages should answer different questions.

Apex Legends Tier List

“Who is strongest right now?”

Useful for:

Meta watchers

Ranked players

Competitive players

Players deciding which Legends deserve practice time

Apex Legends Best Legends Guide

“Who is best for my playstyle?”

Useful for:

Beginners

Solo queue players

Mobility players

Support players

Defensive players

That distinction keeps both pages useful instead of making them duplicate one another.


How to Use This Tier List

Apex Legends tier list guide showing how to choose a Legend based on skill, squad needs, and map suitability

Don’t read:

S-tier = must play

Read:

S-tier = currently deserves serious attention

Then ask:

Can I play the Legend well?

Does my squad benefit from the kit?

Does the map support the Legend?

Do I understand the weaknesses?

If the answers line up, that’s probably a strong choice.


Tier List Rule

Don’t chase the letter. Chase the advantage.

The strongest Legend on paper can be a poor pick in your hands.

A specialist can be excellent when you’ve mastered the exact situation they are designed to solve.

And a balanced Legend that gives you several useful options can be worth more than a character with one spectacular trick.

That’s why this list treats:

meta strength

usage

performance

flexibility

and specialist value

as separate pieces of the puzzle.


Final Verdict

For Season 30, our current S-tier group is:

Loba

Axle

Pathfinder

Seer

They combine the strongest overall mix of current usage, competitive relevance, and broad practical value. Loba, Axle, Pathfinder, and Seer are also the four most-picked Legends in ApexRanked’s current Predator dataset.

Below them, A-tier is full of excellent alternatives, including Mad Maggie, Alter, Vantage, Bangalore, Sparrow, Fuse, Revenant, Gibraltar, Wraith, Horizon, Valkyrie, and Ballistic.

And some of the most interesting names aren’t near the top of the pick-rate chart.

Ballistic, Crypto, and Bloodhound all post exceptional RP-performance figures despite very small shares of Predator play.

That’s exactly why a good tier list needs context.

The current meta tells you who is popular.

Performance data tells you what may be working.

Game knowledge tells you why.

And your own skill determines how much of that strength you can actually use.


Final Thoughts

Apex Legends tier lists are useful.

They become dangerous when players treat them as commandments.

The current Season 30 meta clearly favors a few standout picks, especially Loba, Axle, Pathfinder, and Seer. But the same data also shows that lower-pick specialists can perform extremely well in the right hands.

So use this list as a roadmap, not a rulebook.

Learn the S-tier Legends.

Understand the A-tier options.

Don’t dismiss B-tier specialists.

And never feel bad about playing a lower-ranked Legend that you genuinely understand.

Apex is too fast, too complicated, and too dependent on team decisions for one letter to tell the entire story.

The better question isn’t:

“Who’s S-tier?”

It’s:

“Who gives me the best advantage for the way I play Apex?”

That’s where the real tier list starts.


Related Apex Legends Guides

Apex Legends Best Legends Guide — Find the best Legend for your playstyle, whether you prefer Ranked, solo queue, mobility, support, or aggressive fights.

Apex Legends Squad Composition Guide — Learn how to build stronger squads around complementary Legend roles rather than simply stacking high-tier characters.

Apex Legends Ranked Guide — Learn how RP, placement, rotations, fights, splits, and competitive decision-making work.

Apex Legends Solo Queue Guide — Learn how to adapt to random teammates and make stronger decisions without a premade squad.

Apex Legends Settings Guide — Optimize FOV, sensitivity, graphics, audio, controller, and FPS settings.


Sources & Updates

Last reviewed: September 7, 2026

This article is a Season 30: Marked snapshot. Tier placements should be revisited after major Legend balance changes, meaningful meta shifts, or significant changes to the game’s maps, weapons, or systems.

EA’s official Legend guide confirms that Apex Legends currently has 28 Legends divided into five classes: Assault, Controller, Recon, Skirmisher, and Support.

EA’s official Season 30: Marked patch notes, published August 3, 2026, were used to verify the season’s Bloodhound rework, Loba and Rampart buffs, and balance changes affecting Axle, Seer, and Valkyrie.

EA’s current Season 30 information also confirms the Bloodhound rework, including enemy-footprint tracking, White Ravens, updated Tactical scanning, and the Allfather’s Cloak Ultimate.

Competitive usage data comes from ApexRanked’s September 6, 2026 Season 30 Split 1 Predator dataset, which tracks 823 current Apex Predators across 170,269 match appearances. The dataset records Legend pick rates, RP performance, and common trio compositions.

Current tracked pick rates place Loba at 20.2%, Axle at 19.3%, Pathfinder at 11.7%, Seer at 9.4%, Mad Maggie at 6.7%, Alter at 5.7%, and Octane at 2.6%.

The same dataset shows why pick rate is not used as an automatic tier calculation: Ballistic currently has +56.6 RP performance across 338 tracked games, Crypto +55.4 across 1,036, and Bloodhound +54.7 across 1,107, while Loba has +52.0 across 34,378.

ApexRanked currently lists Axle / Loba / Pathfinder as the most common tracked trio in Season 30 Split 1, appearing 2,967 times with +56.2 RP in its current dataset.

Editorial methodology: Loot Strategist’s tier placements combine current competitive usage, RP-performance context, combat impact, team utility, flexibility, reliability, specialist potential, and editorial judgment. Small samples are treated cautiously and are not allowed to overrule large-sample competitive evidence by themselves.

Editorial note: This is Loot Strategist‘s analysis, not an official EA ranking. The phrase “S-tier,” “A-tier,” “B-tier,” and “C-tier” represents our editorial assessment of relative usefulness within the Season 30 environment.

Apex Legends Settings Guide: Best PC, Controller & Video Settings

Apex Legends Settings Guide: Best PC, Controller & Video Settings

The right Apex Legends settings won’t suddenly turn you into a Predator, but the wrong ones can make an already demanding game harder than it needs to be.

A cluttered image can hide an enemy.

A poor sensitivity can make tracking feel inconsistent.

Unstable FPS can make the game feel less responsive.

And if your music is louder than the footsteps you’re trying to hear, your headset isn’t doing you any favors.

The tricky part is that there is no single configuration that works perfectly for everyone. EA’s current settings guide explicitly recommends experimenting with mouse and controller settings based on your own preferences, playstyle, hardware, and comfort. It currently recommends trying an FOV between 90 and 110, while noting that 110 is common among competitive players.

So rather than giving you one giant list of numbers and telling you to copy them blindly, this Apex Legends Settings Guide gives you practical starting points for:

PC graphics

Mouse and keyboard

Controller

FOV

Audio

FPS

120 FPS console play

Accessibility

And just as importantly, we’ll explain why you’d change a setting in the first place.


The Best Apex Legends Settings at a Glance

Apex Legends settings guide showing recommended video, mouse, controller, and audio settings

Here is a practical baseline.

Think of it as a starting configuration, not a universal law.

SettingRecommended Starting Point
FOV100–110
Sprint View ShakeMinimal
V-Sync (PC)Off unless you need it for tearing
NVIDIA ReflexEnabled on supported NVIDIA hardware
Adaptive Resolution FPS TargetOff unless you have frequent FPS drops
Anti-AliasingNone for performance-focused play
Texture Streaming BudgetLow or Medium
Texture FilteringBilinear
Ambient OcclusionDisabled
Sun Shadow CoverageLow
Sun Shadow DetailLow
Spot Shadow DetailLow
Dynamic Spot ShadowsDisabled
Volumetric LightingDisabled
Model DetailLow
Effects DetailLow
RagdollsLow
Mouse Sensitivity3.0–5.0
ADS Mouse Sensitivity Multiplier1.0
Mouse AccelerationOff
Controller Sensitivity4-3
Controller Response CurveClassic for beginners
Look DeadzoneSmall, or lower if your controller is stable
Master VolumeHigh
Sound Effects VolumeHigh
Music VolumeLow
Dialogue VolumeLow

These values closely follow EA’s current PC recommendations where applicable, while the broader ranges are Loot Strategist’s practical starting points. EA specifically notes that personal preference matters for mouse and controller settings, and that lower graphics settings can improve performance.


Why Apex Legends Settings Matter

Settings don’t make decisions for you.

They can remove friction between your intentions and what happens on screen.

A few examples:

A too-high sensitivity can make small corrections difficult.

A too-low sensitivity can make turning and target switching sluggish.

An unnecessarily high graphics preset can consume performance that your system could otherwise use for a more stable frame rate.

A noisy audio mix can bury useful gameplay sounds under music and dialogue.

A poor button layout can force you to take your thumb away from the right stick at exactly the wrong moment.

None of these settings make you a better player by themselves.

They simply determine how much your setup gets in the way.


Best Apex Legends FOV

Apex Legends FOV comparison showing the same scene at 90, 100, and 110 FOV

Field of View (FOV) controls how much of the game world you can see around your character.

A higher FOV gives you a wider view.

The trade-off is that distant objects and enemies appear smaller.

EA currently recommends experimenting between 90 and 110 FOV, with 110 being common among competitive players. EA also notes that Apex starts new players at 70 FOV by default.

Our Recommended Starting Point

I’d start at:

100 FOV

Then test:

104

106

110

Give each setting enough time to become familiar.

If you keep changing FOV every few matches, you’re never really adapting to any of them.

90–100 FOV

This can be comfortable if you:

  • Struggle to see distant targets
  • Play on a smaller display
  • Prefer a less zoomed-out image
  • Value target size more than peripheral vision

106–110 FOV

This can suit players who:

  • Fight aggressively
  • Value peripheral awareness
  • Spend a lot of time moving
  • Are comfortable tracking smaller targets

There is no achievement for playing at 110.

Use the widest FOV you can aim comfortably with.


Sprint View Shake

Apex’s camera movement can become distracting during sprinting.

EA currently recommends Minimal or personal preference for Sprint View Shake.

For competitive play, I’d start with:

Minimal

It gives you a steadier visual reference during movement.

That doesn’t make the game look as dramatic.

That’s probably fine.


Best Apex Legends PC Graphics Settings

If your main goal is performance, EA’s current advice is straightforward: lower graphics settings to maximize FPS and responsiveness. It specifically recommends lowering options individually if you’re unsure how they affect your system.

That doesn’t mean every PC should look like a potato.

It means you should decide where your hardware budget matters.

For competitive play, stable performance usually matters more than fancy shadows.


Display Mode

Recommended: Full Screen

EA recommends Full Screen for a single-monitor setup and Windowed for players using more than one display.

If you’re playing on one monitor, Full Screen is the obvious starting point.


Aspect Ratio

Recommended: Native

Use your monitor’s normal aspect ratio unless you have a very specific reason not to.

There is no need to complicate this.


Resolution

Recommended: Native resolution

Start with your monitor’s native resolution.

Only lower it when you actually need the additional performance.

If your system already delivers a stable frame rate, sacrificing image sharpness for extra headroom may not be worthwhile.


Brightness

Recommended: Slightly above default

EA recommends increasing brightness slightly to help visibility.

Don’t push it so far that dark environments become washed out.

You want more detail—not a gray filter over the entire map.


Best Advanced Video Settings for Performance

EA’s current PC guidance supports the following performance-oriented configuration.

SettingStarting Point
V-SyncDisabled unless needed for screen tearing
NVIDIA ReflexEnabled on supported NVIDIA GPUs
Adaptive Resolution FPS TargetDisabled unless FPS drops
Anti-AliasingNone
Texture Streaming BudgetLow or Medium
Texture FilteringBilinear
Ambient OcclusionDisabled
Sun Shadow CoverageLow
Sun Shadow DetailLow
Spot Shadow DetailLow
Dynamic Spot ShadowsDisabled
Volumetric LightingDisabled
Model DetailLow
Effects DetailLow
Impact MarksLow or Disabled
RagdollsLow

These aren’t sacred numbers.

They’re a sensible performance-first baseline.

If you have a powerful system and prefer higher image quality, increase settings gradually and watch your performance.


NVIDIA Reflex

If you have a supported NVIDIA GPU, EA currently recommends:

NVIDIA Reflex: Enabled

The purpose is to reduce system latency so your inputs can feel more responsive.

It doesn’t improve your aim by itself.

It simply helps reduce unnecessary delay between your input and what appears on screen.


Adaptive Resolution FPS Target

This setting is best viewed as a safety net.

Stable FPS?

Leave it:

Disabled

Frequent FPS drops?

Consider:

Enabled

EA currently recommends leaving it disabled unless you regularly experience frame-rate drops.

The goal isn’t to force the lowest possible image quality.

It’s to prevent your game from collapsing when your hardware gets pushed.


Texture Streaming Budget

EA currently recommends Low or Medium as a competitive starting point.

Your actual choice should take your available VRAM and system performance into account.

There’s little value in choosing a larger budget if it causes stuttering or instability.


Best Apex Legends Mouse Settings

Mouse sensitivity is where copying somebody else’s setup becomes especially unreliable.

EA currently suggests 3.0–5.0 sensitivity as a competitive starting range, with:

ADS Mouse Sensitivity Multiplier: 1.0

Mouse Acceleration: Off

EA also notes that sensitivity depends on factors such as your aiming style, desk space, and how you balance speed and precision.

My Starting Point

Try:

3.0 sensitivity

1.0 ADS multiplier

Mouse acceleration off

Then leave the sensitivity alone long enough to build familiarity.


What Is eDPI in Apex Legends?

Apex Legends mouse sensitivity and eDPI guide showing how DPI and in-game sensitivity calculate eDPI

This is worth understanding if you compare PC settings.

eDPI = Mouse DPI × In-game sensitivity

For example:

800 DPI × 3.0 sensitivity = 2400 eDPI

Another player might use:

1600 DPI × 1.5 sensitivity = 2400 eDPI

Those two setups can produce a similar overall sensitivity despite having different DPI and in-game values.

That’s why comparing only the sensitivity number can be misleading.

eDPI isn’t an official Apex requirement.

It’s simply a useful comparison tool for PC players.


Does DPI Matter?

Yes.

Your mouse’s DPI changes how much your cursor moves for a given physical mouse movement.

EA identifies 400, 800, and 1600 DPI as common values and notes that DPI interacts with your in-game sensitivity.

A common mistake is seeing a professional player’s:

“Sensitivity 2.0”

and copying it without checking their DPI.

That’s not a complete setup.


How to Find the Right Mouse Sensitivity

Apex Legends mouse sensitivity guide showing five Firing Range tests for finding the right aim sensitivity

Don’t change sensitivity every five minutes.

Use the Firing Range.

EA recommends testing different settings by tracking moving targets, switching between targets, flicking, and varying your shooting patterns.

Test 1: Tracking

Follow a moving target.

Can you stay on target without constantly correcting?

Test 2: Target Switching

Move from one target to another.

Can you stop the crosshair accurately?

Test 3: Close-Range Movement

Strafe while aiming.

Does the sensitivity remain manageable?

Test 4: Fine Corrections

Aim at a distant target.

Can you make small adjustments without repeatedly overshooting?

You don’t need laboratory precision.

You need a sensitivity that feels repeatable.


Best Apex Legends Controller Settings

EA currently notes that 4-3 is a common competitive controller setup:

Look Sensitivity: 4

Look Sensitivity (ADS): 3

That makes it a sensible baseline.

For response curve, the situation is more nuanced.

EA’s accessibility documentation lists several response curves and describes Classic as the default, while its current PC settings guide notes that some competitive players use Linear.

Our recommendation

Beginner: 4-3 Classic

Experienced player: 4-3 or another comfortable setup

Advanced player: Experiment with Linear only when you understand why you want it

Linear can feel immediate.

It can also make existing stick drift much more noticeable.


Controller Deadzone Explained

Apex Legends controller settings guide showing 4-3 sensitivity, Classic and Linear response curves, and deadzone options

This is one setting older Apex guides often overlook.

EA currently lists Look Deadzone options of:

None

Small

Large

The default is Small. EA explains that deadzone can prevent your camera from drifting when you’re not touching the stick, while a smaller deadzone can allow greater aiming control. Movement Deadzone can likewise prevent unwanted movement drift.

Our starting recommendation

Healthy controller: Small

No drift and you want more immediate input: Try None

Stick drift: Increase the deadzone

Don’t automatically choose None because somebody online called it the “best” option.

A controller that constantly drifts isn’t giving you better aim.


Controller Button Layout

EA currently lists six preset controller layouts and identifies Default as the recommended layout, while also describing alternatives such as Bumper Jumper, Button Puncher, Evolved, Grenadier, and Ninja. Evolved puts jump on LB and crouch on the right stick, allowing jumping and sliding without sacrificing camera control.

Our practical recommendation

New player: Start with Default.

Want easier movement access: Try Evolved.

Already comfortable: Keep your existing layout unless it is actively causing problems.

The best layout is the one that lets you perform movement and combat actions without fighting the controller.


Hold or Toggle Crouch?

EA’s current controller documentation gives you both options.

For most players:

Hold is worth learning if you regularly slide, crouch, and move aggressively.

Toggle can feel more comfortable for players who prefer a simpler input model.

Don’t change it because somebody said one option is objectively superior.

Test both.


Controller Vibration

This one is genuinely personal.

EA allows controller vibration to be turned On or Off.

My recommendation:

Turn it off if vibration distracts you or interferes with your aim.

Otherwise, leave it on.

There is no need to pretend everyone experiences controller vibration the same way.


Best Apex Legends Audio Settings

Audio information is critical in Apex.

EA’s current PC settings guide recommends:

Master Volume: high

Sound Effects Volume: high

and reducing:

Dialogue

Music

Lobby Music

when the goal is to make enemy sounds easier to hear.

Recommended Starting Point

Audio SettingStarting Point
Master VolumeHigh
Sound EffectsHigh
DialogueLow
MusicLow
Lobby MusicLow

The objective is simple:

Make useful gameplay sounds easier to isolate.


Best Apex Legends Audio Settings for Footsteps

There is no magic slider labeled:

“Make footsteps perfect.”

The best starting point is the official audio mix above.

Then make sure your headphones or speakers are comfortable and clearly reproducing positional sound.

I would avoid aggressive third-party EQ presets unless you understand what your hardware is doing.

Different headsets produce different results.

An EQ profile that sounds excellent on one pair can sound awful on another.


Apex Legends Voice Chat Settings

EA’s current voice-chat guide lets you select your input device, choose Open Mic or Push to Talk on PC, adjust the Open Mic threshold, and change Incoming Voice Chat Volume. Push to Talk is currently available on PC.

For solo queue:

PC: Push to Talk is useful when background noise is a problem.

Console: Use whichever microphone mode keeps your communication clean.

You can also enable incoming voice-to-text or have incoming text chat played as speech through the Accessibility settings.


Best Accessibility Settings

Accessibility settings aren’t “easy mode.”

They exist so players can get useful information in a way that works for them.

EA currently supports options including:

Colorblind modes

Subtitles

Subtitle size

Damage-number display

Incoming damage feedback

Ping opacity

Controller options

Voice-to-text

Text-to-speech

Use whichever options improve clarity and comfort.


Colorblind Settings

EA currently provides three colorblind options designed to compensate for different types of color-vision deficiency.

If the default color scheme makes important information difficult to separate, try the available modes and choose whichever gives you the clearest visual distinction.

There is no reason to keep a setting that makes the game harder to read simply because it is the default.


Damage Numbers

EA currently provides:

Stacking

Floating

Both

or:

Off

Stacking combines recent damage into a total, while Floating shows damage events individually. Both displays the two systems together.

Our recommendation

Stacking is a good starting point for most players.

Try Floating if you prefer more immediate shot-by-shot feedback.


Ping Opacity

EA’s current accessibility documentation allows pings to remain clearly visible or become more faded.

For solo queue and Ranked, I’d keep them:

Clearly visible

Pings are too important to your squad’s communication to make them hard to notice.


Incoming Damage Feedback

EA also allows players to change how incoming damage indicators are displayed, including 2D, 3D, or both.

My recommendation:

Start with the default 3D indicator.

Experiment only if you have a specific visibility problem.


Best Apex Legends Settings for Visibility

Visibility doesn’t mean:

Turn every graphic setting to Low.

It means removing unnecessary clutter while keeping the picture clear enough to identify targets and terrain.

Prioritize:

Stable FPS

Comfortable FOV

Clear enemy visibility

Readable UI

Minimal unnecessary camera movement

EA’s competitive graphics guidance follows the same broad principle by recommending lower-impact visual settings when the goal is performance.


How to Show FPS in Apex Legends

Before changing graphics settings, find out whether you actually have an FPS problem.

Apex includes a Performance Display option that can show performance information while you play.

Steam users can also use Steam’s FPS overlay.

On PC, EA additionally documents using the launch option:

+fps_max

to cap the frame rate. For example:

+fps_max 200

limits the game to 200 FPS.

Don’t pick a random cap just because someone on YouTube uses it.

First determine what your system can maintain consistently.


Should You Cap Your FPS?

There is no universal number.

Your ideal cap depends on:

GPU

CPU

monitor refresh rate

game settings

how stable your frame time is

For a 144 Hz monitor, for example, some players may prefer a cap around that range or another stable value based on their system.

The useful word here is:

stable

A frame rate that moves wildly between 100 and 180 can feel worse than a stable result that your system maintains consistently.


Apex Legends 120 FPS on PS5 and Xbox Series X|S

This is one of the most important settings sections for current console players.

EA currently says PlayStation 5 and Xbox Series X|S players can enable 120 FPS mode when they have a 120 Hz display and compatible HDMI equipment. In Apex, this requires selecting Performance graphics mode.

PS5

Make sure your console is configured for 120 Hz output.

Then:

Apex Legends → Settings → Video → Graphics Mode → Performance

Apply the setting.

Xbox Series X|S

Set the display refresh rate to:

120 Hz

Then:

Apex Legends → Settings → Video → Graphics Mode → Performance

EA’s current instructions also require a display and HDMI connection capable of supporting 120 Hz.


Should You Prioritize FPS or Image Quality?

Apex Legends graphics settings guide comparing stable FPS with unstable frame rates and when to lower graphics settings

For competitive play, my preference is:

Stable performance first.

That doesn’t mean everyone needs the lowest settings possible.

If your hardware can maintain a stable frame rate while keeping some visual quality, there’s no reason to destroy the image just to copy a professional setup.

EA’s current PC guidance does, however, specifically recommend lower graphics settings when maximizing FPS and performance.


Best Apex Legends Settings for Beginners

New players don’t need an extreme competitive setup.

I’d start with:

FOV: 90–100

Sprint View Shake: Minimal

Mouse Sensitivity: 3.0

ADS Multiplier: 1.0

Mouse Acceleration: Off

Controller: 4-3 Classic

Look Deadzone: Small

Graphics: Performance-focused settings appropriate for your hardware

Master Volume: High

Sound Effects: High

Music: Low

Dialogue: Low

Then stop changing things every match.

Give yourself time to adapt.


Best Apex Legends Settings for Competitive PC Players

For a performance-oriented PC starting point:

FOV: 100–110

V-Sync: Off unless needed

NVIDIA Reflex: Enabled on supported NVIDIA hardware

Adaptive Resolution FPS Target: Off unless needed

Graphics: Mostly Low

Texture Streaming Budget: Low or Medium

Mouse Sensitivity: 3.0–5.0

ADS Multiplier: 1.0

Mouse Acceleration: Off

These are grounded in EA’s current PC recommendations, with the FOV range reflecting the broader 90–110 range EA currently suggests.


Best Apex Legends Settings for Controller Players

A strong starting point is:

Look Sensitivity: 4

ADS Sensitivity: 3

Response Curve: Classic

Look Deadzone: Small

Movement Deadzone: Small

Vibration: Personal preference

EA’s current documentation supports 4-3 as a common competitive sensitivity and identifies Classic as the default controller response curve.

If you already have strong controller mechanics, experiment from there rather than resetting everything simply because a guide recommends it.


Best Apex Legends Settings for Solo Queue

Solo queue increases the value of information.

I’d prioritize:

Sound Effects: High

Music: Low

Dialogue: Low

Ping Opacity: Clearly visible

Comfortable FOV: 100–110

Reliable movement controls

Stable FPS

Your goal is to hear enemies, communicate quickly, and keep your controls predictable.

For the strategic side of solo queue, see our Apex Legends Solo Queue Guide.


Best Apex Legends Settings for Ranked

Ranked doesn’t require completely different settings.

It requires consistency.

Once you’ve found a sensitivity and FOV that work, stop changing them because you lost three games.

Keep your performance stable.

Keep your audio readable.

Use controls you can execute automatically.

And spend your time improving your decision-making rather than endlessly rebuilding your settings menu.

For the competitive strategy itself, see our Apex Legends Ranked Guide.


How Often Should You Change Your Settings?

Not very often.

Change something when:

You have identified a specific problem.

For example:

“My controller drifts.”

Change deadzone.

“I can’t comfortably track at this sensitivity.”

Lower it.

“My FPS collapses during big fights.”

Lower the appropriate graphics settings.

“My FOV feels too zoomed out.”

Reduce it.

That’s a better process than changing six settings because somebody uploaded a new “INSANE PRO SETTINGS” video.


The One-Change Rule

When you’re troubleshooting your configuration:

Change one major variable at a time.

Test it.

Play a few matches.

Then decide whether it helped.

This makes cause and effect much easier to understand.

If you simultaneously change your FOV, sensitivity, response curve, deadzone, button layout, and graphics, you’re not testing a setting.

You’re replacing your entire muscle memory.


Common Apex Legends Settings Mistakes

Copying a Professional Player’s Setup

Their DPI, monitor, controller, grip, vision, hardware, and muscle memory aren’t yours.

Use their setup as a reference.

Not an instruction manual.

Using 110 FOV Automatically

110 is common competitively.

That doesn’t mean it’s automatically best for you.

Running Maximum Graphics on Weak Hardware

Pretty shadows don’t help when your frame rate collapses during a fight.

Changing Sensitivity Constantly

Your aim needs consistency to develop.

Using No Deadzone on a Drifting Controller

Lower deadzone can improve responsiveness, but existing stick drift makes the trade-off obvious.

Turning Music Up While Trying to Hear Footsteps

EA currently recommends lowering music and dialogue when prioritizing gameplay audio.

Ignoring Accessibility Settings

If an accessibility option improves your ability to see or interpret information, use it.

Changing Settings Because You Lost

Three bad games don’t automatically mean your sensitivity is wrong.


A Simple Apex Settings Checklist

Before you leave the settings menu, ask:

Can I see enemies comfortably?

Can I track targets without fighting my sensitivity?

Can I hear gameplay sounds clearly?

Can I move without awkward controls?

Is my frame rate stable?

Can I communicate quickly?

Does my FOV feel natural?

Does my controller drift?

Have I given the new setup enough time to adapt?

If most answers are yes, stop tinkering.

Go play.


Loot Strategist’s Settings Rule

Don’t copy someone’s settings. Copy the reason they use them.

A player might use 110 FOV because they value peripheral vision.

Another might use 100 because they prefer larger targets.

Someone might run very low graphics because their priority is consistent performance.

A controller player might use Linear because they prefer raw stick input and have a controller stable enough to handle it.

Those are useful ideas.

The numbers aren’t universal.

Your best Apex Legends settings are the ones you can use comfortably, consistently, and confidently.


Final Thoughts

There is no secret configuration that turns average aim into elite aim.

Your settings can’t teach you how to rotate.

They can’t teach you when to disengage.

They can’t make you position better.

What they can do is remove unnecessary friction.

A sensible FOV gives you a comfortable view.

A stable sensitivity gives you repeatable aim.

Clear audio gives you information.

Good keybinds let you move without fighting your own controls.

A stable frame rate gives you a more consistent experience.

That’s what you should be chasing.

Start with a sensible baseline.

Change one thing.

Test it in the Firing Range.

Play enough matches to adapt.

Keep what works.

Then stop thinking about your settings and start thinking about the enemy.

That’s usually when you’ve found the right setup.


Related Apex Legends Guides

Apex Legends Beginner Guide — Learn the fundamentals of movement, weapons, looting, positioning, healing, and squad play.

Apex Legends Best Legends Guide — Find the right Legend for your playstyle, from beginners and solo queue to Ranked, mobility, support, and defense.

Apex Legends Ranked Guide — Learn how RP, placement, rotations, fight selection, and competitive decision-making work.

Apex Legends Squad Composition Guide — Build stronger teams by combining complementary Legend classes and squad roles.

Apex Legends Solo Queue Guide — Learn how to communicate, position, adapt to random teammates, and make better decisions without a premade squad.


Sources & Updates

Last reviewed: September 6, 2026

Apex Legends settings can change between seasons, platform updates, and balance changes. This guide therefore distinguishes EA’s documented recommendations from Loot Strategist’s editorial starting points.

EA’s current Best Settings for Apex Legends on PC guide was used to verify recommendations for FOV, mouse sensitivity, ADS sensitivity, mouse acceleration, controller sensitivity, PC graphics settings, FPS performance, and audio. EA currently recommends experimenting with settings based on personal preference and suggests a 90–110 FOV range, 3.0–5.0 mouse sensitivity as a competitive starting range, 1.0 ADS sensitivity multiplier, mouse acceleration off, and 4-3 controller sensitivity as a commonly used competitive setup.

EA’s current controller/accessibility documentation was used to verify response-curve options, controller button layouts, look and movement deadzones, damage-number settings, ping opacity, incoming damage indicators, vibration, and other accessibility options. EA identifies Small as the default Look Deadzone and recommends increasing deadzone only when needed to address drift; smaller deadzones can provide more control.

EA’s current voice-chat documentation was used to verify voice-chat controls, including Open Mic, Push to Talk on PC, microphone selection, open-mic threshold, and incoming voice-chat volume.

EA’s current FPS documentation was used to verify the 120 FPS mode available on PlayStation 5 and Xbox Series X|S with compatible 120 Hz displays and HDMI equipment, as well as the Performance graphics mode and the +fps_max PC launch option.

Editorial note: FOV ranges, sensitivity starting points, controller configurations, graphics preferences, and other recommendations in this article are Loot Strategist’s editorial starting points unless explicitly attributed to EA. There is no universally perfect Apex Legends configuration, and players should adjust settings according to their hardware, controls, comfort, and playstyle.

Apex Legends Best Legends Guide: Best Legends for Every Playstyle

Apex Legends Best Legends Guide: Best Legends for Every Playstyle

Apex Legends gives you a roster of 28 Legends, and asking which one is “the best” sounds like it should have a simple answer.

It doesn’t.

The Legend that works beautifully for a coordinated Ranked squad may feel awkward to a beginner. A highly mobile Skirmisher can be incredible in the hands of an aggressive player but less useful to someone still learning positioning. A Support Legend with a modest pick rate can be exactly what a solo-queue player needs.

So instead of forcing every Legend into one giant S-to-D tier list, this Apex Legends Best Legends Guide looks at the roster from several angles:

Best overall

Best for beginners

Best for Ranked

Best for solo queue

Best for aggressive players

Best for support

Best for information

Best for mobility

Best for defense

The goal is simple: help you find a Legend that fits how you actually play.

Editor’s note: “Best” in this guide means best for a specific job, playstyle, or use case. These are Loot Strategist’s editorial recommendations, not official EA rankings.


The Best Apex Legends Right Now

Apex Legends best Legends at a glance showing recommended picks for overall play, mobility, information, beginners, support, defense, and assault

For readers who want the quick answer, these are our current picks for Season 30:

CategoryLoot Strategist PickWhy
Best overallLobaFlexible utility, loot access, mobility, and team value
Best aggressive mobilityAxleStrong movement and fight-creation potential
Best mobilityPathfinderExcellent repositioning, angles, and rotations
Best informationSeerStrong enemy-information and fight-control tools
Best beginnerBangaloreForgiving kit with useful cover and disengagement tools
Best supportLifelineStraightforward healing and recovery utility
Best solo queueLobaSelf-sufficient utility plus team resource value
Best defensiveRampartStrong area control when the squad can establish a position
Best breaching AssaultMad MaggieReliable pressure against entrenched enemies
Best active supportConduitCan directly support teammates without falling behind the fight

These recommendations are deliberately broader than a simple meta tier list.

Current high-level data also shows why. In ApexRanked’s September 4, 2026 Predator snapshot, Loba led tracked pick rate at 20.3%, followed by Axle at 19.2%, Pathfinder at 11.6%, Seer at 9.6%, and Mad Maggie at 6.7%.

That doesn’t prove that these are the five best Legends for every player.

It does tell us which kits are currently seeing serious use at the highest end of the ladder.


How We Decide Which Legends Are “Best”

A tier list becomes much more useful when you explain what the tiers actually mean.

For this guide, we judge Legends across six areas.

Combat Value

How much can the Legend contribute once the shooting starts?

Team Utility

Does the kit make teammates stronger, safer, or more flexible?

Flexibility

Can the Legend solve several different problems during a match?

Accessibility

Can a new or intermediate player reliably get value from the kit?

Current Meta Relevance

Is the Legend appearing frequently in high-level play or receiving meaningful balance attention?

Map Dependence

Does the Legend become significantly stronger or weaker depending on the terrain and available positions?

That last category matters more than many tier lists admit.

A Legend isn’t operating in a vacuum.

Maps, weapons, squad composition, player skill, and the Ring can all change a character’s practical value.


Best Overall Legend: Loba

Why We Pick Her

Loba is our current best overall pick because she combines several useful qualities without requiring your entire squad to revolve around her.

Her Tactical gives her mobility through the Jump Drive bracelet, her Passive highlights nearby Epic and Legendary loot through walls, and her Ultimate brings nearby loot to the Black Market. (help.ea.com)

Season 30 made her even more attractive.

EA reduced the Tactical’s equip time from 0.6 seconds to 0.4 seconds, increased its range, shortened projectile travel time, and reduced the Black Market cooldown from 150 seconds to 120 seconds. Respawn said the changes were intended to improve her survivability and ability to support her team.

That’s a useful combination for a wide range of players.

Loba can help your team:

Find better resources.

Escape dangerous positions.

Rotate more safely.

Recover from poor loot.

Support teammates without needing perfect coordination.

The competitive data backs up her current relevance too: she ranked first in the September 4 Predator snapshot from ApexRanked.

For an all-purpose recommendation, that’s hard to ignore.


Best Aggressive Mobility Legend: Axle

Axle is the pick for players who want to create chaos and move through fights quickly.

Her kit is built around speed and aggressive repositioning, helping her close distance, create new angles, and pressure enemies before they can fully reset.

Respawn has already had to rein Axle in. In Season 30, her maximum slide-boost duration was reduced, while her Ultimate was changed so it also affects Axle and her allies, creating more counterplay and demanding more careful timing.

Despite those changes, Axle remained the second-most selected Legend among tracked Predator players at 19.2% in ApexRanked’s September 4 snapshot.

Best For

Aggressive players

Strong mechanics

Fast repositioning

Players who like forcing engagements

The trade-off is a higher skill ceiling.

Axle gives you options.

You still have to choose the right one.


Best Mobility Legend: Pathfinder

Pathfinder remains one of the strongest movement-oriented choices for players who want flexibility without committing completely to Axle’s aggressive pace.

His mobility can help you:

Reach high ground

Take unexpected angles

Cross difficult terrain

Escape losing fights

Create rotations for the squad

That’s what makes Pathfinder so valuable.

His mobility doesn’t merely make movement faster.

It changes where your squad can realistically fight.

The September 4 Predator snapshot placed Pathfinder third overall at 11.6% pick rate among the tracked players.

Best For

Movement-focused players

Aggressive repositioning

Flexible rotations

Players who enjoy taking unusual angles


Best Information Legend: Seer

Seer is our current information-focused recommendation.

His kit becomes especially valuable when your squad understands how to turn information into action.

That’s important because information by itself doesn’t win fights.

Knowing where the enemy is helps you decide:

Whether to push

Where to rotate

Which angle to hold

When to disengage

Respawn has continued adjusting Seer because his Tactical can become oppressive when layered repeatedly. Season 30 reduced its turn-slow effect, while previous changes moved some of his strongest upgrades deeper into the progression system.

His current high-level pick rate was 9.6% in the ApexRanked Predator snapshot.

Best For

Information-heavy players

Shot-callers

Coordinated squads

Players who like planning before fighting

Seer is significantly better in the hands of somebody who actually communicates what their scans mean.


Best Legend for Beginners: Bangalore

If you’re new to Apex, Bangalore remains our safest starting recommendation.

EA’s current beginner documentation identifies Bangalore among the Legends available from the start of the player experience, alongside Lifeline and Wraith. EA also recommends several beginner-friendly Legends in its current onboarding material. (help.ea.com)

Bangalore is especially useful because her kit teaches several fundamentals at once.

Her Smoke Launcher can create cover and break sightlines.

Her Passive can increase movement speed when she’s under fire.

Her Ultimate helps control space and disrupt enemy movement. (help.ea.com)

That teaches:

Positioning

Cover

Movement

Disengagement

Timing

She’s straightforward enough to learn without being simplistic.

That’s exactly what you want in a first main.


Best Support Legend: Lifeline

Lifeline is one of the cleanest introductions to support play.

Her value is immediately understandable:

Keep teammates alive.

That doesn’t sound spectacular.

It is.

A timely heal or recovery can change the outcome of a fight just as effectively as another damage ability.

Lifeline is particularly good for players who naturally keep an eye on teammates rather than tunnel-visioning on their own damage.

Best For

New players

Support-focused players

Players who watch teammate health

Squads that value recovery


Best Active Support Legend: Conduit

Conduit is the better choice when you want support utility without playing a purely defensive role.

Her kit lets her protect teammates during active fights, while her mobility and Ultimate help her remain involved in the engagement rather than sitting behind the squad.

That creates an important distinction:

Lifeline is recovery-focused.

Conduit is fight-support focused.

Neither is universally superior.

The right one depends on what your squad needs.

Best For

Aggressive support

Coordinated squads

Players who watch teammate shields

Players who want to support a push


Best Defensive Legend: Rampart

Rampart is a specialist rather than a universal pick.

That’s not a criticism.

Specialists can be incredibly powerful when the match gives them the right conditions.

Rampart is strongest when your squad can establish a position and force enemies to fight on your terms.

Season 30 increased the effectiveness of her defensive identity by giving her tougher walls at earlier EVO levels and improving her interaction with stronger weapons through her Passive, while also making Sheila more mobile during use.

Pick Rampart When

The Ring favors your position

You expect extended fights

Your squad likes holding ground

You have time to establish your setup

She becomes much less attractive when your squad is constantly forced to rotate.


Best Breaching Assault Legend: Mad Maggie

Mad Maggie is our preferred Assault pick for players who like attacking fortified positions.

Her kit is built around pressure and breaching rather than patient defense.

That makes her useful against squads hiding inside buildings or relying heavily on defensive setups.

She also continues to see respectable high-level usage: ApexRanked’s September 4 Predator snapshot placed her at 6.7%, fifth overall among tracked Legends.

Best For

Aggressive teams

Close-range players

Breaching defensive positions

Squads that want to force movement

The key with Maggie is timing.

Her abilities are much stronger when your squad already knows why it is pushing.


Best Repositioning Legend: Wraith

Wraith is a strong option for players who want to take aggressive angles without completely sacrificing the ability to disengage.

Her Portal gives the squad another way to think about movement:

Instead of asking:

“How do we win this fight?”

you can sometimes ask:

“How do we make this fight safer?”

That’s a valuable distinction.

Wraith is particularly useful for players who like pressure but don’t want every mistake to become fatal.

She’s also a practical option for players who are still developing their positioning because her kit provides another escape and rotation layer.


Best Recon Legend for Learning Information: Bloodhound

Bloodhound is an excellent choice for players who want to learn how information changes a fight.

Season 30 significantly refreshed the Legend.

Bloodhound’s Passive now shows red trails near fresh enemy clues and gives players more ways to follow enemy movement. Their Tactical now provides a three-second full-body scan followed by four snapshot scans, while the new Allfather’s Cloak Ultimate cloaks players within its area and gives movement speed and threat vision while active.

That’s a major departure from older versions of Bloodhound.

The important beginner lesson is still the same:

Don’t scan simply because the button is available.

Scan because the information changes what you intend to do.

That mindset transfers to almost every Legend in the game.


Best Legend for Solo Queue: Loba

For solo queue, we’re going back to Loba.

Not because she’s automatically the strongest Legend.

Because she gives you a lot of useful tools without needing perfect coordination.

Her kit can help you:

Find gear

Escape danger

Support teammates

Recover from a poor drop

Stay useful even when your squad isn’t synchronized

That makes her a particularly forgiving solo-queue choice.

For a deeper breakdown of surviving with random teammates, see our Apex Legends Solo Queue Guide.


Best Legends for Ranked

Ranked changes what “best” means.

A flashy kit isn’t enough.

A Ranked Legend needs to provide value repeatedly across many matches.

Our Season 30 shortlist is:

Loba — utility and resource value

Axle — movement and pressure

Pathfinder — rotation and positioning

Seer — information

Mad Maggie — pressure against fortified teams

The recommendation is supported by current Predator-level pick data, but pick rate alone isn’t enough to define the meta. ApexRanked’s September 4 snapshot shows Loba, Axle, Pathfinder, Seer, and Maggie as the top five tracked Legends in that population.

Your team’s composition still matters.

So does your ability to use the Legend correctly.


Best Legends by Playstyle

Apex Legends best Legends by playstyle showing recommended characters for fighting, support, scouting, movement, and holding ground

Sometimes the easiest way to choose a main is to start with yourself.

“I Want to Fight”

Try:

Axle

Mad Maggie

Revenant

Octane

These Legends reward players who enjoy pressure, movement, and close engagements.

“I Want to Help My Team”

Try:

Loba

Lifeline

Conduit

Newcastle

These picks make squad survival and resources part of your value.

“I Want More Information”

Try:

Seer

Bloodhound

Vantage

Crypto

These Legends are especially attractive if you enjoy scouting and planning.

“I Want Maximum Mobility”

Try:

Axle

Pathfinder

Wraith

Octane

Horizon

Movement-heavy Legends can dramatically change how you approach fights and rotations.

“I Want to Hold Ground”

Try:

Rampart

Catalyst

Caustic

Wattson

These are strongest when your squad can decide where the fight happens.


Best Legends for Beginners

If you’re brand new to Apex, don’t overwhelm yourself with the entire roster.

Start with:

Bangalore — best all-around teacher

Lifeline — easiest introduction to support

Wraith — useful introduction to repositioning

Bloodhound — strong introduction to tracking and information

Loba — good next step for resource management and flexible utility

EA’s current beginner guidance also highlights Bangalore, Conduit, Fuse, Lifeline, and Pathfinder as beginner recommendations. (help.ea.com)

The important difference is that our list is an editorial progression path, not an official ranking.


Best Legends for Solo Queue

Solo queue changes the priorities.

You want a Legend who can still contribute when your teammates don’t understand your plan.

Our strongest options are:

Loba — resources plus mobility

Bangalore — cover and disengagement

Pathfinder — movement and repositioning

Wraith — escape and rotation utility

Conduit — active teammate support

Newcastle — recovery and defensive utility

For more detailed advice, see our Apex Legends Solo Queue Guide.


Class vs. Squad Role: They’re Not the Same Thing

Apex Legends guide comparing Legend classes with squad roles such as information, entry, mobility, control, recovery, and shot-calling

This distinction is easy to miss.

A class describes the type of utility a Legend is built around.

A squad role describes what that player is trying to accomplish during the match.

Those are not identical.

A Recon Legend might also be the team’s shot-caller.

A Support Legend might help initiate fights.

A Skirmisher can be both mobility and entry.

A Controller can act as the squad’s anchor.

That’s why simply choosing one Legend from each class doesn’t automatically create a balanced team.

Your squad needs jobs, not just labels.

For a deeper explanation, see our Apex Legends Squad Composition Guide.


What Makes a Legend “Meta”?

A Legend becomes meta when its combination of abilities, team utility, map fit, and current balance makes it particularly effective in the prevailing environment.

That doesn’t mean it will stay there.

Season 30 is a perfect example.

Bloodhound received a major rework.

Loba and Rampart were buffed.

Axle, Seer, and Valkyrie received balance changes.

Respawn also said it used player feedback and internal match data to guide these changes.

The lesson is important:

Today’s strongest Legend is not necessarily next season’s strongest Legend.

That’s why this guide focuses on why a Legend is useful, not just where they sit on a tier list.


Why Pick Rate Doesn’t Tell the Whole Story

Pick rate is useful.

It is not the whole story.

A Predator player and a brand-new player may both choose the same Legend for completely different reasons.

The Predator may value a very specific interaction within a coordinated composition.

The beginner may simply find the character comfortable.

That is why we compare multiple signals:

High-level usage

Kit strength

Team utility

Accessibility

Map fit

Recent balance changes

Current data also demonstrates the problem with treating one statistic as gospel. The September 4 Predator snapshot had Loba at 20.3%, while broader player-tracking services can show very different distributions. (apexranked.com)

Different populations produce different answers.

And that’s exactly why a “best Legend” list needs context.


How to Choose Your Main

Start with five questions.

Do I enjoy aggressive fights?

Look at Assault and Skirmisher Legends.

Do I like helping the squad?

Try Support.

Do I enjoy scouting and information?

Explore Recon.

Do I prefer controlling where the fight happens?

Try Controller.

Do I want freedom to rotate?

Look toward mobility-focused Legends.

Then ask the question that matters most:

Can I actually use this Legend well?

That’s often more important than a tier-list position.


A Practical Way to Learn the Roster

You don’t need to play all 28 Legends immediately.

Use this progression:

Main: one Legend you understand deeply.

Backup: one Legend with a different strength.

Flex: a third choice you can use when the squad needs something specific.

For example:

Bangalore → Pathfinder → Loba

gives you combat utility, mobility, and resource support.

Or:

Bloodhound → Wraith → Lifeline

gives you information, repositioning, and recovery.

You’re learning the game while gradually expanding your toolkit.


Our Legend Recommendation Framework

When you are choosing a Legend, think in this order:

What do I enjoy?

What can I play consistently?

What does my squad need?

What does the current meta reward?

That order matters.

If you reverse it, you can easily end up playing a Legend you barely understand because a tier list told you that you should.

The tier list isn’t playing the match.

You are.


Final Thoughts

There is no single Legend who is automatically the best for everyone.

Current Season 30 data does show a few clear leaders among high-ranked players. Loba, Axle, Pathfinder, Seer, and Mad Maggie currently have the strongest presence in ApexRanked’s tracked Predator sample, while the wider player population can produce a very different ranking.

That isn’t a contradiction.

It is the reason context matters.

For beginners, Bangalore is an excellent teacher.

For mobility, Pathfinder and Axle stand out.

For information, Seer and the reworked Bloodhound offer different ways to understand the battlefield.

For support, Loba, Lifeline, and Conduit solve very different problems.

For defense, Rampart can be extremely effective when the match gives her the right conditions.

And for solo queue, Loba remains one of the most flexible choices because she can create value for herself while still helping the squad.

So don’t ask only:

“Who is S-tier?”

Ask:

“What do I need this Legend to do?”

That’s a much better question.

The best Legend isn’t necessarily the one with the highest pick rate.

It’s the one whose strengths match your playstyle, your squad, and the situation in front of you.

Master one.

Learn another.

Then start making the choice based on the match—not the tier list.


Related Apex Legends Guides

Apex Legends Beginner Guide — Learn the fundamentals of weapons, movement, positioning, looting, healing, and squad play.

Apex Legends Ranked Guide — Learn how Ranked, RP, placement, rotations, and competitive decision-making work.

Apex Legends Squad Composition Guide — Learn how Legend classes and complementary squad roles fit together.

Apex Legends Solo Queue Guide — Learn how to adapt to random teammates and choose Legends that remain useful without a premade squad.


Sources & Updates

Last reviewed: September 6, 2026

Apex Legends currently has 28 Legends across five classes: Assault, Controller, Recon, Skirmisher, and Support. EA’s official Legend documentation was used to verify the current roster, classes, and ability information.

Season 30: Marked launched on August 4, 2026 and introduced a Bloodhound rework alongside buffs to Loba and Rampart and balance changes affecting Axle, Seer, and Valkyrie.

Current high-rank pick-rate information was used as supporting evidence rather than as the sole definition of the meta. ApexRanked’s September 4, 2026 Predator snapshot tracks 812 Apex Predator players across 154,057 match appearances and currently places Loba, Axle, Pathfinder, Seer, and Mad Maggie at the top of that population.

Respawn has also stated that it uses player feedback and internal match data when evaluating Legend balance and broader meta changes.

Editorial note: Legend rankings and playstyle recommendations in this article are Loot Strategist editorial judgments. They are not official EA rankings and may change as Apex Legends receives balance updates.